Every island location in Sea of Thieves is exclusive, various in dimension, form, and magnificence.
Some are jagged mountains, others dense jungles, and much more easy seashores.
Right here we are going to listing each island out there to discover whereas crusing in Sea of Thieves, detailing the identify, form, and site of each island, seaport, and outpost.
On this web page:
If you happen to’re seeking to study the necessities of Sea of Thieves, first participate within the Maiden Voyage, and skim extra about crusing, ship battles, and tips on how to survive fights with skeletons and the kraken.
The place to seek out the map in Sea of Thieves
The map you may be utilizing to navigate the Sea of Thieves is discovered onboard your ship, however its location adjustments barely relying on the boat:
- On the sloop it is immediately in entrance of the staircase.
- On the brig its behind the steps.
- On the galleon its on the mid-deck.
Interacting with the map lets you use it and see the whole world map, and allows you to mark areas and importantly, allows you to zoom out and in to get extra element.

Some islands are uncharted and can’t be discovered on the map desk. We have left them off the beneath indexes so you possibly can uncover them for your self, however we talk about them in additional element on the very finish of this text.
Sea of Thieves map areas by area
This is the place to seek out each named island location by the Sea of Thieves’ 4 areas:
Shores of Loads island areas
The Wilds island areas
Historical Isles island areas
Satan’s Roar island areas
Sea of Thieves map areas alphabetically
You’ll be able to soar to every particular person island, listed beneath in alphabetical order:
Historical Spire Outpost location in Sea of Thieves
Historical Spire co-ordinates: Q17
The tavern on high of the spire provides wonderful views of the ocean, and an opportunity for drunken pirates to fall all the way in which down.

Ashen Reaches location in Sea of Thieves
Ashen Reaches co-ordinates: U23 / V23
The volcano at Ashen Reaches may appear like probably the most harmful a part of the island, however the arsenal of cannons able to defend the northern shores should not be forgotten about.

Barnacle Cay location in Sea of Thieves
Barnacle Cay co-ordinates: O15 / O16
A big rocky outcrop dominates this small sandy island, however there’s nonetheless loads of vegetation to get misplaced in too.

Black Sand Atoll location in Sea of Thieves
Black Sand Atoll co-ordinates: O3 / O4
The sand is extra gray than black right here, and moreover a big boulder there is not a lot else to see.

Black Water Enclave location in Sea of Thieves
Black Water Enclave co-ordinates: R5
Sharp outcrops stab on the sky on the northern edge Black Water Enclave, providing a small quantity of safety.

Blind Man’s Lagoon location in Sea of Thieves
Blind Man’s Lagoon co-ordinates: N6
A small island fabricated from rocks, sand and vegetation, with an excellent smaller lagoon within the centre.

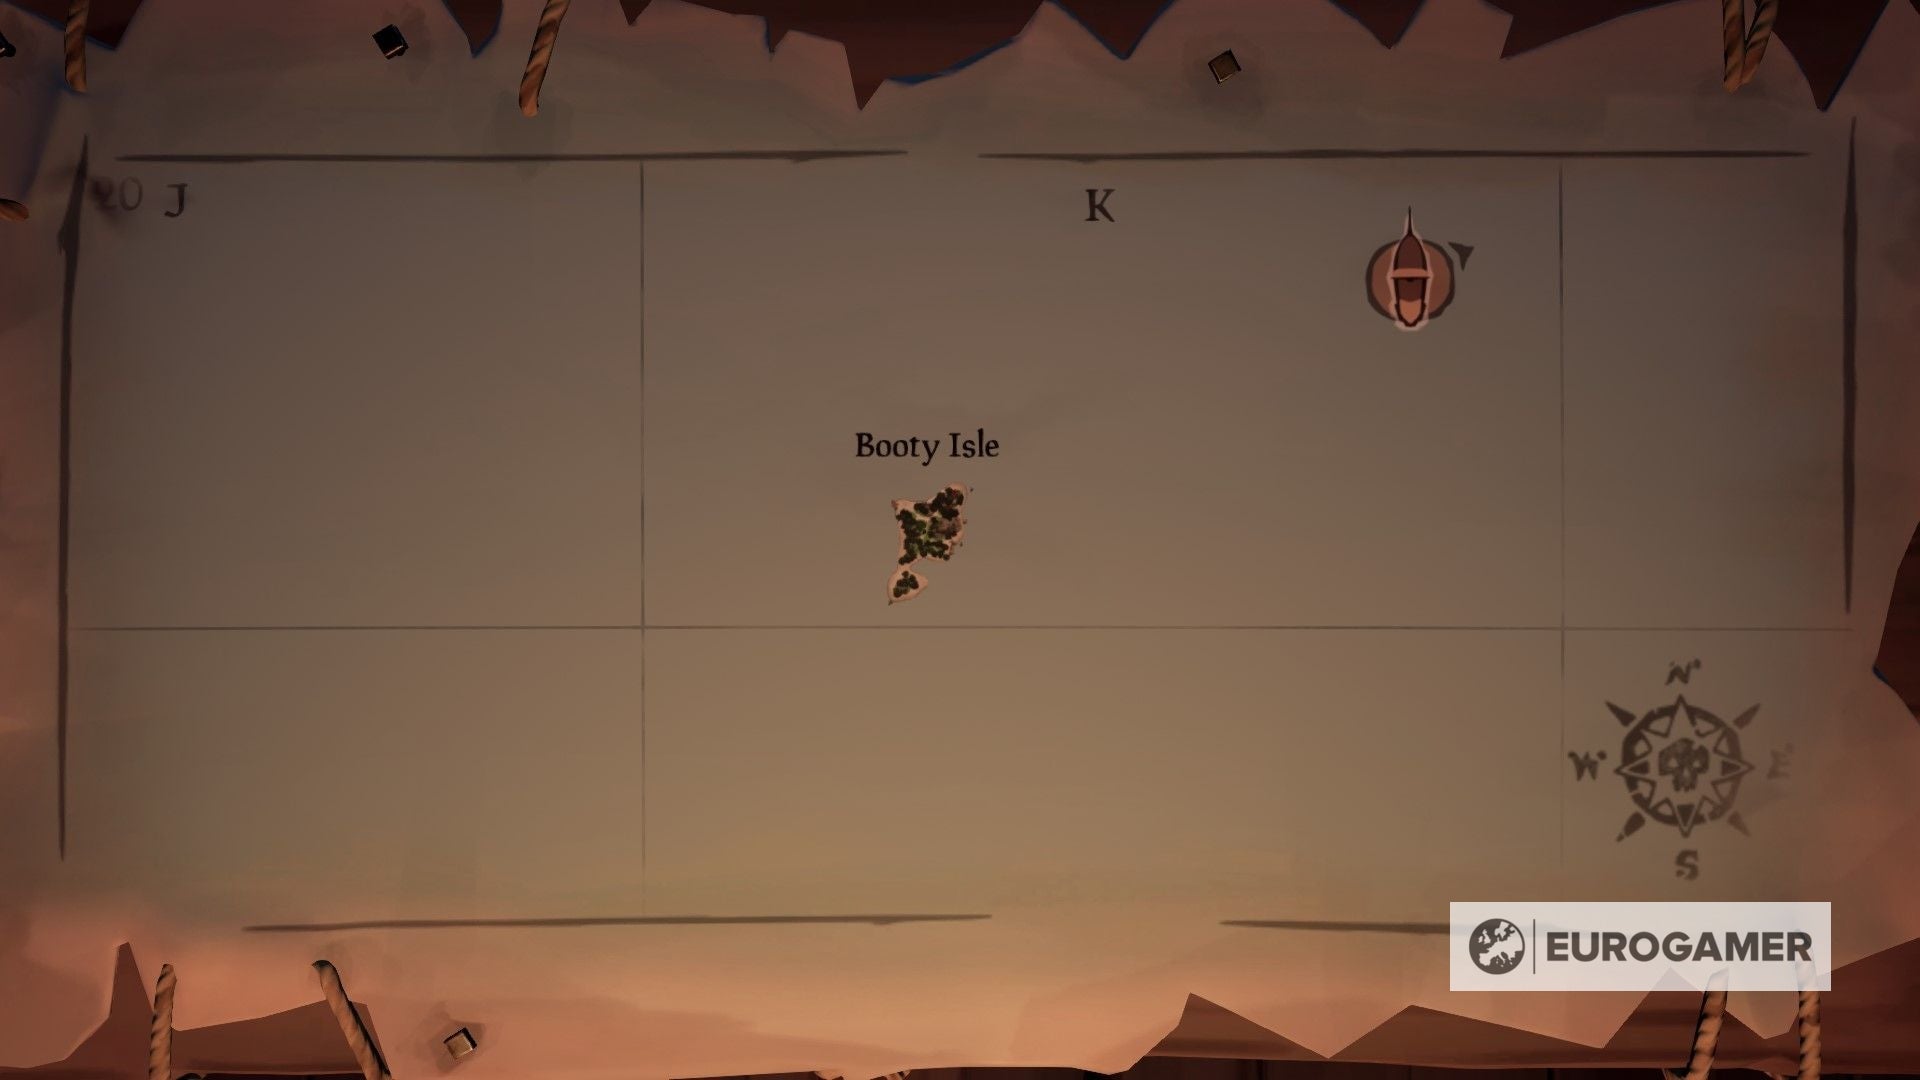
Booty Isle location in Sea of Thieves
Booty Isle co-ordinates: K20
A small island blanketed below a cover of bushes and dense vegetation, crisscrossed with sandy pathways.
Boulder Cay location in Sea of Thieves
Boulder Cay co-ordinates: G5
Regardless of the identify Boulder Cay is about equal elements sand, rocks, and vegetation, however it’s the big shipwreck off its southern seashores that’s its most noteworthy characteristic.

Brian’s Bazaar location in Sea of Thieves
Brian’s Bazaar co-ordinates: Y12
Surrounded by pink crystals, this small store within the northern finish of the Satan’s Roar is a good spot to promote your Devilfish.

Brimstone Rock location in Sea of Thieves
Brimstone Rock co-ordinates: X18 / Y18
This largely barren pile of curved sand provides subsequent to no safety from the weather, or different pirates.

Cannon Cove location in Sea of Thieves
Cannon Cove co-ordinates: F10 / G9 / G10
This massive island provides a bunch of attention-grabbing options, from its central rocky peak, sprawling caves and a pier that’s barely too tall for many ships.

Castaway Isle location in Sea of Thieves
Castaway Isle co-ordinates: K14
Lengthy and skinny, Castaway Isle is a small however dense jungle surrounded by clear seashores.

Rooster Isle location in Sea of Thieves
Rooster Isle co-ordinates: I16
Often dwelling to chickens, this isle is usually flora with a couple of giant rocks on the southern edge that breaks up the sandy seashores.

Cinder Islet location in Sea of Thieves
Cinder Islet co-ordinates: U14
Located between two energetic volcanoes, this tiny cluster of islands is little greater than a pile of sand and a few hardy bushes.

Crescent Isle location in Sea of Thieves
Crescent Isle co-ordinates: B9 / C9
This massive moon formed island has an expansive bay, which can be utilized as a harbour for even the biggest ships, and a cave system that cuts via the center of the island.

Crooked Masts location in Sea of Thieves
Crooked Masts co-ordinates: O11
Sharp rocks off the island make harbouring on Crooked Masts a harmful affair, whereas snakes and enormous drops on the island make it simply as lethal as soon as you have come ashore.

Criminal’s Hole location in Sea of Thieves
Criminal’s Hole co-ordinates: M16 / N16
Named for the expansive cave system operating via the island, which might be entered from the bay, a big pit within the centre, and behind the waterfall.

Crow’s Nest Fortress location in Sea of Thieves
Crow’s Nest Fortress co-ordinates: O17 / O18
Watchtowers and curved partitions make it laborious to assault this fortress when its energetic, however the pool within the centre might be extremely helpful towards hoards of Golden Skeletons.

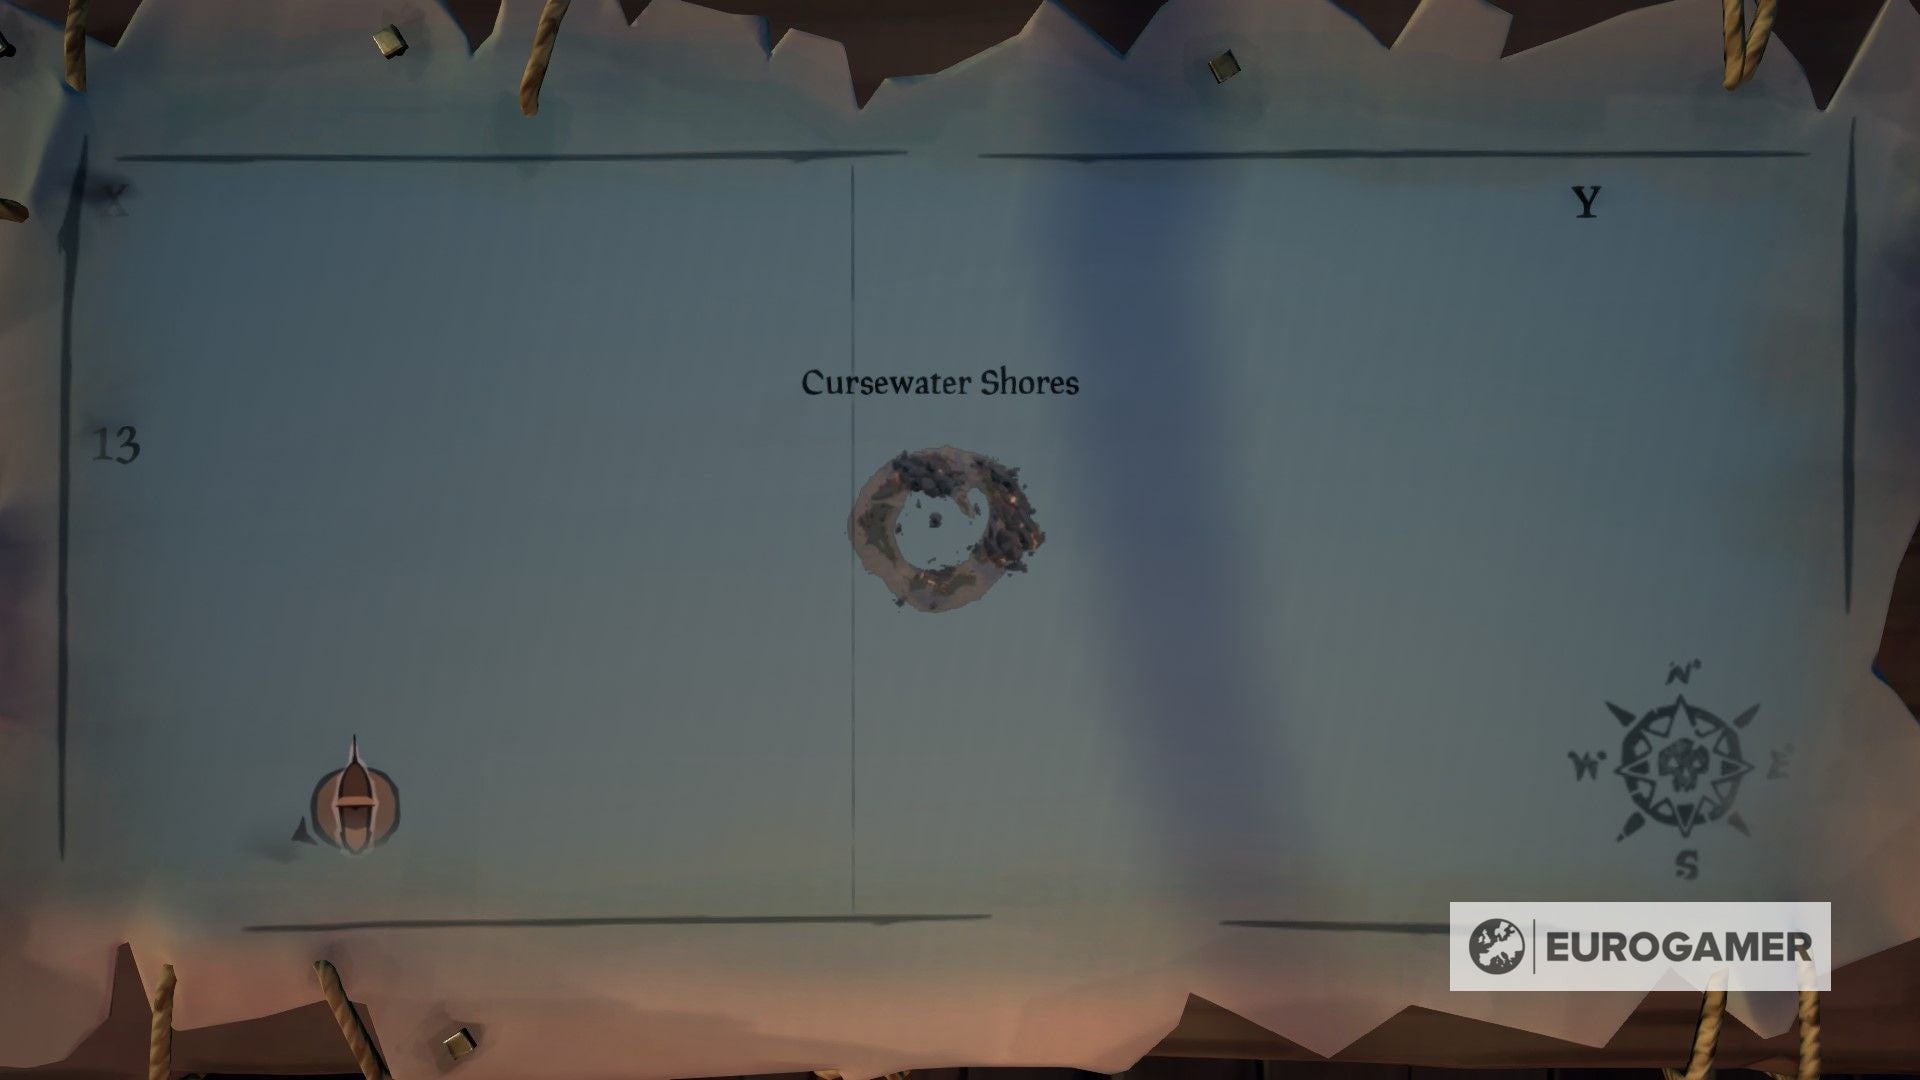
Cursewater Shores location in Sea of Thieves
Cursewater Shores co-ordinates: Y13
This donut formed island could be secure from volcanoes, however would not provide a lot besides from sand and crystal growths.
Cutlass Cay location in Sea of Thieves
Cutlass Cay co-ordinates: M18
A sliver of sand and bushes, cutlass cay is surrounded by deceptively shallow waters that may simply catch out unaware crews.

Dagger Tooth Outpost location in Sea of Thieves
Dagger Tooth Outpost co-ordinates: M7 / M8 / N7 / N8
One among two outposts in The Wilds, Dagger Tooth village is guarded on one aspect by a large rocky outcrop and from the opposite by a watery wreck.

Satan’s Ridge location in Sea of Thieves
Satan’s Ridge co-ordinates: P19
Behind the waterfall in Satan’s Ridge is an intensive cave system that works its manner from the seashores all the way in which to its towering peak

Satan’s Thrist location in Sea of Thieves
Satan’s Thrist co-ordinates: W21
A big rocky peak on the centre of this massive island shrinks compared to the enormous volcano looming alongside the south west coast.

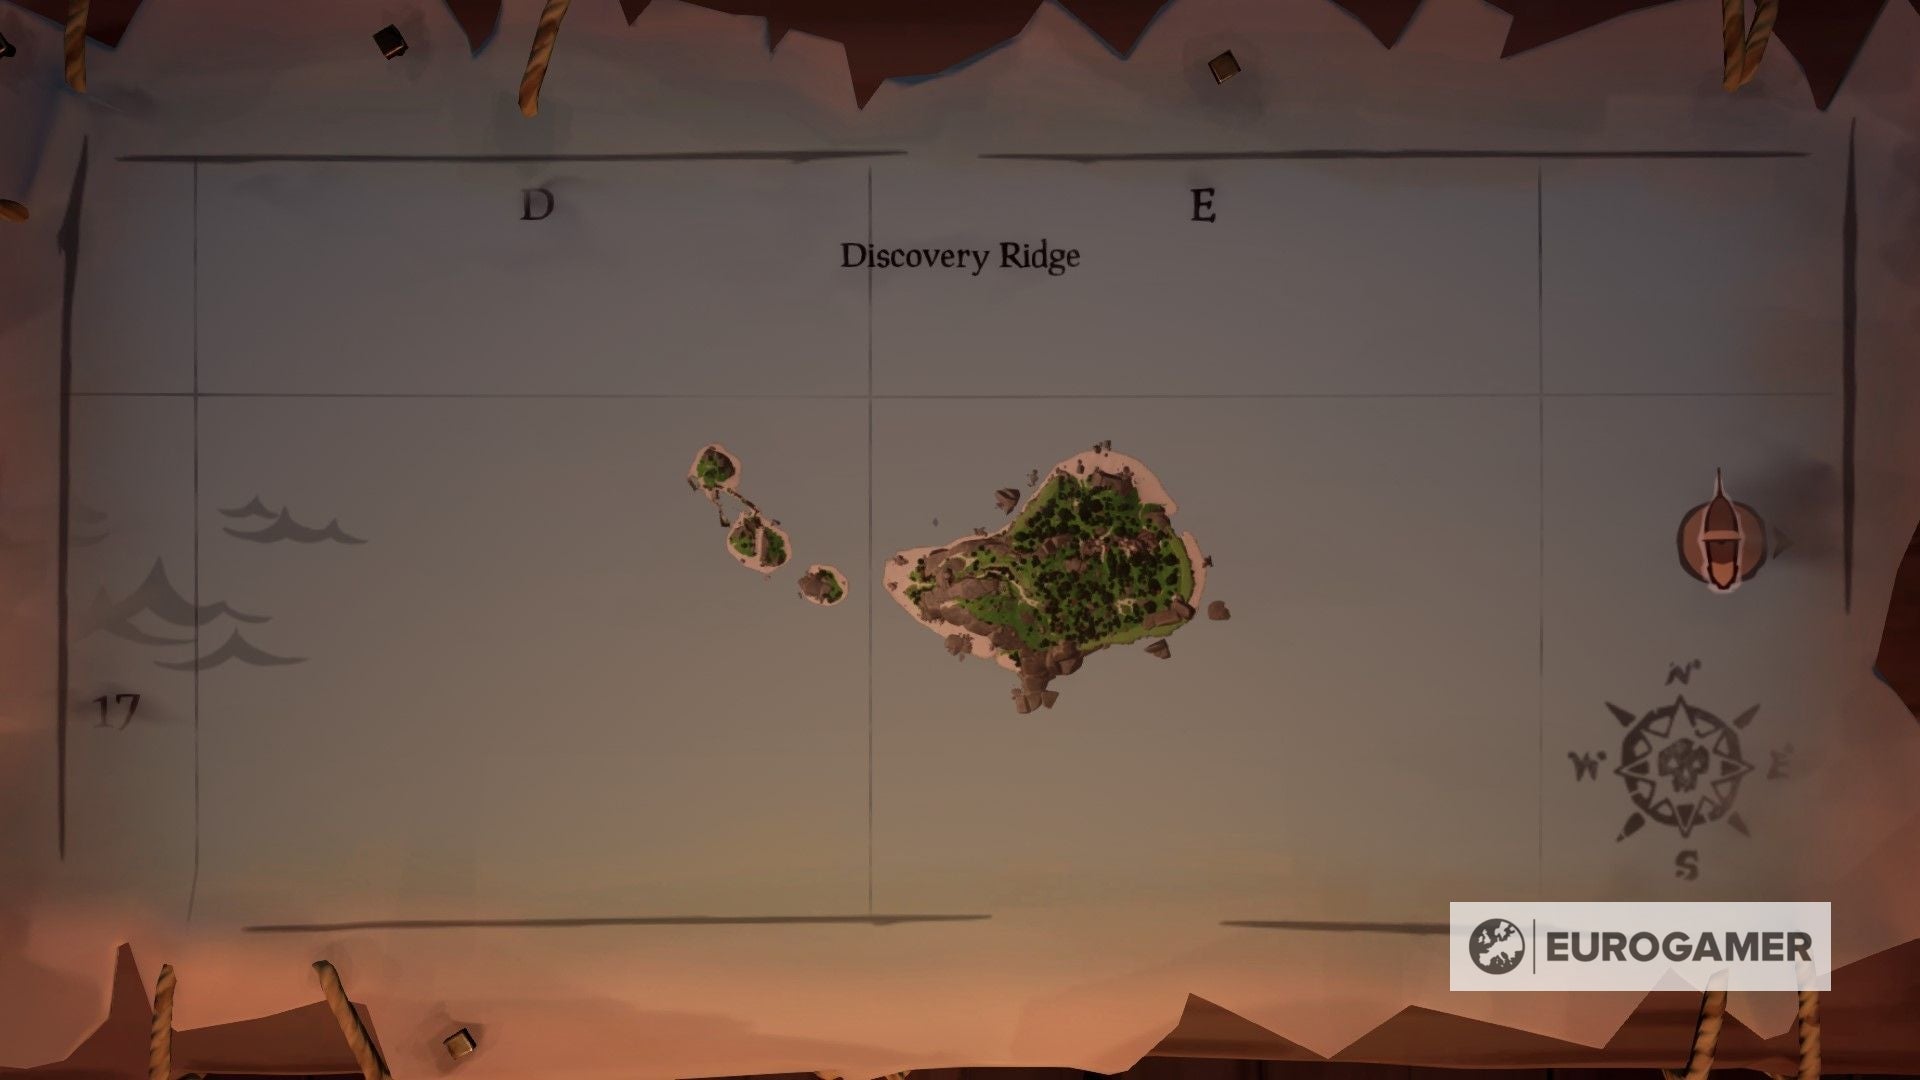
Discovery Ridge location in Sea of Thieves
Discovery Ridge co-ordinates: D17 / E17
A visit to Discovery Ridges cliffy shoreline would not be full with visiting the tail of sand at its japanese edge that’s coated in historic shipwrecks.
Fetcher’s Relaxation location in Sea of Thieves
Fetcher’s Relaxation co-ordinates: V12
Damaged in two, this massive volcanic island has sandy and cliffy shores, dried out vegetation and loads of sandy walkways to discover.

The Most interesting Buying and selling Put up location in Sea of Thieves
The Most interesting Buying and selling Put up co-ordinates: F17
Nestled close to the sting of the Historical Isles, The Most interesting Buying and selling Put up could be a helpful drop off for Historical Scales as you journey in the direction of The Shores of Loads
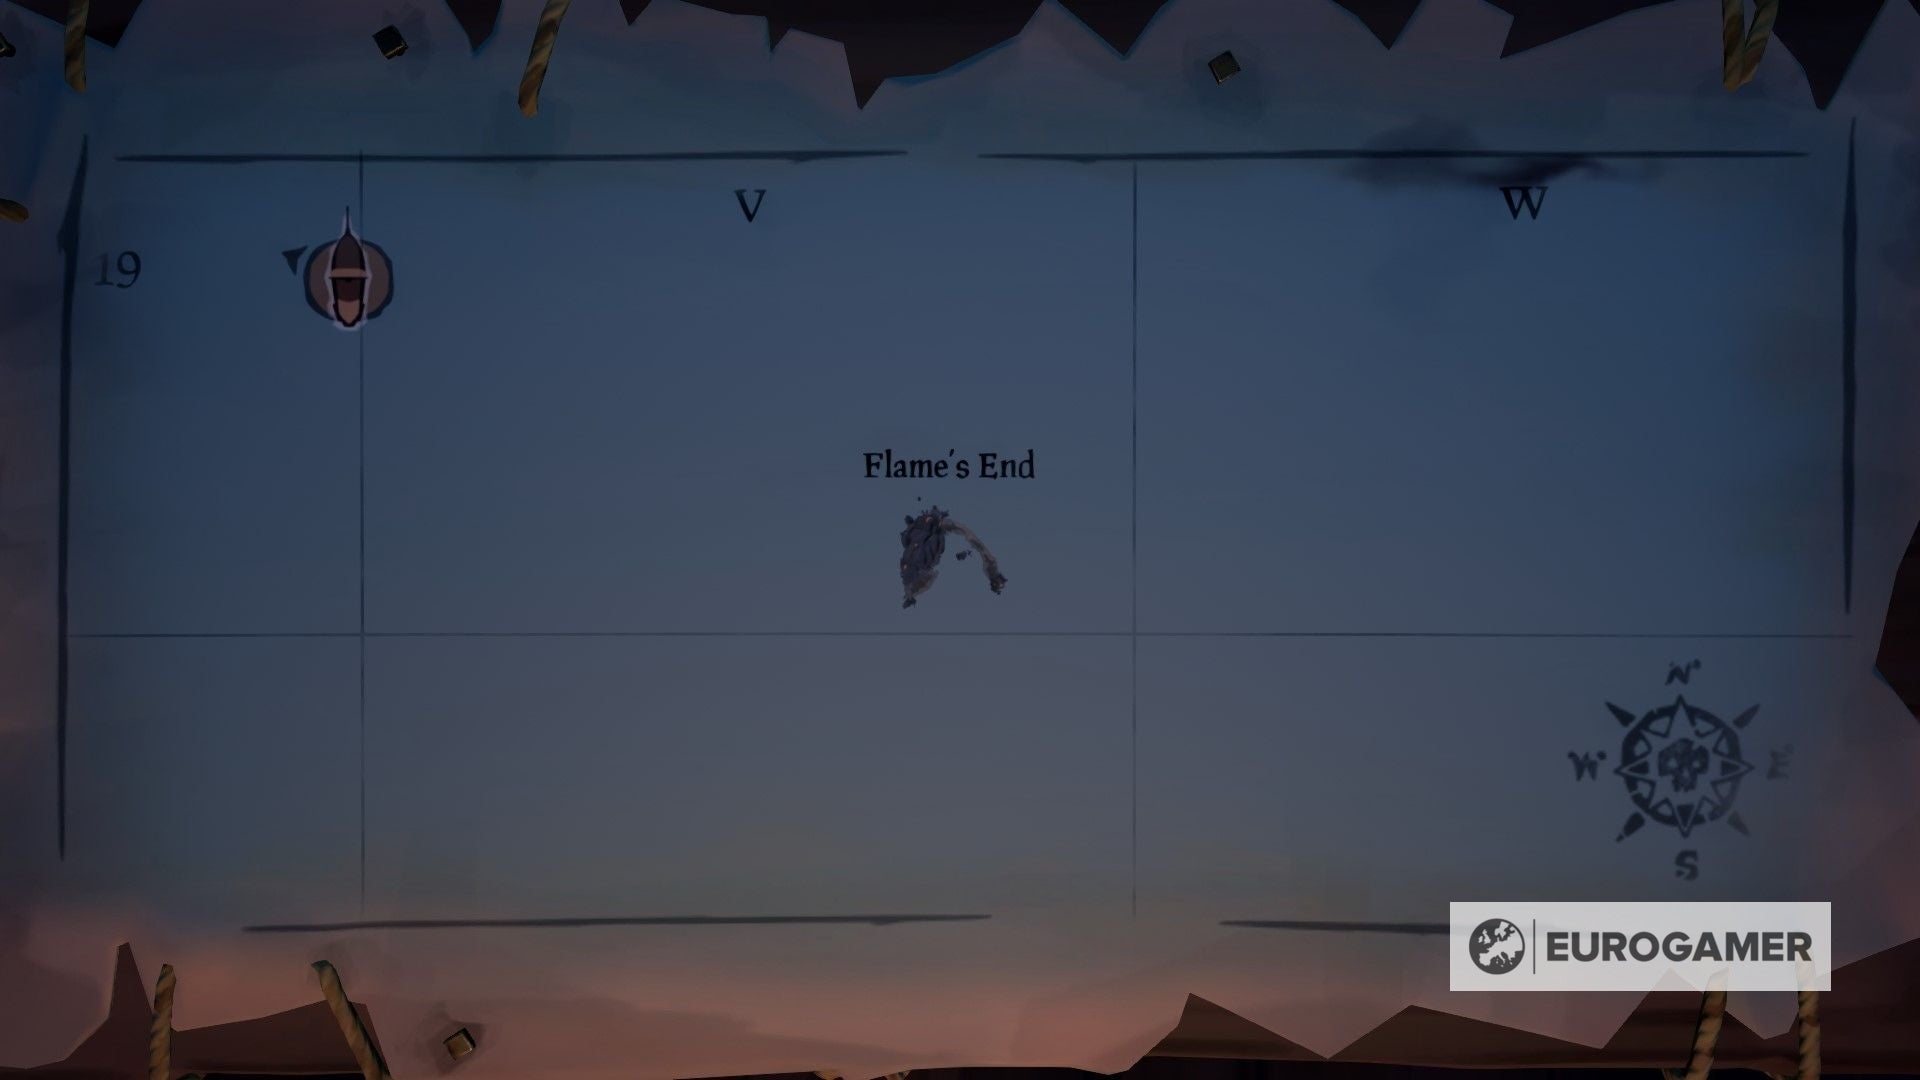
Flame’s Finish location in Sea of Thieves
Flame’s Finish co-ordinates: V19
This tiny ‘V’ formed island has a big rocky outcrop to its west, and a reasonably good view of the oceanic volcano to its south.
Flintlock Peninsula location in Sea of Thieves
Flintlock Peninsula co-ordinates: W14 / W15
Flintlock Peninsula could be cut up into three, however the waters between are too shallow, rocky, and close to the lethal volcano for pirates to attempt to sail via.

Fools Lagoon location in Sea of Thieves
Idiot’s Lagoon co-ordinates: I14
Because the identify implies, the lagoon on the centre of this island remains to be related to the ocean and never an acceptable location to drink, or catch Pondies from.

Forsaken Brink location in Sea of Thieves
Forsaken Brink co-ordinates: T16 / U16
With out a volcano, Forsaken Brink is not as unfriendly because the identify suggests, even when the dominating rocky outcrop may look able to erupt at any second.

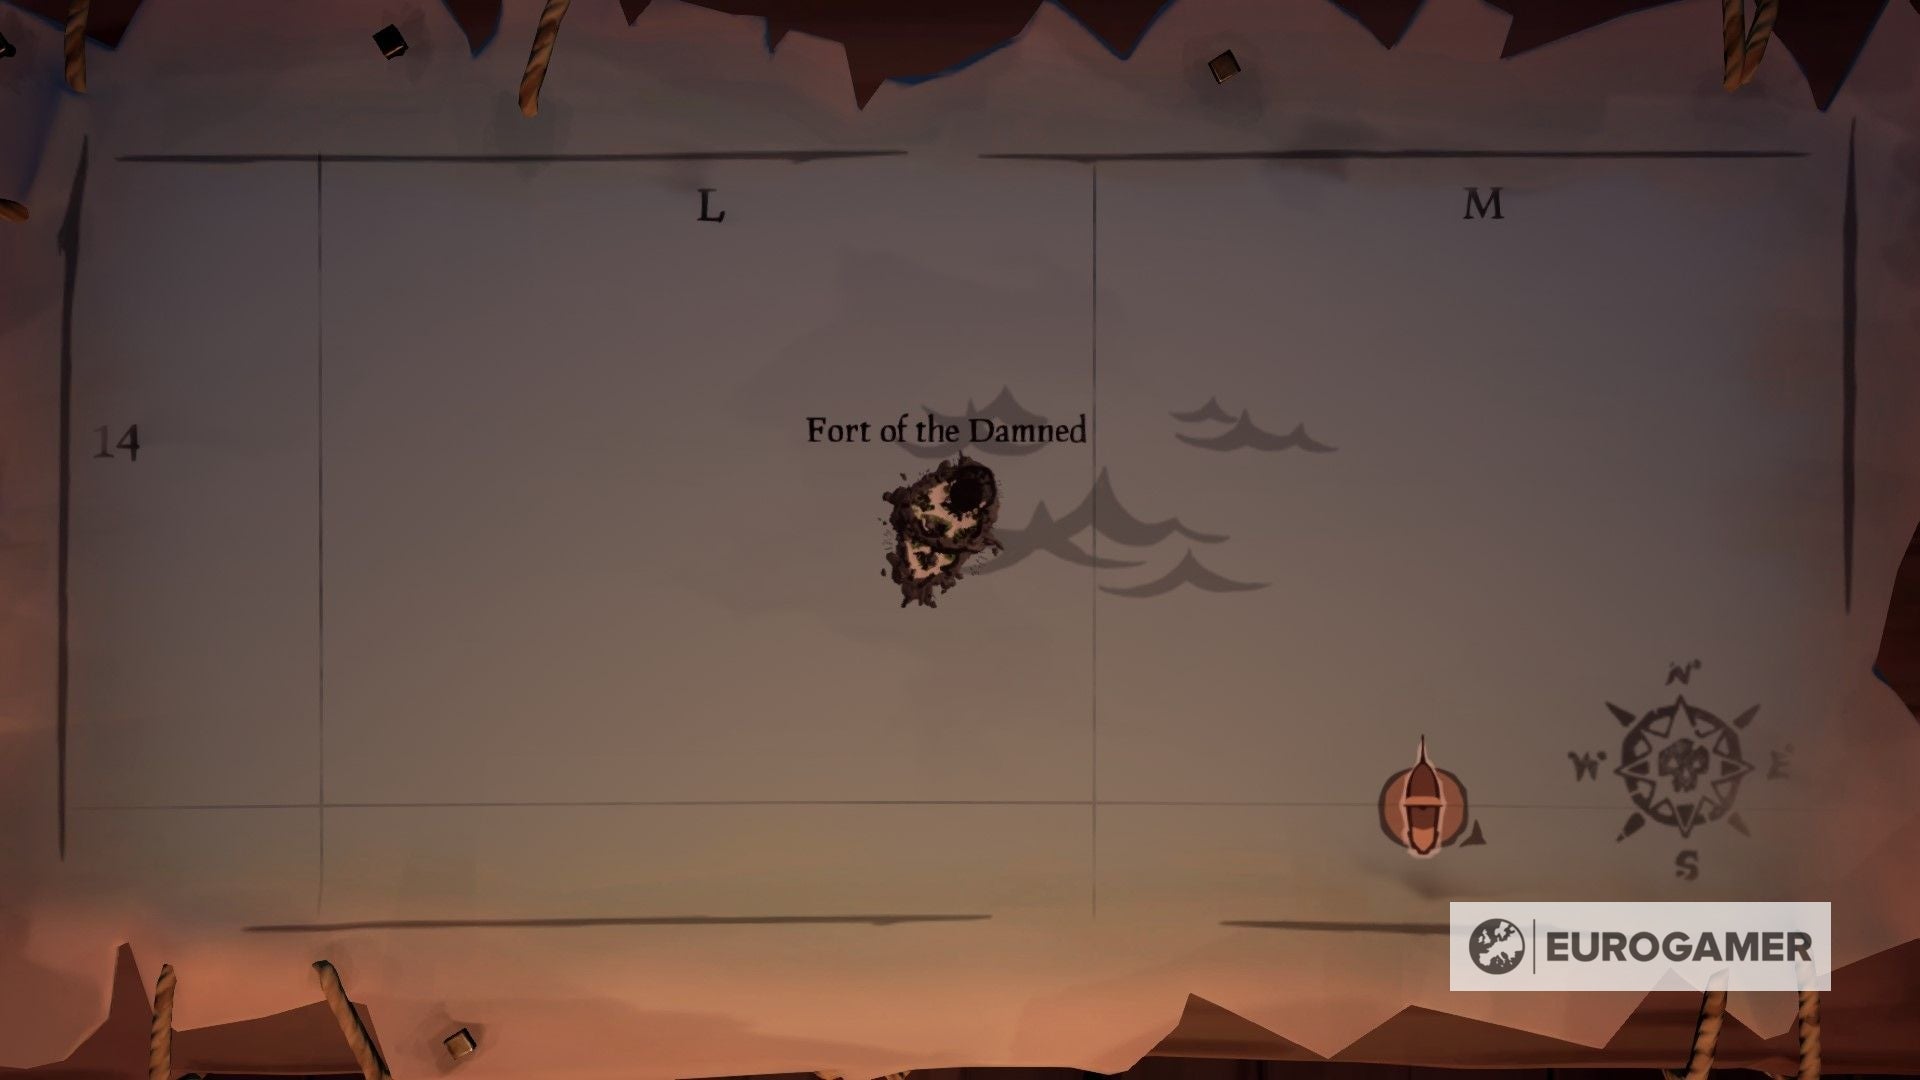
Fort of the Damned location in Sea of Thieves
Fort of the Damned co-ordinates: L14
Previously Previous Boot Fort, this mist shrouded island is dwelling to one of the vital formidable battles within the recreation.
Galleon’s Grave Outpost location in Sea of Thieves
Galleon’s Grave Outpost co-ordinates: R8
The entrance half of a shipwrecked galleon hangs above this island, pincered between two enormous rocky peaks, providing a enjoyable place to attempt to soar off of, in addition to the standard outpost facilities.

Glowstone Cay location in Sea of Thieves
Glowstone Cay co-ordinates: Z18
On the very fringe of the map sits Glowstone Cay, an island with loads of sand and a single rocky hall on its japanese aspect.

Golden Sands Outpost location in Sea of Thieves
Golden Sands Outpost co-ordinates: D10 / D11 / E10
Golden Sands is a group of sandy islands related by picket walkways that every one ultimately lead in the direction of the tavern.

Hidden Spring Hold location in Sea of Thieves
Hidden Spring Hold co-ordinates: I8
Massive cliffs encompass most of this raised fortress, however damaged harbour, sandy seashores and even a small pond might be discovered within the centre of the island.

Isle of Final Phrases location in Sea of Thieves
Isle of Final Phrases co-ordinates: O9
Surrounded by 4 large stone peaks, the Isle of Final Phrases appears much more intimidating from a distance then the small pile of sand really is.

Keel Haul Fort location in Sea of Thieves
Keel Haul Fort co-ordinates: C6 / D6
The central bay in Kell Haul Fort is extremely harmful to assault, however the partitions surrounding the remainder of the island make it the best choice for expert pirates.

Kraken Watchtower location in Sea of Thieves
Kraken Watchtower co-ordinates: L6
This skinny, sloped island is roofed in picket walkways and palisades that undertaking the raised fort from assault.

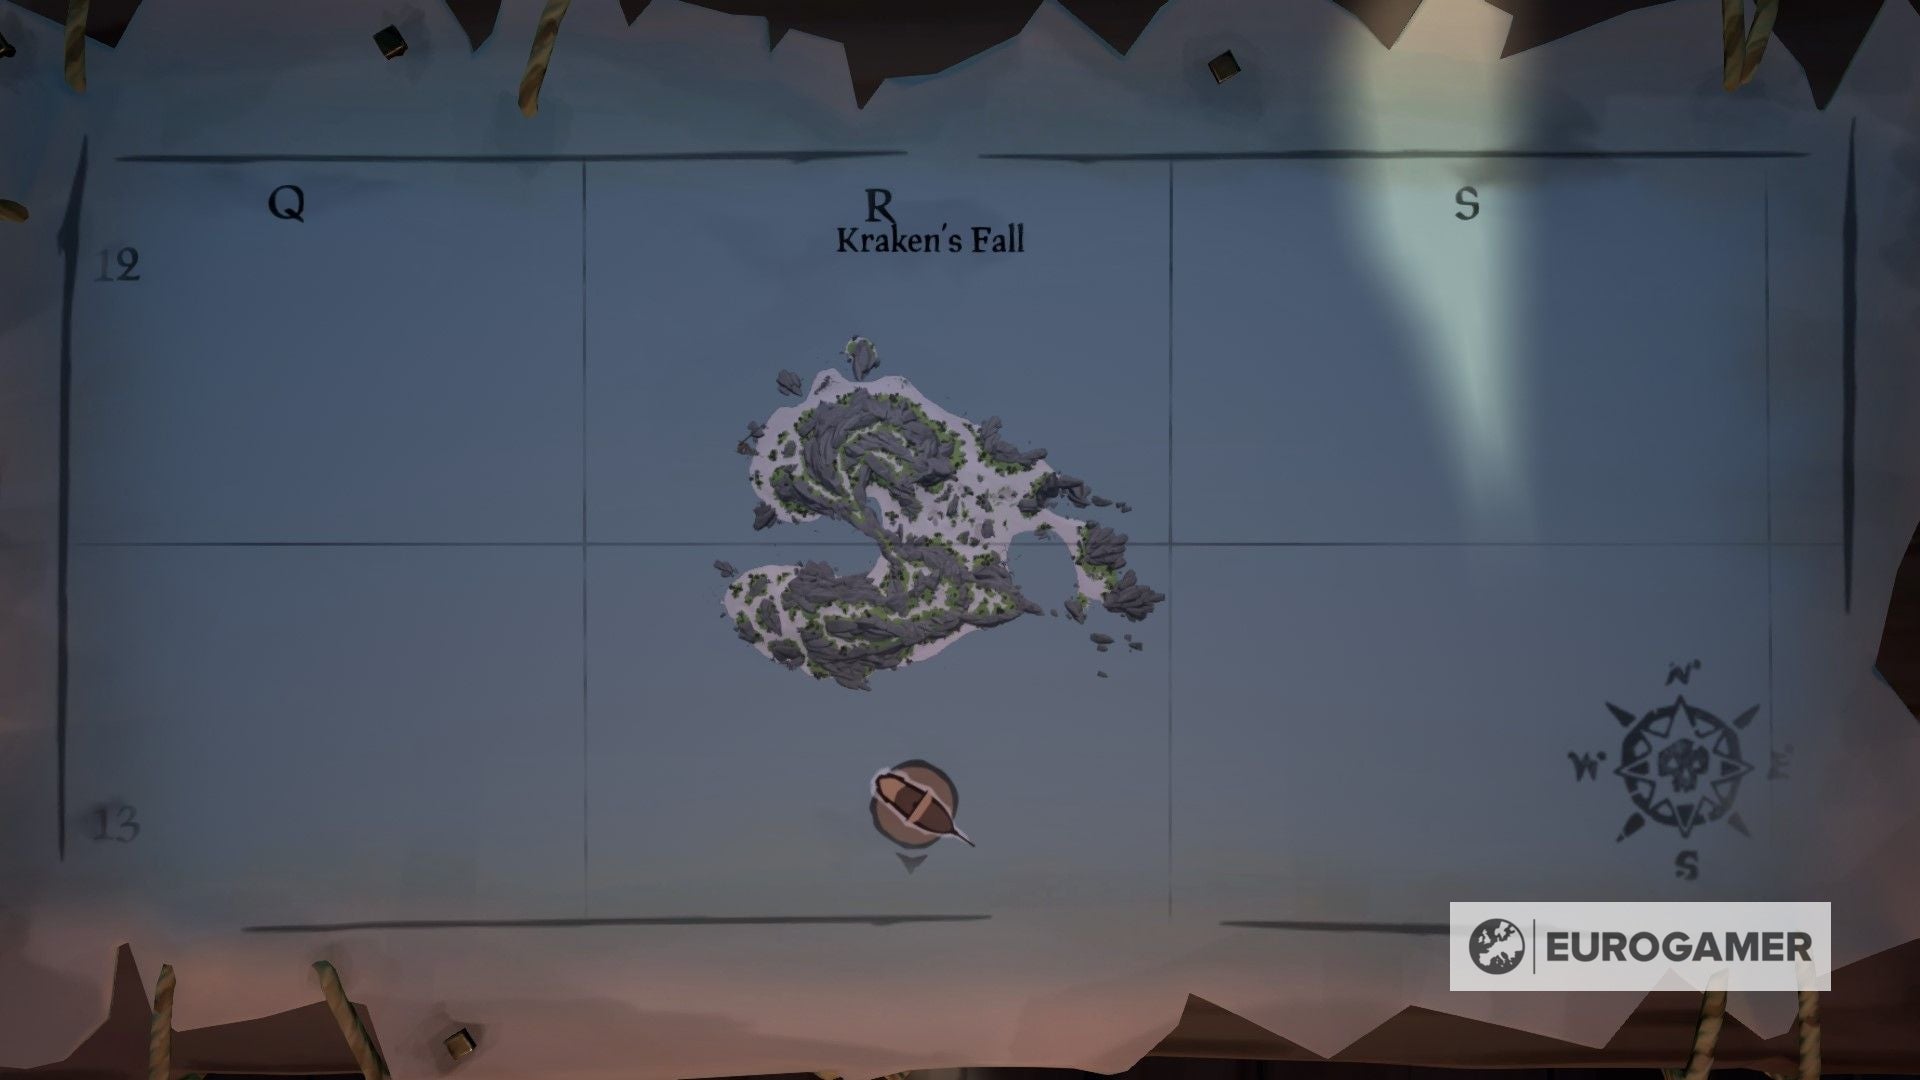
Kraken’s Fall location in Sea of Thieves
Kraken’s Fall co-ordinates: R12 / R13
This massive island is punctured with deep bays, and hallmarked with spiraling peaks that meet within the centre.
Lagoon of Whispers location in Sea of Thieves
Lagoon of Whispers co-ordinates: D12 / D13
This donut formed island is damaged into 4 items, with overgrown and rocky patches to the north, and skinny strips of sand to the south

Liar’s Spine location in Sea of Thieves
Liar’s Spine co-ordinates: S11
This small island slopes upwards from east to west, peaking in a small rocky cliff that stretches over the water

Lone Cove location in Sea of Thieves
Lone Cove co-ordinates: H6
Lone Cove is a big island with sandy seashores, stretches of grasslands and a big piratical graveyard within the centre. There’s a cave because the identify suggests, however it could possibly solely be accessed from the north-west nook.

Lonely Isle location in Sea of Thieves
Lonely Isle co-ordinates: G8
Lonely Isle is a bit more than a sliver of sand with some bushes and an excuse to sing “I am On A Boat”.

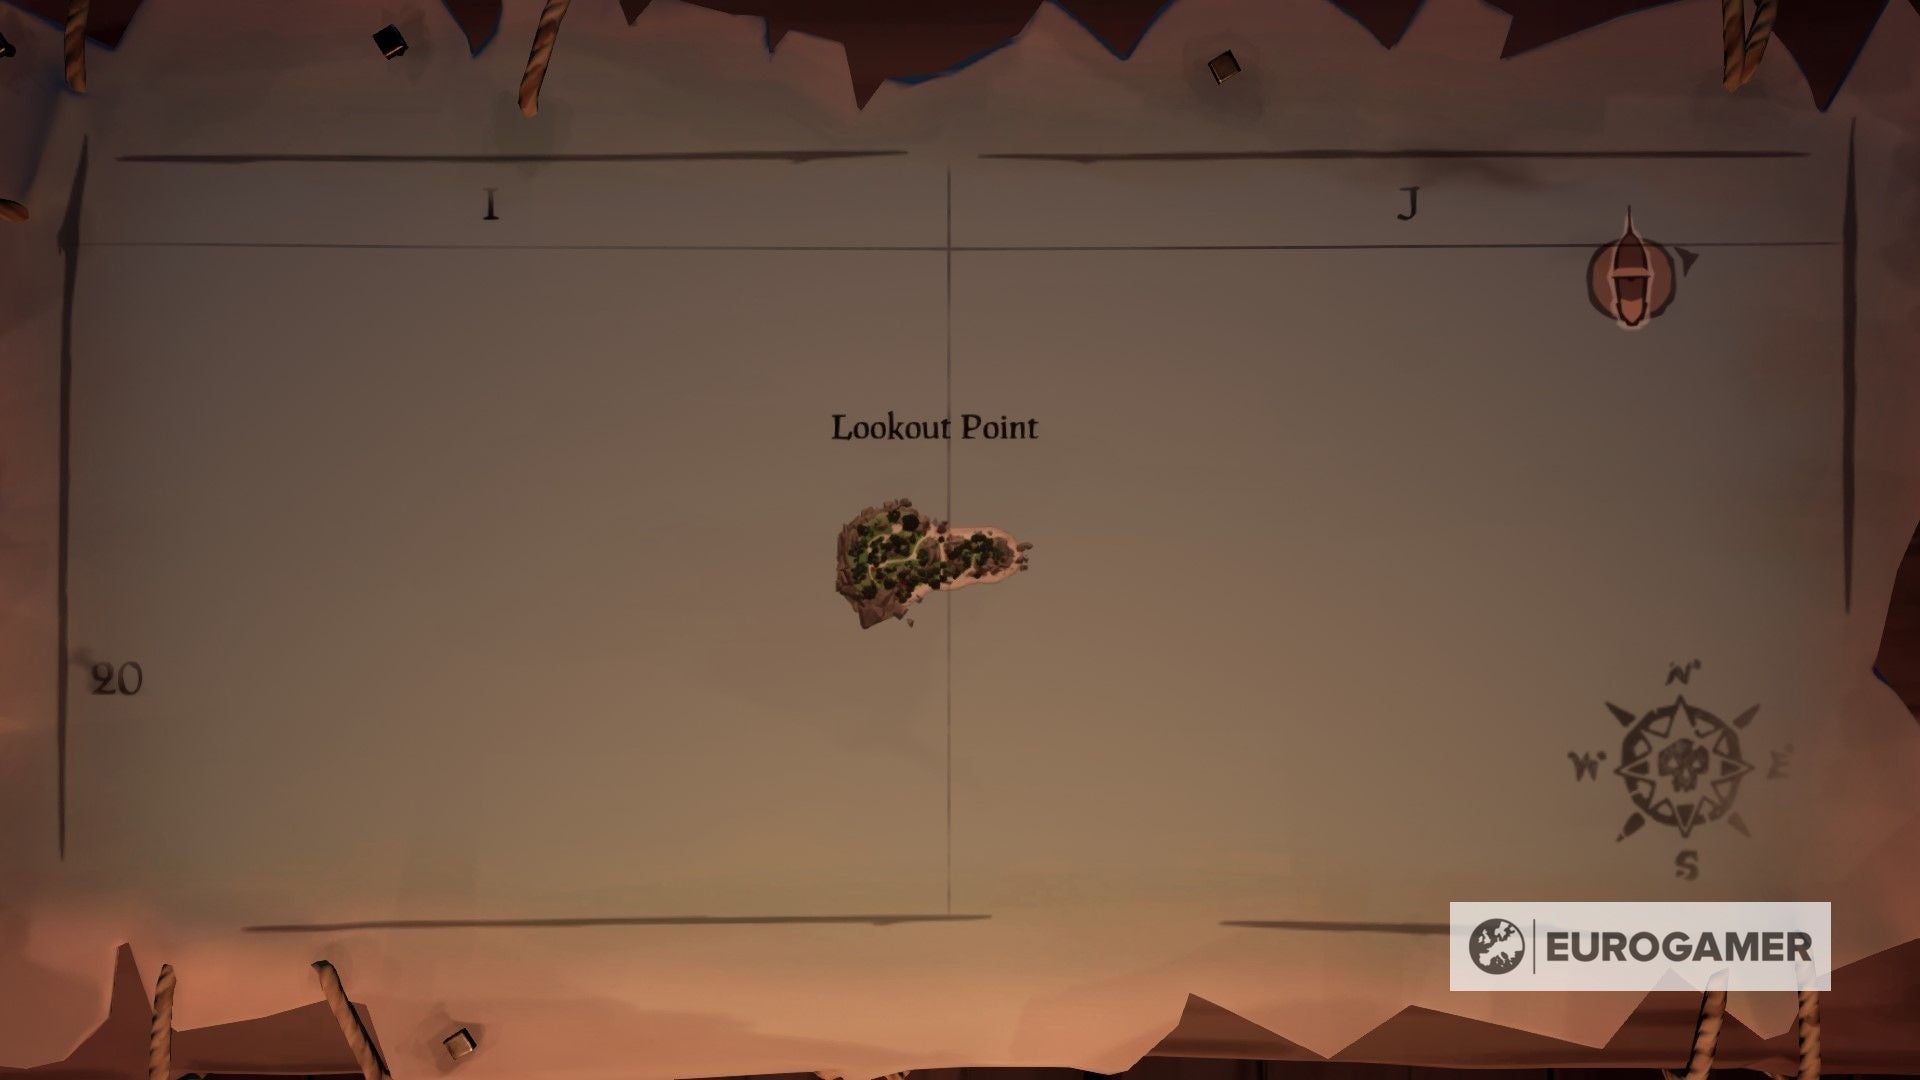
Lookout Level location in Sea of Thieves
Lookout Level co-ordinates: I20 / J20
A skinny, sloped island with cliffs to the west, and accessible seashores to the north and south.
Misplaced Gold Fort location in Sea of Thieves
Misplaced Gold Fort co-ordinates: H17 / I17
Constructed atop of a tiered cliff island, Misplaced Gold Fort might be troublesome to navigate because of the luxurious, overgrown foliage and winding stairs.
Magma’s Tide location in Sea of Thieves
Magma’s Tide co-ordinates: Y20
This small island is dominated by the big rocky outcrop within the centre and small cliffs to the south.

Marauder’s Arch location in Sea of Thieves
Marauder’s Arch co-ordinates: Q3 / This fall
Providing an opportunity to nimble sailors to show their expertise, Marauders Arch is 2 giant islands related by an enormous stone arch that may be sailed below.

Mermaids Hideaway location in Sea of Thieves
Mermaid’s Hideaway co-ordinates: B13 / C13
A big island, Mermaids Hideaway has an expansive seashore, freshwater pool, and a big raised space full with stone pillars to discover.

Molten Sands Fortress location in Sea of Thieves
Molten Sands Fortress co-ordinates: Z11 / Z12
The one fortress constructed into the aspect of an energetic volcano, this fort will problem your fight and crusing expertise.

Morrow’s Peak Outpost location in Sea of Thieves
Morrow’s Peak Outpost co-ordinates: V17
This not so secure outpost is constructed into the aspect of volcano and provides the identical vary of intensive, if often distaterous, providers you will discover in much less lethal outposts.

Mutineer Rock location in Sea of Thieves
Mutineer Rock co-ordinates: N19
Presumably named after the big rock to the east, this cluster of islands is a mix of sandy shores and huddles of bushes.

North Star Seapost location in Sea of Thieves
North Star Seapost co-ordinates: H10
This tiny seapost is ideal for promoting fish and looking out on the stars.

Previous Trustworthy Isle location in Sea of Thieves
Previous Trustworthy Isle co-ordinates: M4 / M5/ N4 / N5
Previous Trustworthy Isle is a maze of dense, rocky cliffs and winding sandy paths with accessible seashores to the north, east, and south.

Previous Salts Atoll location in Sea of Thieves
Previous Salts Atoll co-ordinates: F18 / F19
On the centre of this small island is the uncovered stays of a shipwreck, surrounded by shallow waters and small clusters of sand seashores and undergrowth.

Paradise Spring location in Sea of Thieves
Paradise Spring co-ordinates: L17
This small island consists of two densely forested segments related by a sandy seashore, with a small rockpool within the bigger part.

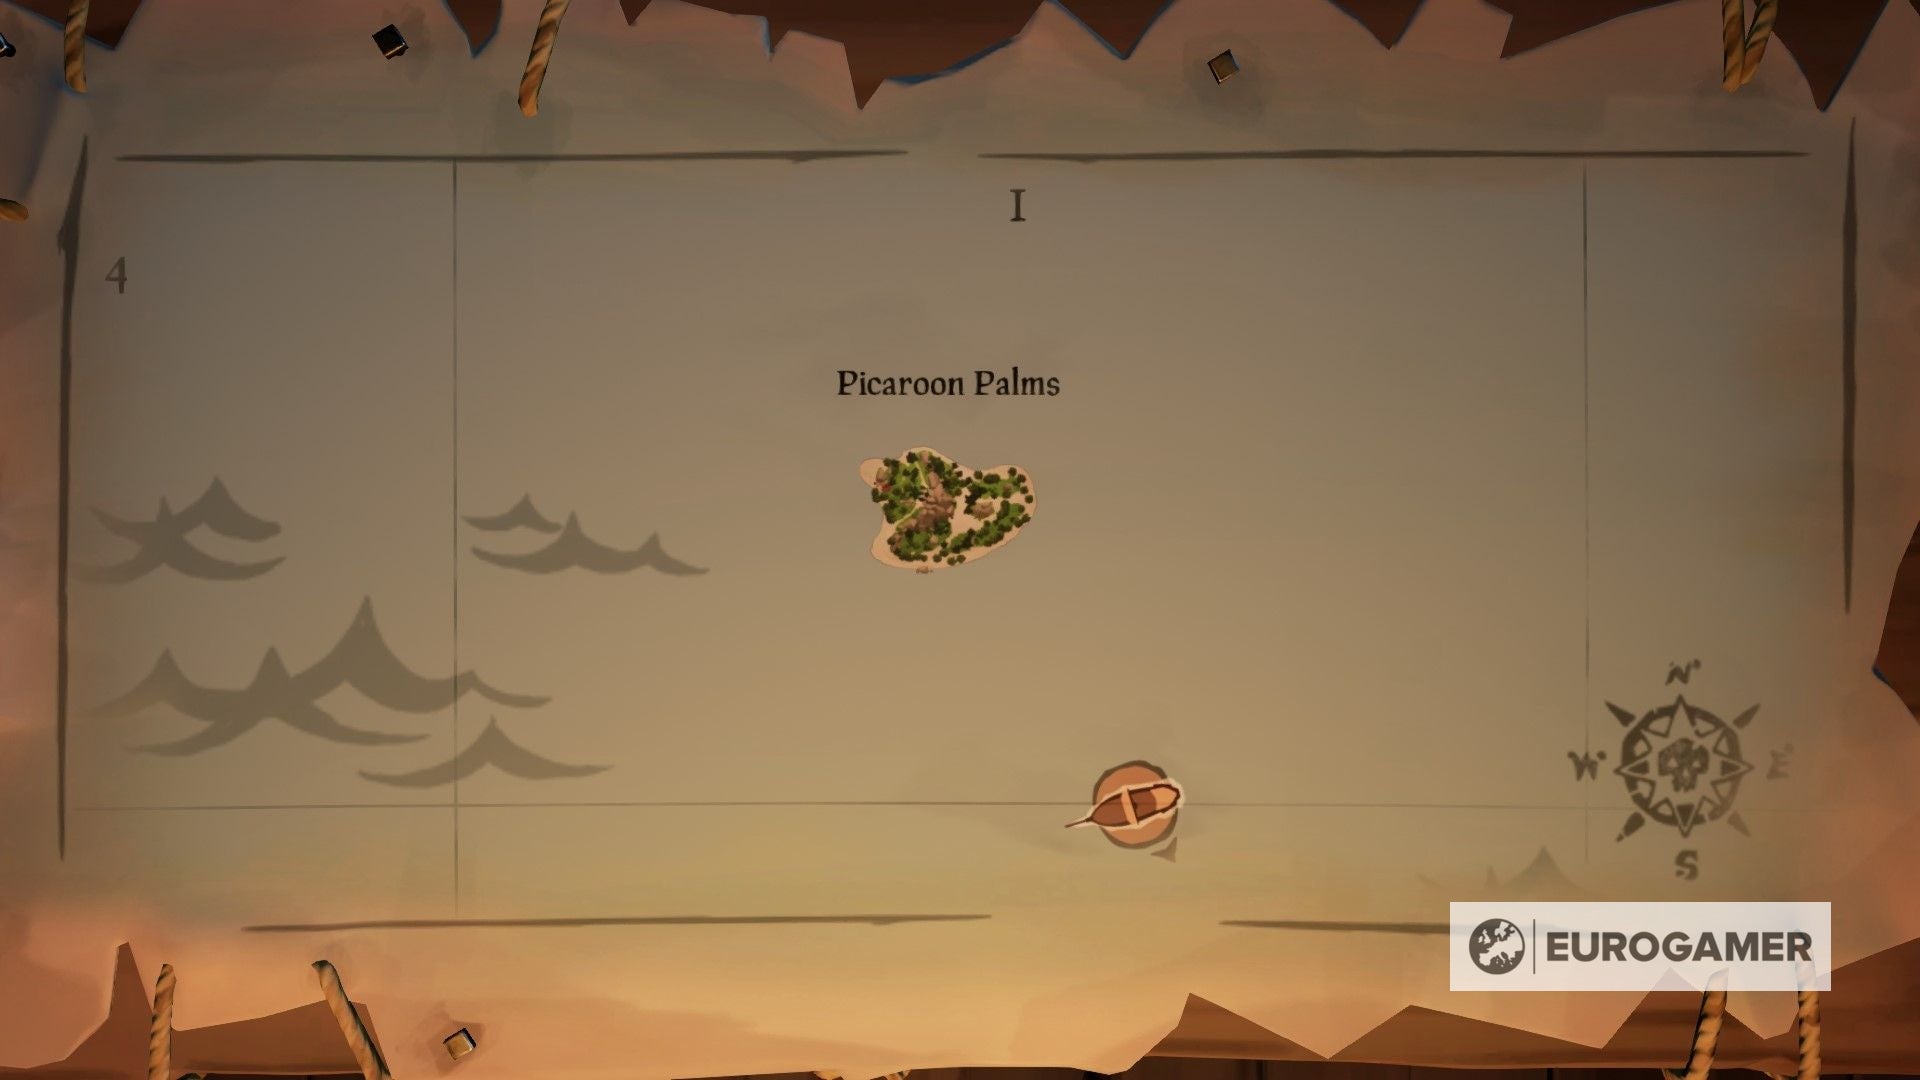
Picaroon Palms location in Sea of Thieves
Picaroon Palms co-ordinates: I4
The central rocky outcrop of Picaroon Palms is flanked by giant patches of bushes and greenery, damaged up by sandy paths.
Plunder Outpost location in Sea of Thieves
Plunder Outpost co-ordinates: J18 / K18
Constructed across the base of a big rocky mountain, Plunder Outpost has all of the common retailers and taverns, in addition to a couple of forests and seashores to discover

Plunder Valley location in Sea of Thieves
Plunder Valley co-ordinates: G16
Named for the valley that runs west to east, this island is giant and mountainous, with loads of caves and cliffs to discover.

Plunderer’s Plight location in Sea of Thieves
Plunderer’s Plight co-ordinates: Q6
This flat island stretches south-west to north-east, headed off by a small cluster of rocks on the high edge.

Rapier Cay location in Sea of Thieves
Rapier Cay co-ordinates: D8
This barely emerged slip of sand is so small that crews can crash headlong into it if they are not paying consideration.

Reaper’s Hideout location in Sea of Thieves
Reaper’s Hideout co-ordinates: I12 / I13
Previously uncharted, this desolate assortment of islands is now dwelling to the fortress for the Reaper’s Bones that may be discovered on southern island.

Roaring Sands location in Sea of Thieves
Roaring Sands co-ordinates: U21
Scars of pink crystal might be seen within the giant rocks that loom over the northern fringe of this small island.

Roaring Merchants location in Sea of Thieves
Roaring Merchants co-ordinates: U20
Discovered on the japanese fringe of the Satan’s Roar, this small pier provides a second to relaxation from the volcanoes and probability to promote any fish you may need caught.

Ruby’s Fall location in Sea of Thieves
Ruby’s Fall co-ordinates: Y16
Named for its tall, treacherous walkways, Ruby’s Fall is harmful not simply due to its cliffs, but additionally for the volcano on its westerly aspect.

Rum Runner Isle location in Sea of Thieves
Rum Runner Isle co-ordinates: H9 / I9
You needn’t ask the place all of the rum has gone with this island on the horizon, though its deceptively shallow waters may make you want you stopped consuming the grog a bit sooner.

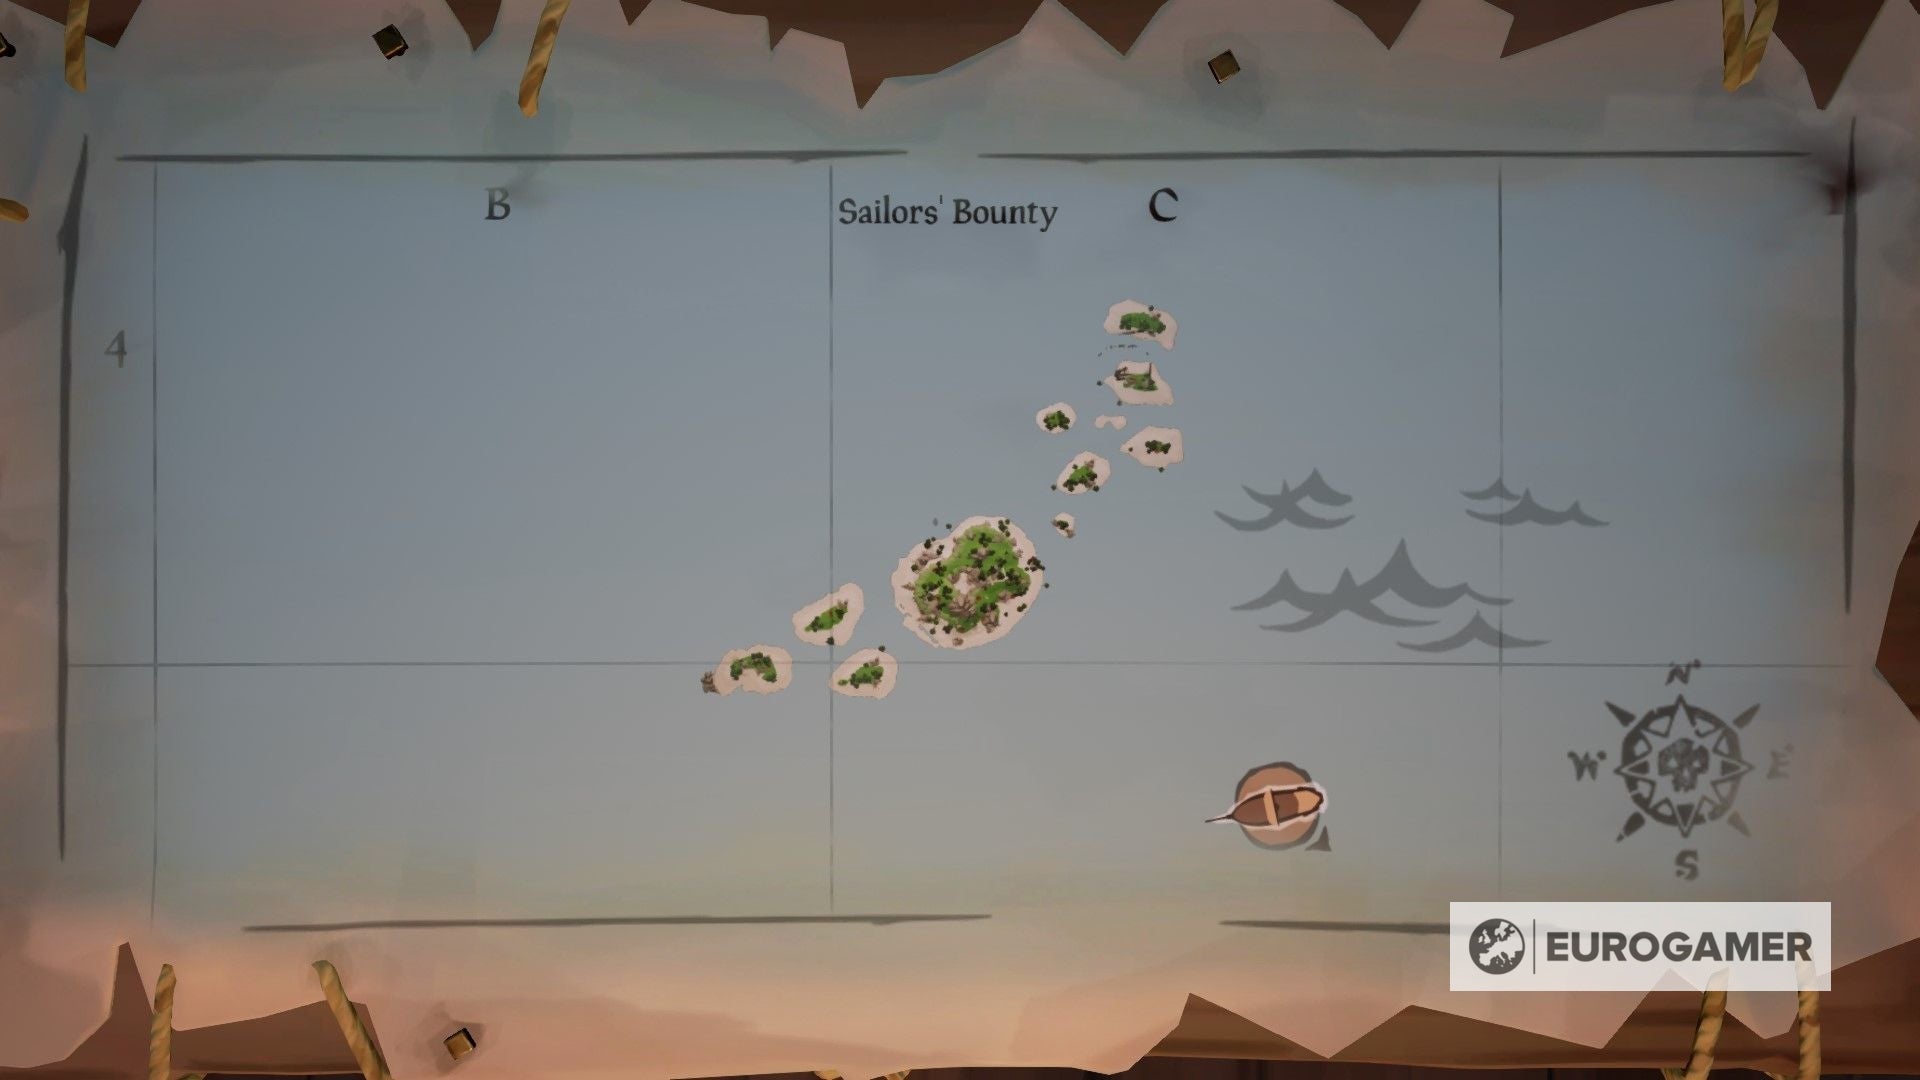
Sailor’s Bounty location in Sea of Thieves
Sailor’s Bounty co-ordinates: B4 / B5 / C4 / C5
Sailor’s Bounty is a group of smaller islands orbiting a bigger central one, with loads of greenery and seashores to discover.
Sailor’s Knot Stronghold location in Sea of Thieves
Sailor’s Knot Stronghold co-ordinates: E14
Divided in two by the islands’ defenses, The battle for Sailors Knot Stronghold might be fought on the decrease seashores or the upper fortress.

Salty Sands location in Sea of Thieves
Salty Sands co-ordinates: G3 / G4
Two small islands coated in seashores, bushes, and a few rocks are related by a shallow sandbar to make up Salty Sands.

Sanctuary Outpost location in Sea of Thieves
Sanctuary Outpost co-ordinates: F7
The facilities of Sanctuary Outpost might be discovered on the biggest, central island of this cluster, with damaged picket walkways and bridges meandering across the smaller outer islands.

Sandy Shallows location in Sea of Thieves
Sandy Shallows co-ordinates: D5 / E5
Most of Sandy Shallows is underwater, with solely a curving sandbar, and small cluster of bushes standing out above the waves.

Scorched Move location in Sea of Thieves
Scorched Move co-ordinates: X11
Dominated on the west by a big rocky outcropping, Scorched Move is a small island of slim, sandy paths and dry vegetation.

Scurvy Isley location in Sea of Thieves
Scurvy Isley co-ordinates: K4
This small and barely curved island is flanked on the east and west by rocks, some vegetation clustered between the seashores.

Sea Canine’s Relaxation location in Sea of Thieves
Sea Canine’s Relaxation co-ordinates: C11
Sea Canine’s Relaxation is a small island of dense jungle, damaged up by sandy paths and surrounded by seashores.

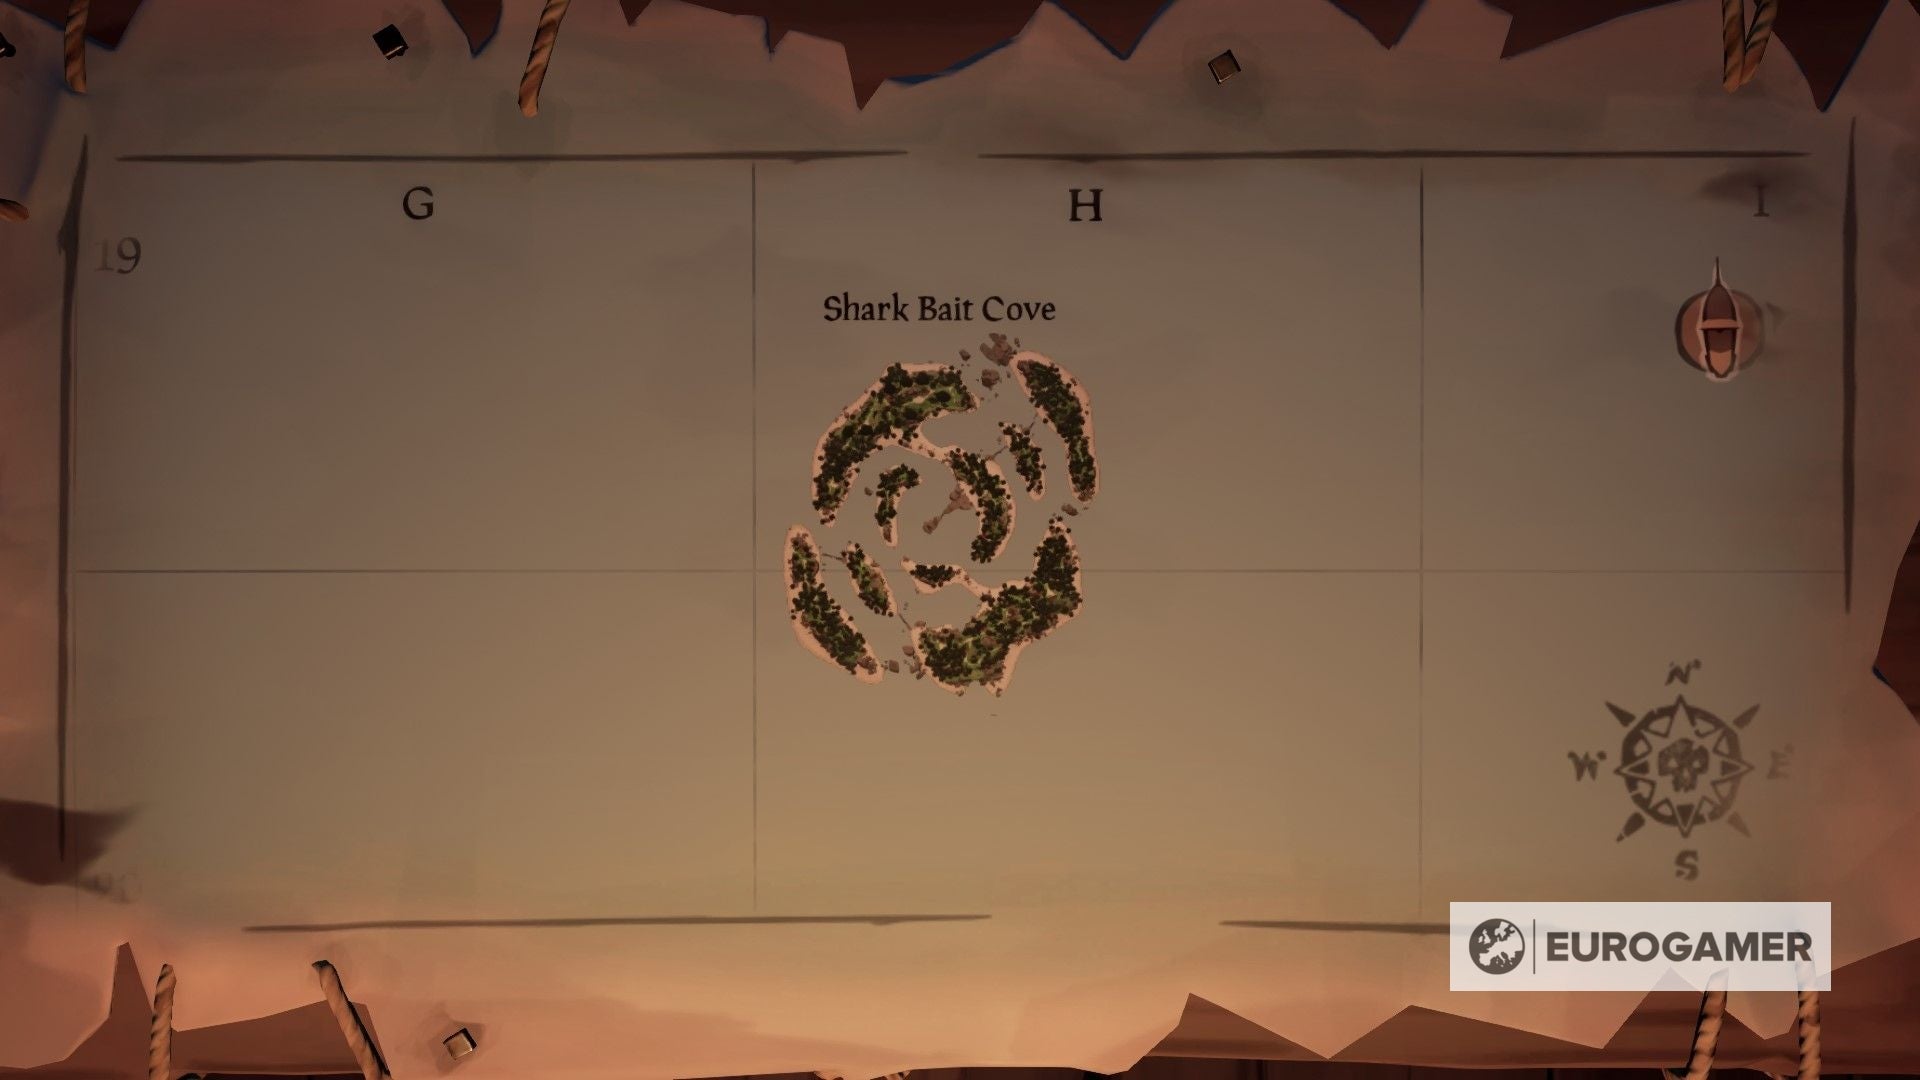
Shark Bait Cove location in Sea of Thieves
Shark Bait Cove co-ordinates: H19 / H20
One of the crucial recognisable islands within the Sea of Thieves, Shark Bait Cove is a collection of round bands of land crisscrossed with vegetation and watery channels.
Shark Fin Camp location in Sea of Thieves
Shark Fin Camp co-ordinates: P5
The fortress at Shark Fin Camp is constructed into the aspect of the northerly rocky outcrop, making an assault from the nicely defended southern seashores the one route for pirates.

Shark Tooth Key location in Sea of Thieves
Shark Tooth Key co-ordinates: P13
Formed like a damaged anchor, this small island is marked with giant rocks and small clusters of bushes.

Shipwreck Bay location in Sea of Thieves
Shipwreck Bay co-ordinates: M10 / M11
Surrounded by a hoop of shipwrecking rocks, this massive island has a rocky mountain within the centre and a big shipwreck to the east.

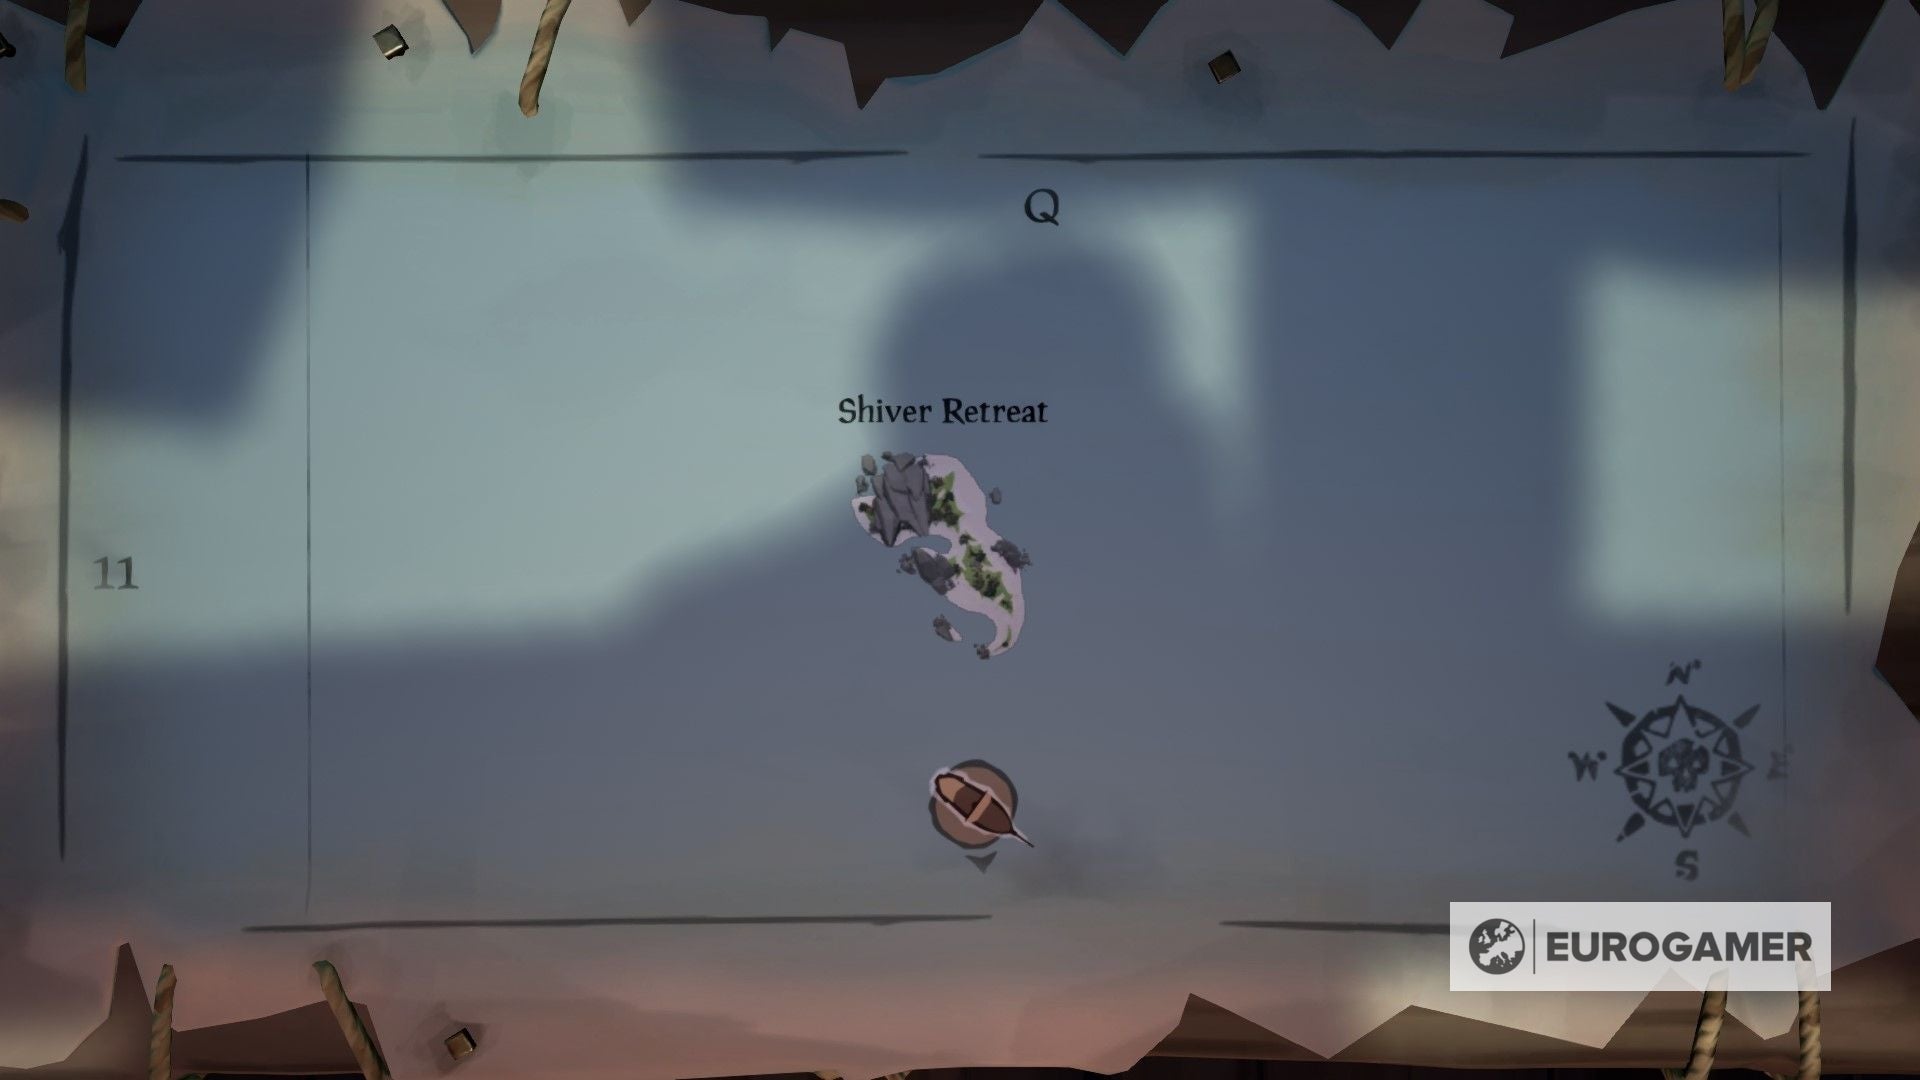
Shiver Retreat location in Sea of Thieves
Shiver Retreat co-ordinates: Q11
Hooked at one finish and rocky on the different, this island can also be notably for the vegetation operating up its small backbone.
Cranium Hold location in Sea of Thieves
Cranium Hold co-ordinates: P9
A number of bridges join the smaller, defensive islands to the fort, with partitions of rock appearing as safety from the west.

Smuggler’s Bay location in Sea of Thieves
Smuggler’s Bay co-ordinates: E3 / E4 / F3 / F4
This massive round island has a deep bay within the centre that ships can anchor in, if they’ll slip between the big stone peaks that flank the waterway.

Snake Island location in Sea of Thieves
Snake Island co-ordinates: K15 / K16
These three islands are damaged by deep waterways, however all have equally forested centres and sandy seashores.

The Spoils of Loads Retailer location in Sea of Thieves
The Spoils of Loads Retailer co-ordinates: B7
This small store sits on the western fringe of the Shores of Loads and is the right alternative to promote some Plentifins.

Stephen’s Spoils location in Sea of Thieves
Stephen’s Spoils co-ordinates: L15 / L16
This seaport within the coronary heart of the Historical Isles is pretty much as good an excuse as any to promote any Historical Scales you could be carrying.

Sunken Grove location in Sea of Thieves
Sunken Grove co-ordinates: O7 / P7
This massive island surrounds a deep cavern with round rock formations and smaller islands.

Thieves’ Haven location in Sea of Thieves
Thieves’ Haven co-ordinates: L20 / M20
The deep water cove beneath the island makes Thieves Haven the right hiding spot for pirates, in addition to treasure.

Three Paces East Seapost location in Sea of Thieves
Three Paces East Seapost co-ordinates: S9
This port is unsurprisingly discovered on the japanese fringe of The Wilds.

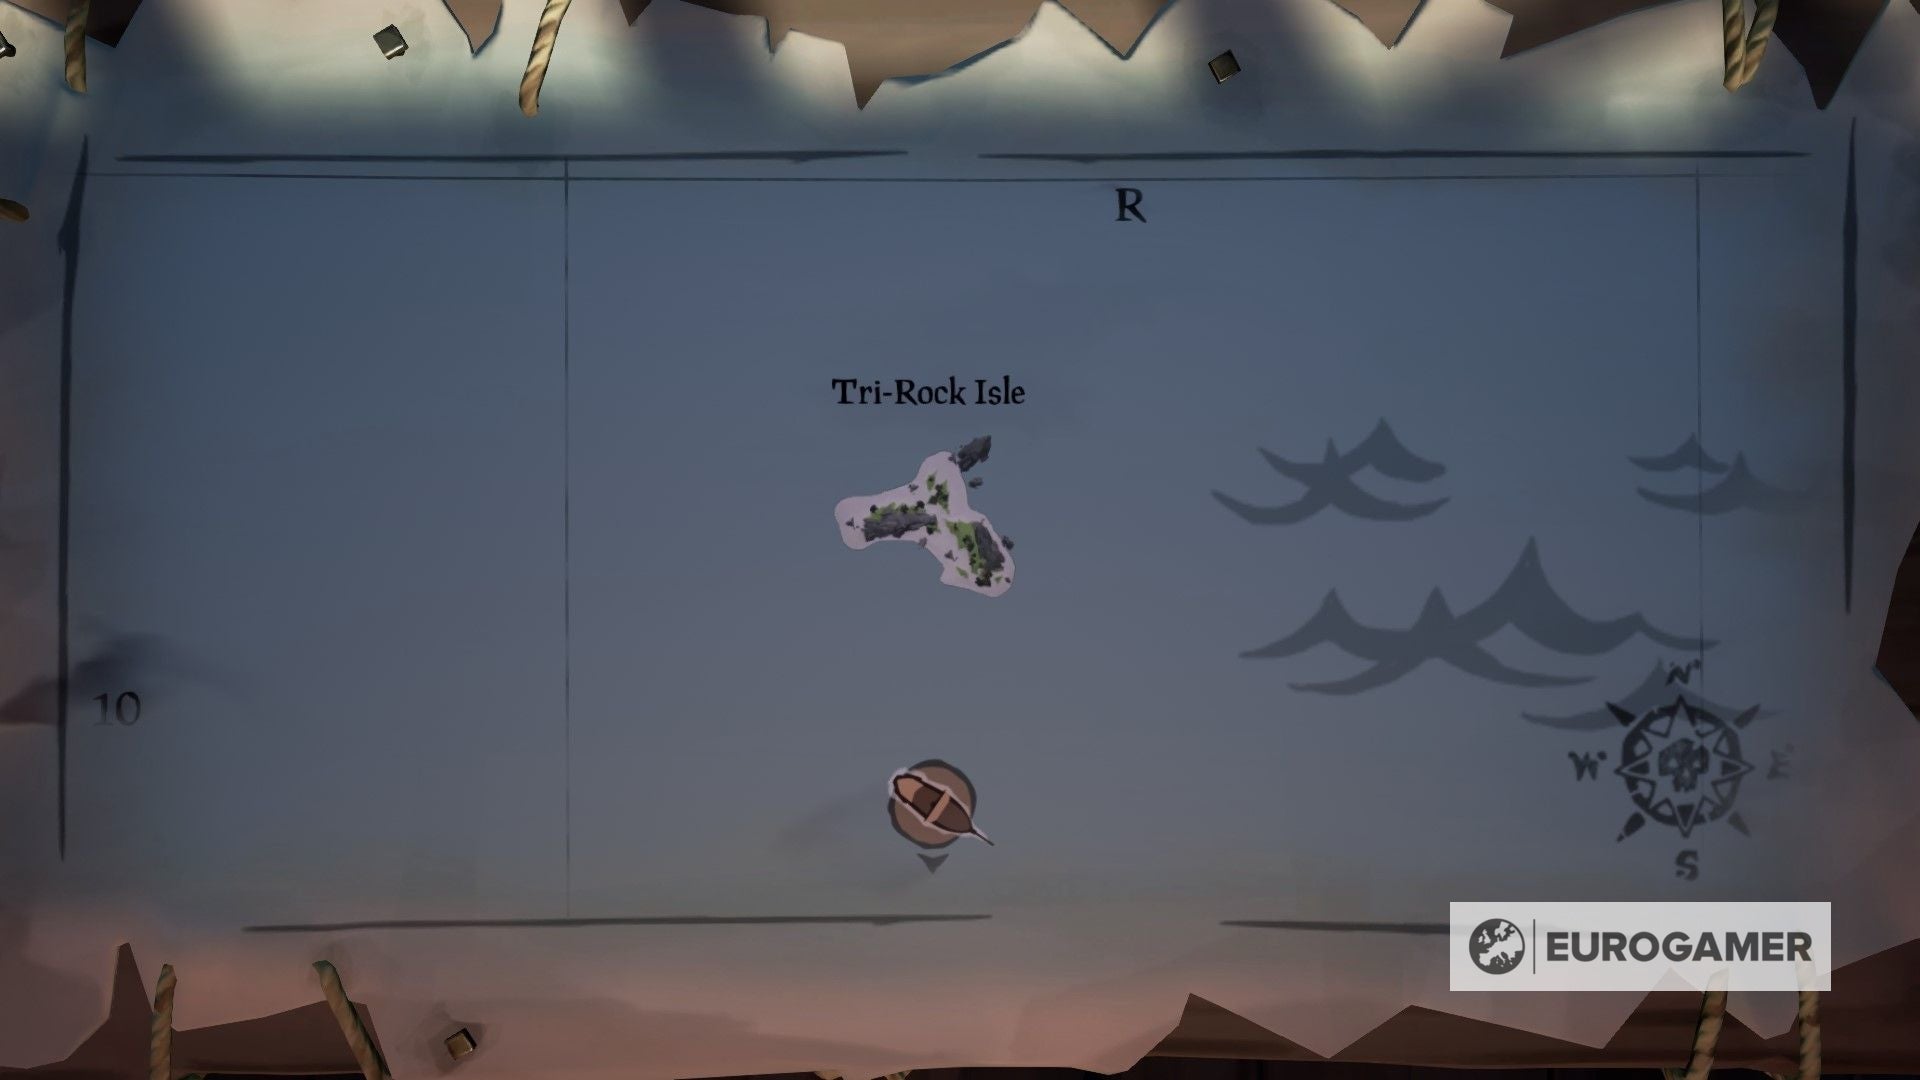
Tri-Rock Isle location in Sea of Thieves
Tri-Rock Isle co-ordinates: R10
This island is imaginatively named after the three notable rocky outcrops that emerge from the three corners of this triangular isle.
Twin Groves location in Sea of Thieves
Twin Groves co-ordinates: H11
Two small patches of vegetation related by a slim sandbar are flanked by rocky shores to the north and south of this small island.

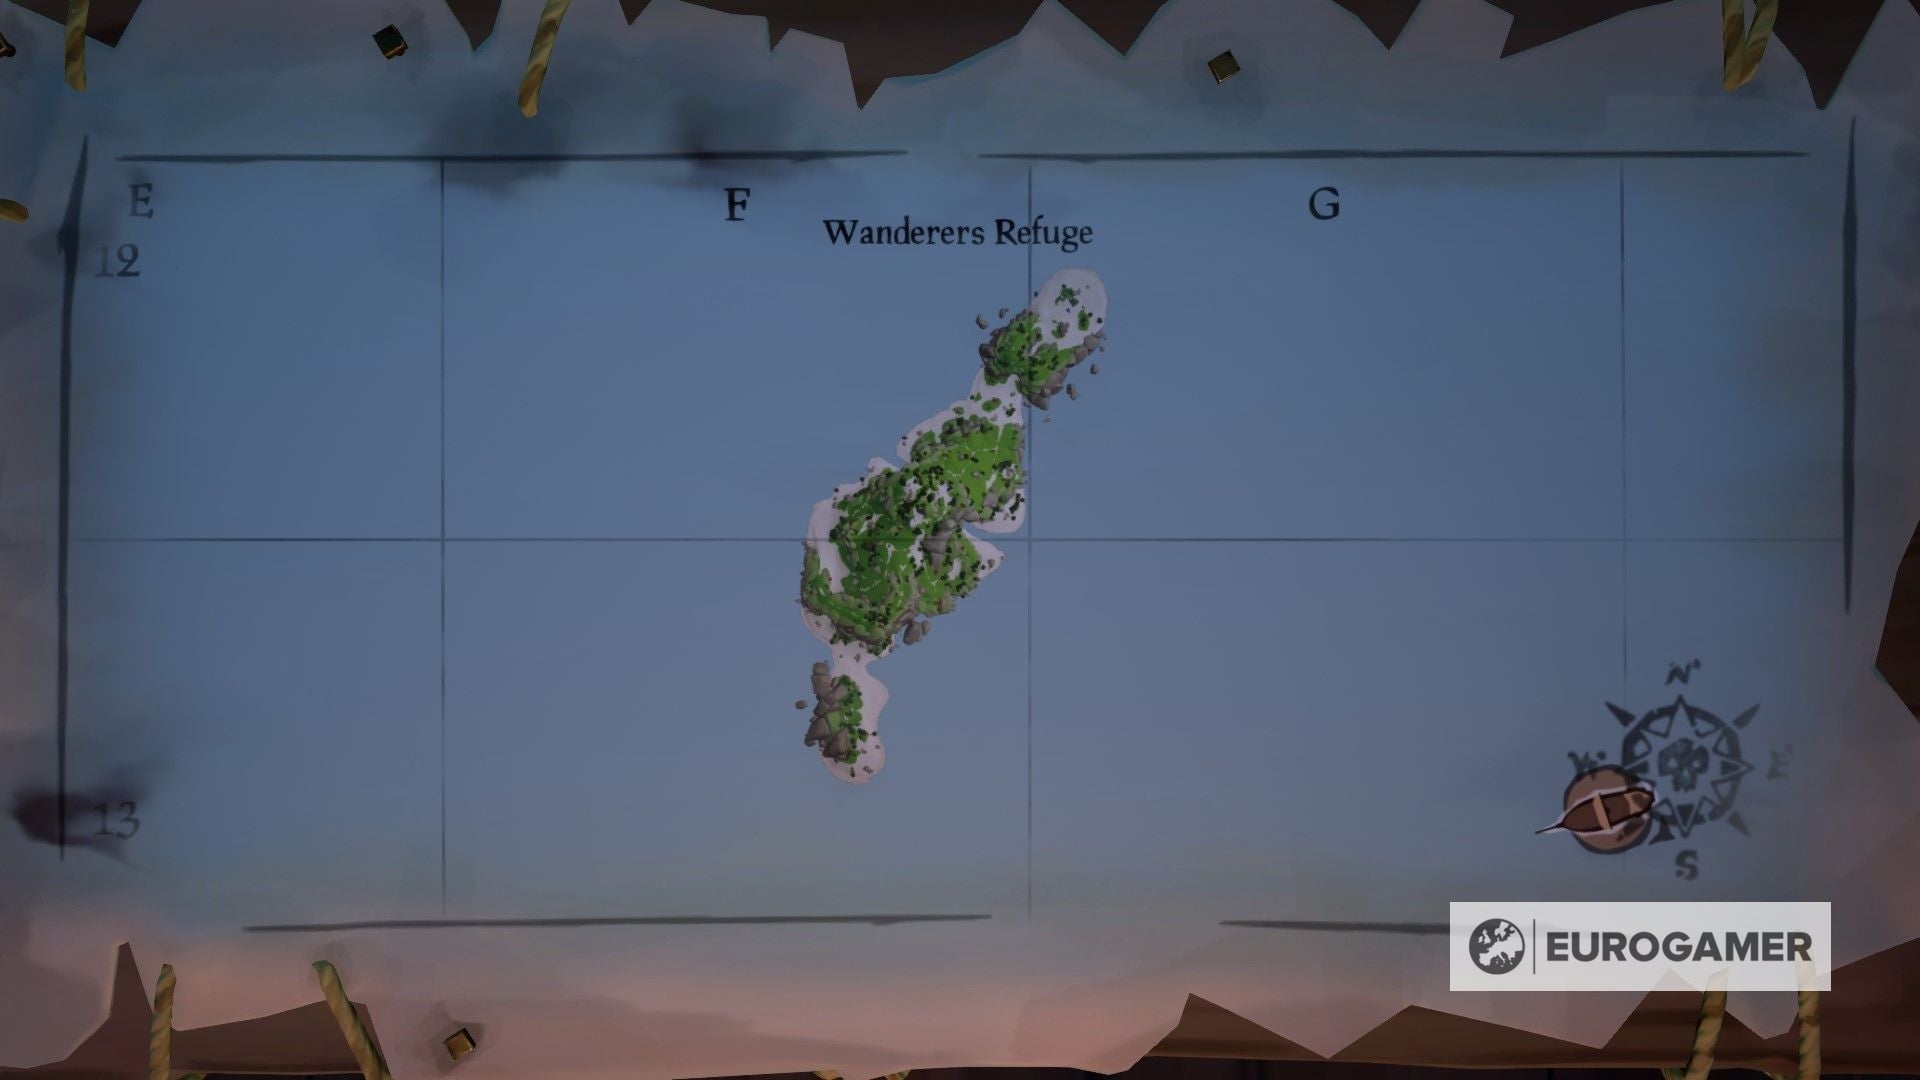
Wanderer’s Refuge location in Sea of Thieves
Wanderer’s Refuge co-ordinates: F12 / F13 / G12
Massive seashores make up the northern and southern corners of this lengthy island, with interweaving paths, caves, vegetation, and cliffs making up the center part.
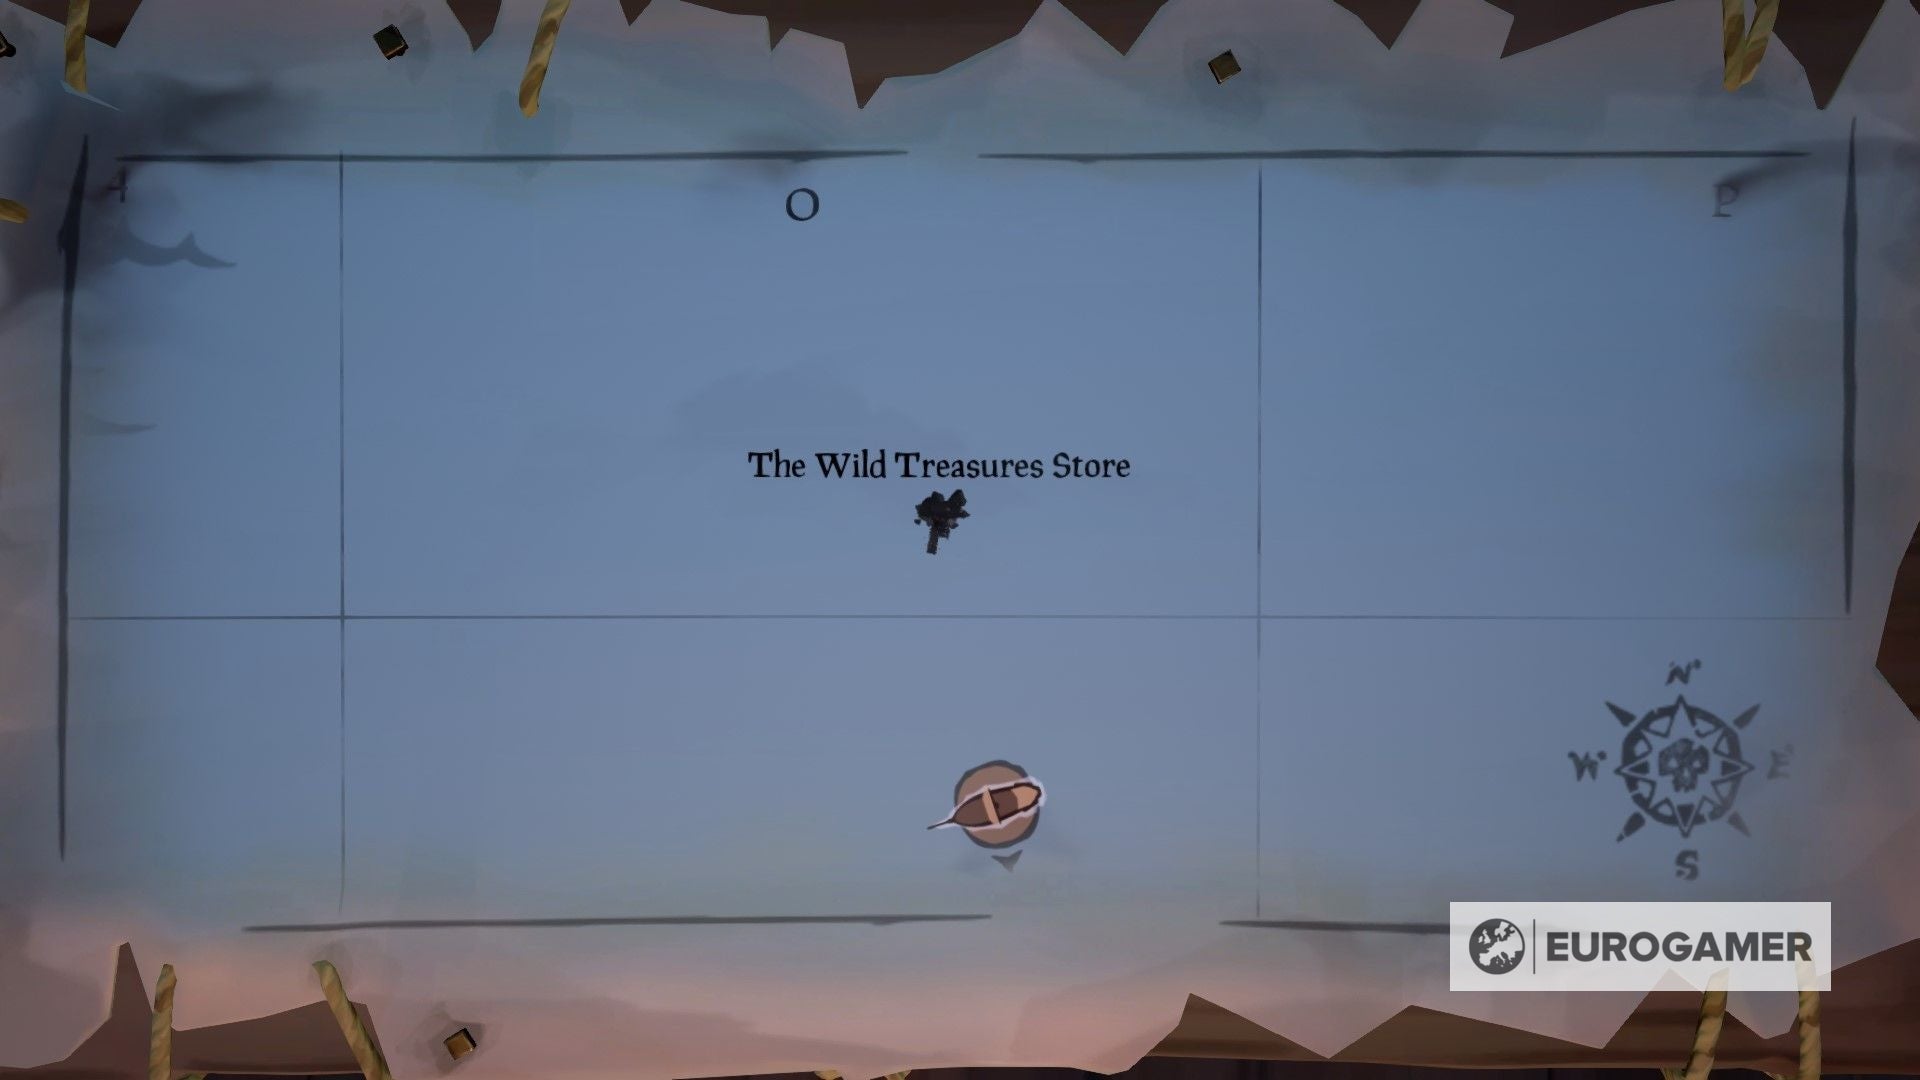
Wild Treasures Retailer location in Sea of Thieves
Wild Treasures Retailer co-ordinates: O4
In direction of the northern fringe of The Wilds is The Wild Treasures Retailer, a tiny seaport excellent for promoting your Wildsplashes.
The primary season has arrived! Study all Season 1 Battle Move rewards and all the pieces else added within the Sea of Thieves patch notes.
New to the sport? Study what to do in Sea of Thieves and take participate within the Maiden Voyage tutorial, which teaches you the necessities of crusing and ship battles. It is also helpful for inexperienced persons to know tips on how to survive fights with skeletons and the kraken.
Elsewhere we have now recommendation on tips on how to get straightforward gold and doubloons, full skeleton forts and The Shroudbreaker, participate in fishing in Sea of Thieves and Sea of Thieves island maps.
Uncharted islands in Sea of Thieves defined
Some islands in Sea of Thieves haven’t any identify, and will not seem in your map. Very like a sat-nav, it may be harmful crusing with out trying your self, as you may crash into one thing the map would not know is there.
Under we listing three most notable uncharted islands, however with no identify, they’re simply referred to by their co-ordinates by the group.
There could be extra on the market, however they solely seem for story causes – and saying extra could be spoilers…
K9
A small island with a shipwreck and coral reef which can be fairly fairly.
K11 (Wonderful Sea Canine Tavern)
This massive stone arch used to take a seat within the very centre of the map, and impressed a whole lot of theories as to its objective. For the reason that Anniversay Replace, the pure formation moved and a tavern was constructed there for the Sea Canine, the faction that guidelines the sector.
There’s additionally a parkour impediment course that loops across the island, when you really feel like stretching your legs after a log voyage.
N13
This assortment of small islands is surrounded in reefs, wrecks, and historic constructions.