If you happen to’ve been taking part in Horizon Zero Daybreak for greater than the primary couple of hours, likelihood is you may have heard about these mysterious objects known as Energy Cells.
Dotted across the recreation world, Energy Cells are what you may must unlock one thing fairly particular: a secret set of armour, known as the Defend Weave armour, which grants near-invincibility to Aloy and fully adjustments the way in which you possibly can play the sport. In short, it’s miles and away the perfect armour within the recreation.
So with that stated, this is our information on the Energy Cell areas, discover them, and get the invincible Defend Weaver armour.
Horizon Zero Daybreak Energy Cell areas
There are 5 Energy Cells in Horizon Zero Daybreak, and you may must get a good method by the principle story with a purpose to accumulate all of them.
That being stated, some can be found very early on within the recreation – early sufficient, even, to get by the primary of two puzzle locks that guard the Defend Weave armour after just some hours of play – however that also will not get you the armour itself.

This is the place to seek out them, however do word that there will probably be some minor spoilers under, when it comes to location names on the very least, as all of those areas are visited in some unspecified time in the future alongside the way in which throughout essential story quests:
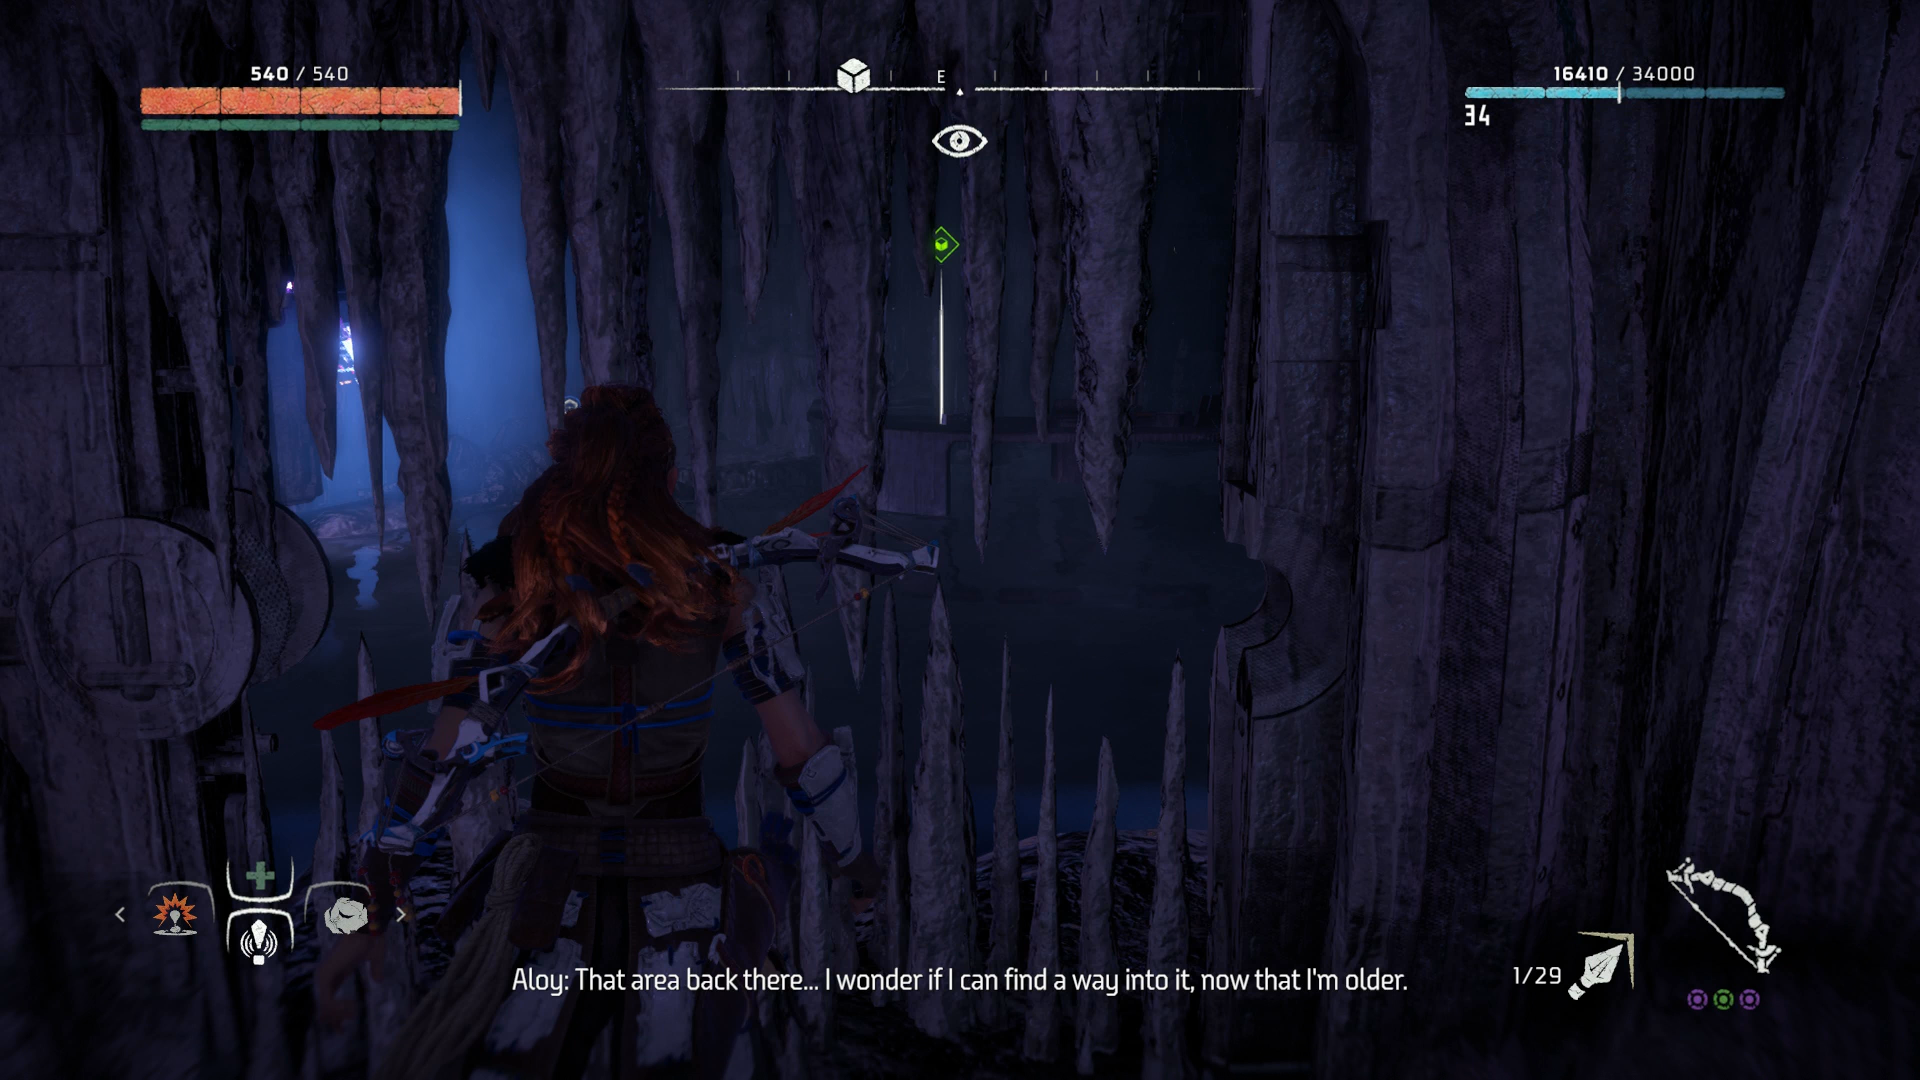
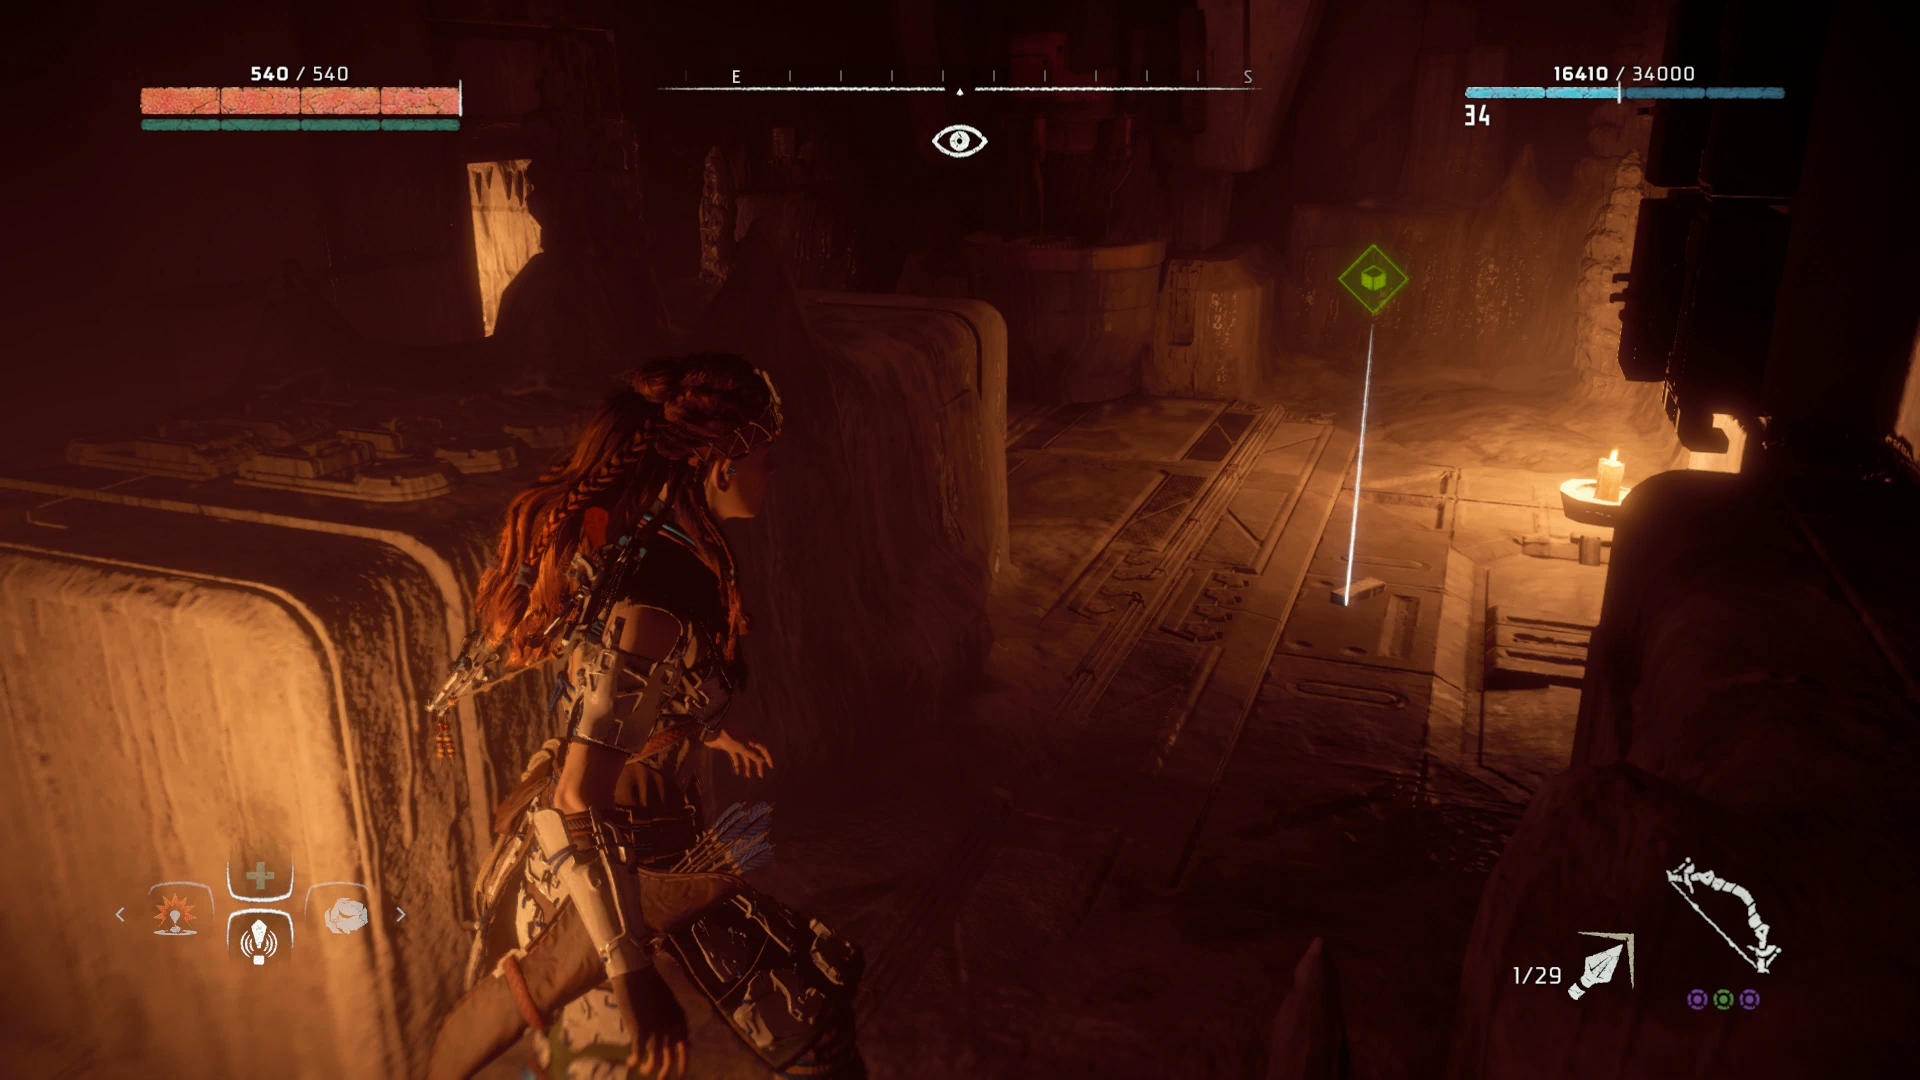
Energy Cell location 1: Underground Bunker from the Prologue – You will get this one as quickly as you could have management of grownup Aloy and free roam of the surroundings, after the Prologue-style mission, A Reward from the Previous, together with her as a baby. Head again to the placement of your first steps with Aloy, which is marked as Ruins in your map with a inexperienced image, simply east of Mom’s Watch. It is simple to get caught getting in circles by this cavern, particularly as you possibly can re-enter it on a special stage. We advise you drop proper right down to the bottom stage when re-entering, and operating by it in the identical order as you probably did with younger Aloy initially of the sport. The Energy Cell is positioned the opposite aspect of some stalactites and stalacmites – you possibly can see it by them, however must smash them together with your Lance to get by. It is about three quarters of the way in which by the Ruins, and Aloy will provide you with a little bit dialogue questioning if she will be able to by some means get by now she’s older if you get shut.
Energy Cell location 2: All-Mom Temple – You may entry this both throughout or at any time after the search Womb of the Mountain, after the Proving. If you happen to’re getting it mid quest, it is by two doorways after you get up, after which a small vent-like tunnel it’s important to crouch to get by, that is in your proper. If you happen to’re re-entering the Temple, easy head in, down the slope, and straight on by the hall that juts off to the precise from the doorway corridor till you attain the primary small, round room. Flip left, and it is simply by there subsequent to a type of desk.
Energy Cell location 3: Maker’s Finish – It is best to get this one in the course of the quest of the identical identify, Maker’s Finish, as you may have already got scaled the tower for this mission and solely must go a really brief method additional up. In any other case, it is a 5 minute trek up by the constructing once more, and it will should be accomplished after the mission anyway. Head all the way in which to the highest of the tower, then as you come out onto the rooftop, flip round to face the bronze-like spire. You may see there are the yellow-gold handholds on it for climbing on. Use them to scale proper to the very prime of that spire, and the Energy Cell is ready for you up there, together with some nauseating views.

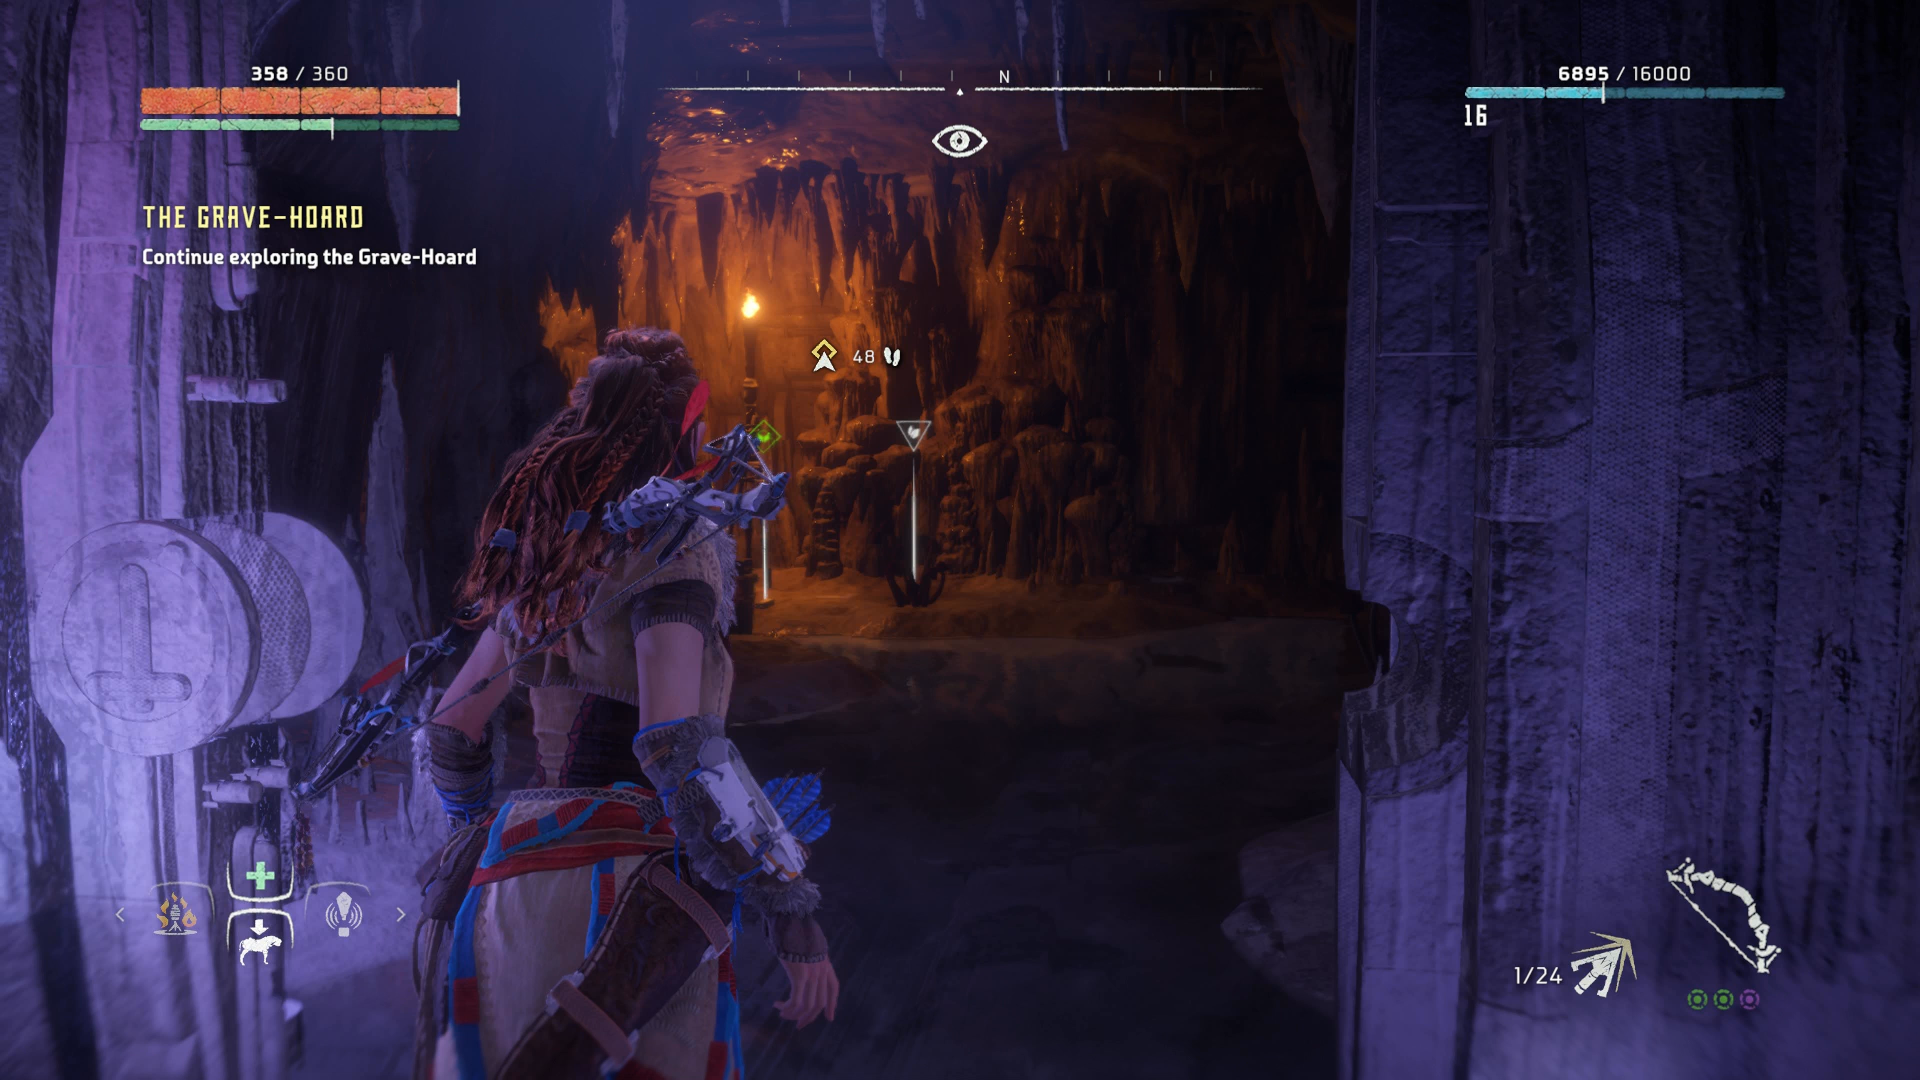
Energy Cell location 4: The Grave-Hoard – This one, like that at Maker’s Finish, isn’t accessible till the mission titled The Grave-Hoard or after it in the event you select to return. Quickly after you enter the ruins, you may want to resolve three spinning disc puzzles which are unfold throughout two flooring. After that, you possibly can climb up a ledge and open a door forward of you and to the left. The opposite aspect of that could be a Energy Cell, together with some medicinal crops, immediately in entrance of you on the bottom. It is arduous to overlook! If for some purpose you miss it in the course of the mission, you possibly can come again and choose it up be retracing your steps sooner or later. For options to the puzzles and extra element, check out our mission walkthrough for The Grave Hoard, though beware the spoilers inside.
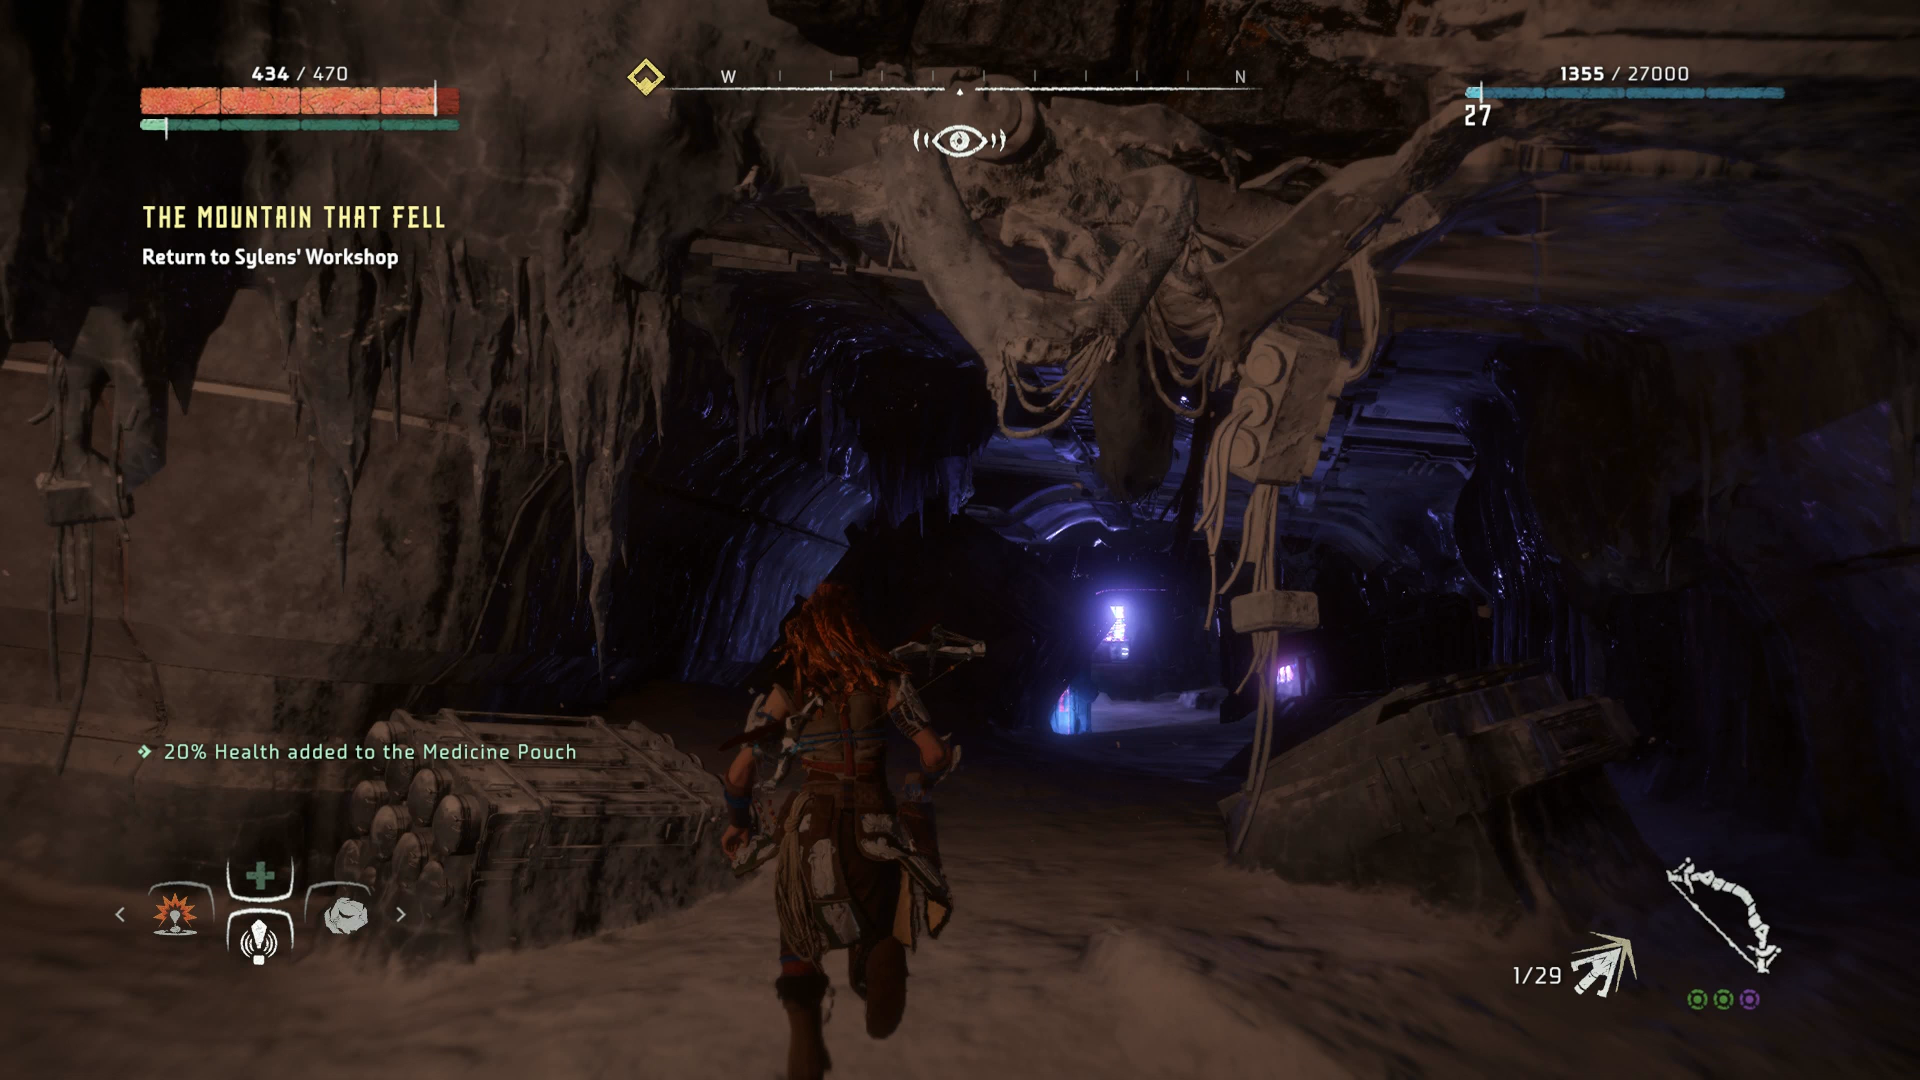
Energy Cell location 5: GAIA Prime – The final Energy Cell is positioned contained in the ruins of GAIA Prime, in direction of the tip of the principle questline, and is offered from the mission The Mountain That Fell onwards. It is a little bit simpler to overlook than among the earlier Cells, nonetheless. After making your method by many of the spoil and claiming the merchandise you went there looking for (coyness right here is to keep away from spoilers), you may come exterior and use a zipline to drop right down to a decrease, exterior, rocky space. The waypoint will probably be telling you to proceed straight forward, however instantly after dropping off the zipline, flip round 180 levels, and you may catch a glimpse of a white merchandise indicator on a increase up stage. Double again a couple of yards, and there is a yellow-tinged handhold on the rock face, and some extra above. Climb up a brief method, and you may see a purple-lit entrance right into a small cave within the aspect of the mountain. In the back of that’s the Energy Cell, on a shelf to the precise.
Historical Armory – Find out how to get the traditional Defend Weave armour in Horizon Zero Daybreak
To get your arms on the Defend Weave armour itself, you may want to gather all 5 of the Energy Cells, head to the bunker the place it is hidden, and resolve the 2 puzzles.
The situation of the bunker will probably be marked in your map if you discover and choose up your first Energy Cell. At that second, a quest will activate – known as Historical Armory – and you may then at the very least acess the underground cave, which is de facto an historical spoil, that homes the armour itself.

Inside, you may be confronted with two of the disc-spinning door puzzles which are usually present in these historical ruins throughout the principle questline. Each of those require Energy Cells to really activate, the primary two Cells, the second three.
- The primary puzzle, as soon as energy is restored, is solved by turning the discs to level within the path indicated by the pink field close by, which is proven in instances of day. From left to proper, they go: Up, Proper, Down, Left, Up.
- The second puzzle, as soon as restored, is solved by turning the discs to face the path indicated by the pink field that makes use of levels to speak the instructions. From left to proper, they go: Proper, Left, Up, Proper, Left.
With that accomplished, the armour is free for the taking! Head again into the central room the place the door will now be open to the Defend-Weave armor. Choose it up, after which open the field that is in your stock and equip it to reap the advantages.
For extra ideas, explainers and recommendation on Horizon be sure you try our essential Horizon Zero Daybreak information and walkthrough hub, which incorporates recommendation for issues like Horizon Zero Daybreak’s override Cauldrons and which machines they allow you to management, getting maintain of the Golden Quick Journey Pack for limitless quick journey, discovering and unlocking the very highly effective Horizon Zero Daybreak Defend Weave Armour and Energy Cell areas, after which for DLC gamers there’s our essential Horizon Zero Daybreak Frozen Wilds walkthrough and information, a web page on earn Bluegleam rapidly, and at last, a web page on the helpful A Secret Shared quest and improve your spear in Horizon Frozen Wilds.
Lastly, there are a few issues to notice in regards to the armour and the way it works. With it outfitted, you may be completely invincible, up to a degree. As soon as you have taken a certain quantity of potential injury, the armour will start to flash pink. At that time you may take injury as regular, however you merely must keep away from fight for a couple of seconds, and it’ll recharge, turning to that pretty white glow once more to point your invulnerability.
For extra guides like this, be certain to check out our full Horizon Zero Daybreak walkthrough and information of the principle story, which incorporates a wide range of ideas too, alongside our information to unlocking unlimted quick journey with the Golden Quick Journey Pack.