The Toxic Path is an intriguing Treasure Map in Crimson Useless Redemption 2 with some unbelievable rewards, however the Toxic Path answer can be one of many sport’s hardest, because of some tricky-to-navigate places.
We’ll information you thru it step-by-step on this web page, taking you thru all three Toxic Path Treasure Map places so you know the way to begin it and the place to seek out the maps themselves, in addition to guiding you proper to the very worthwhile treasure that’s your reward.
The Toxic Path Treasure Map places – the best way to get all three Toxic Path Maps
The Toxic Path is without doubt one of the solely treasure hunts within the sport that has no prior necessities or, so far as we are able to inform, even any hints at its existence except you uncover it your self.
The primary map, then, is one you simply have to exit and seize. As soon as you’ve got obtained it, The Toxic Path quest begins.
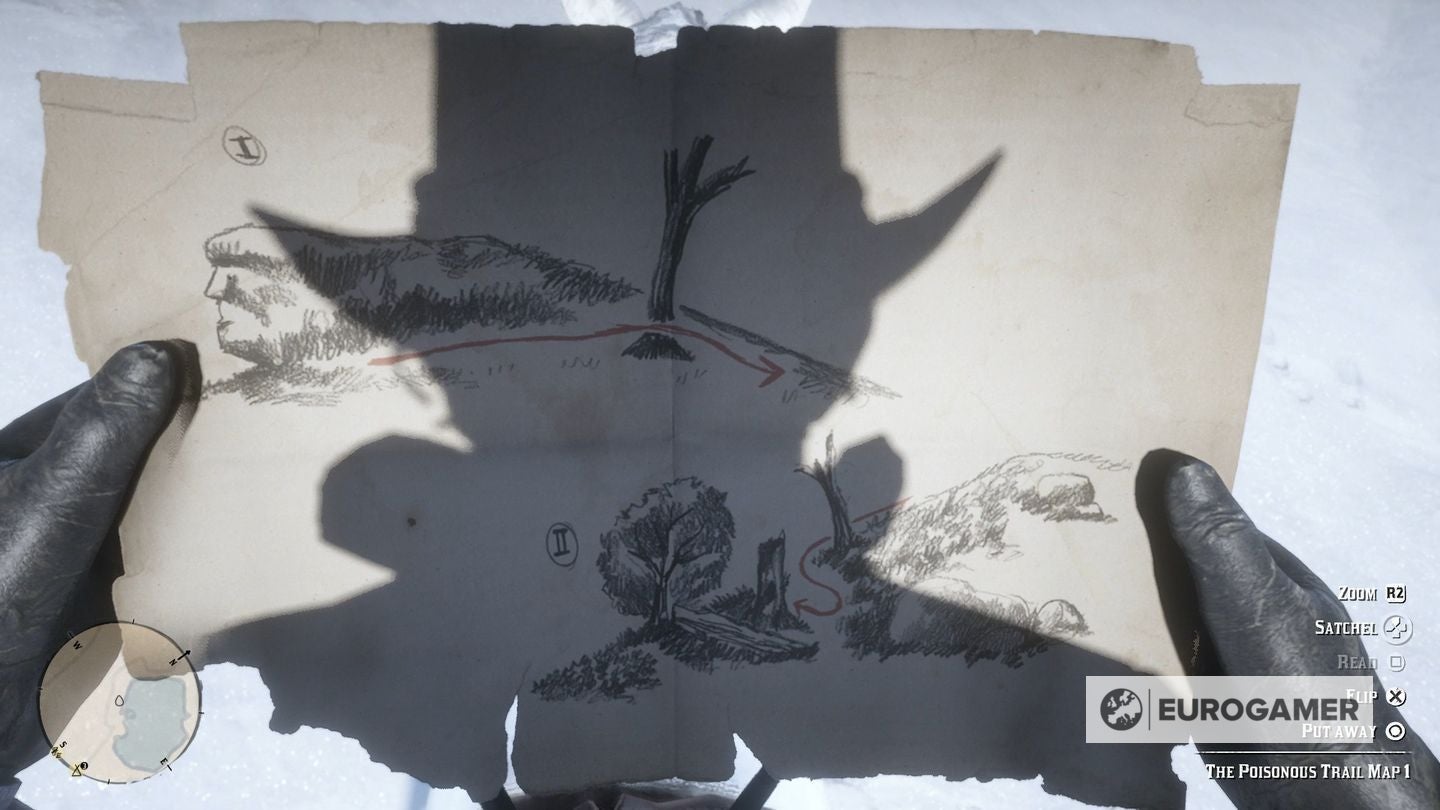
Toxic Path Treasure map 1 location:
The primary Toxic Path map is discovered up in direction of Coulter, the place the place your journey very first begins.
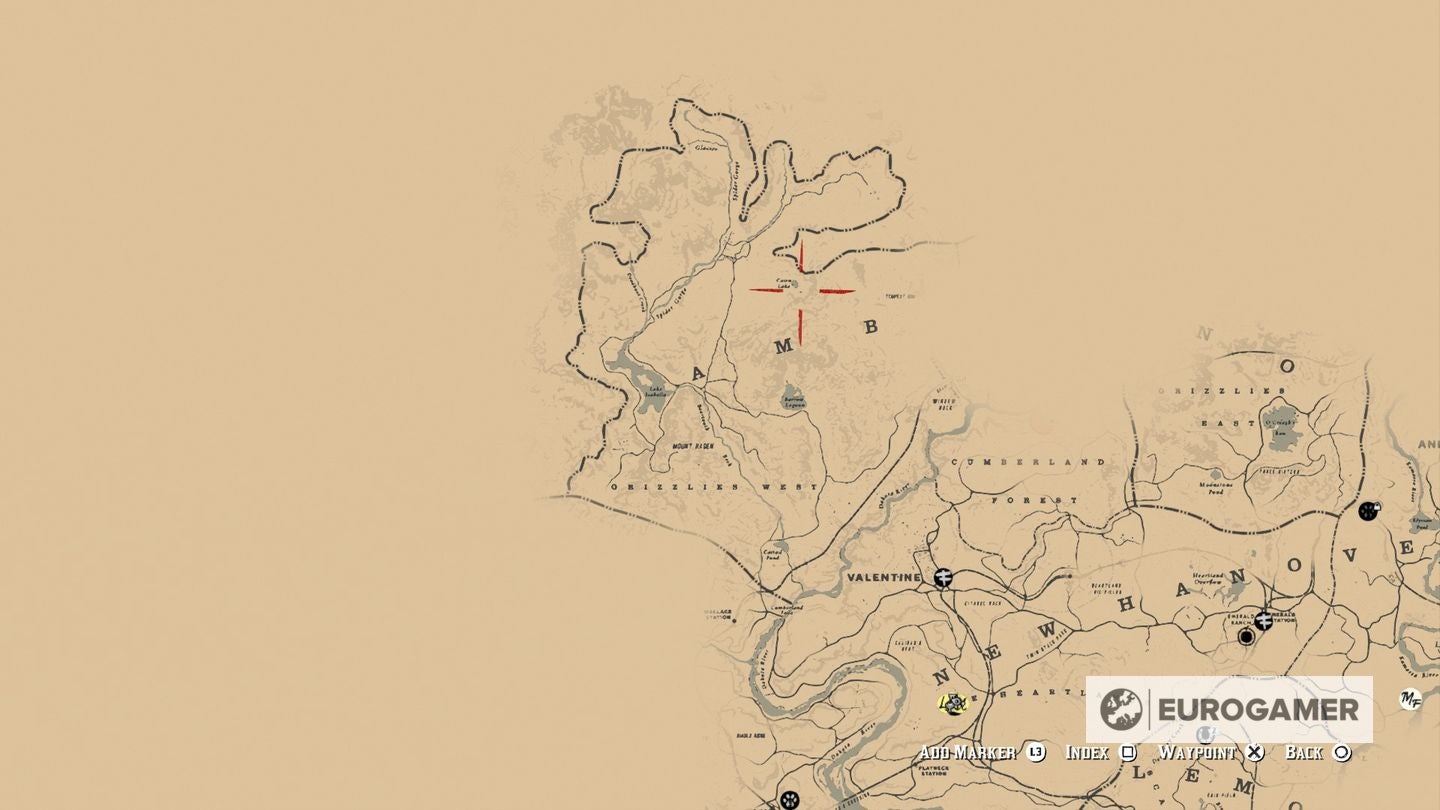
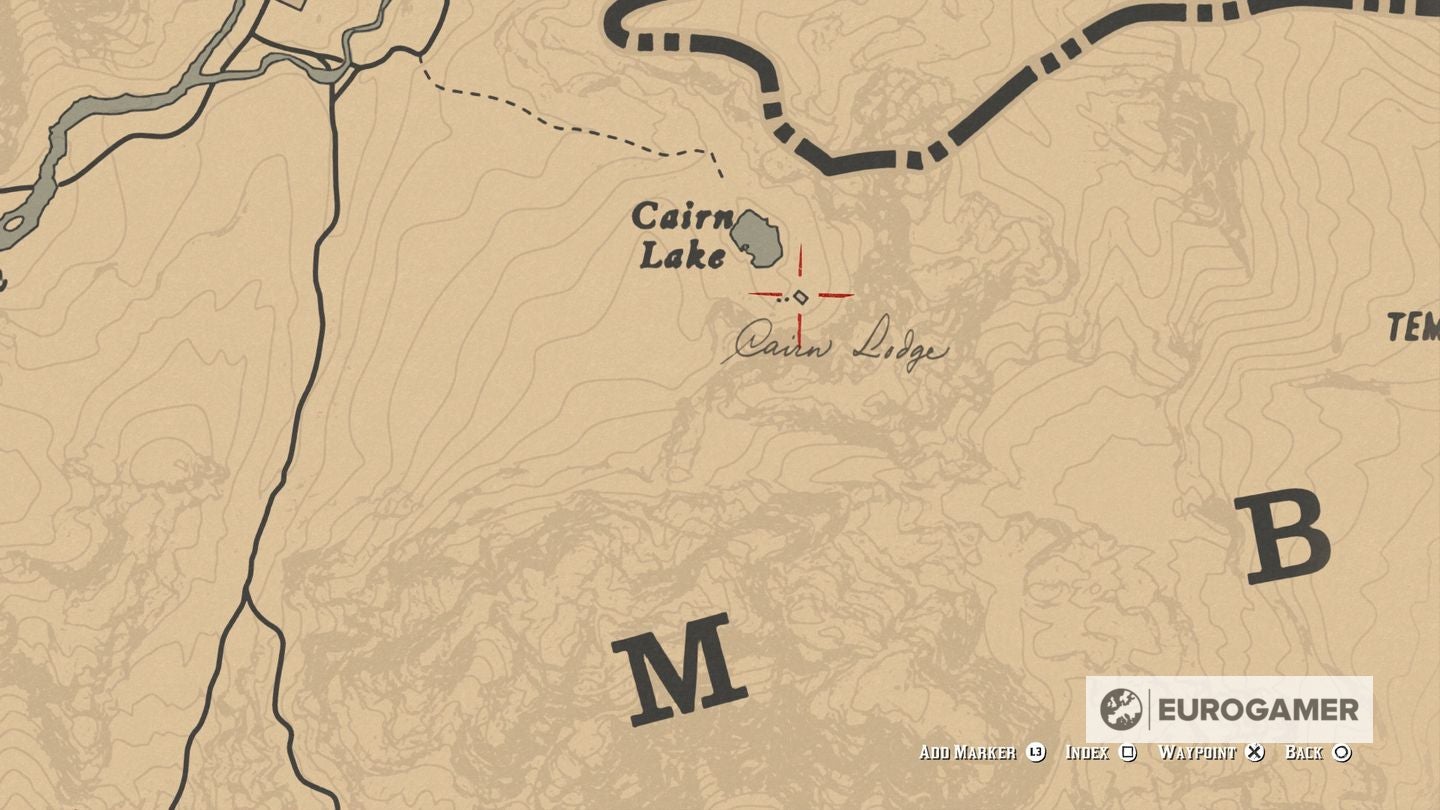
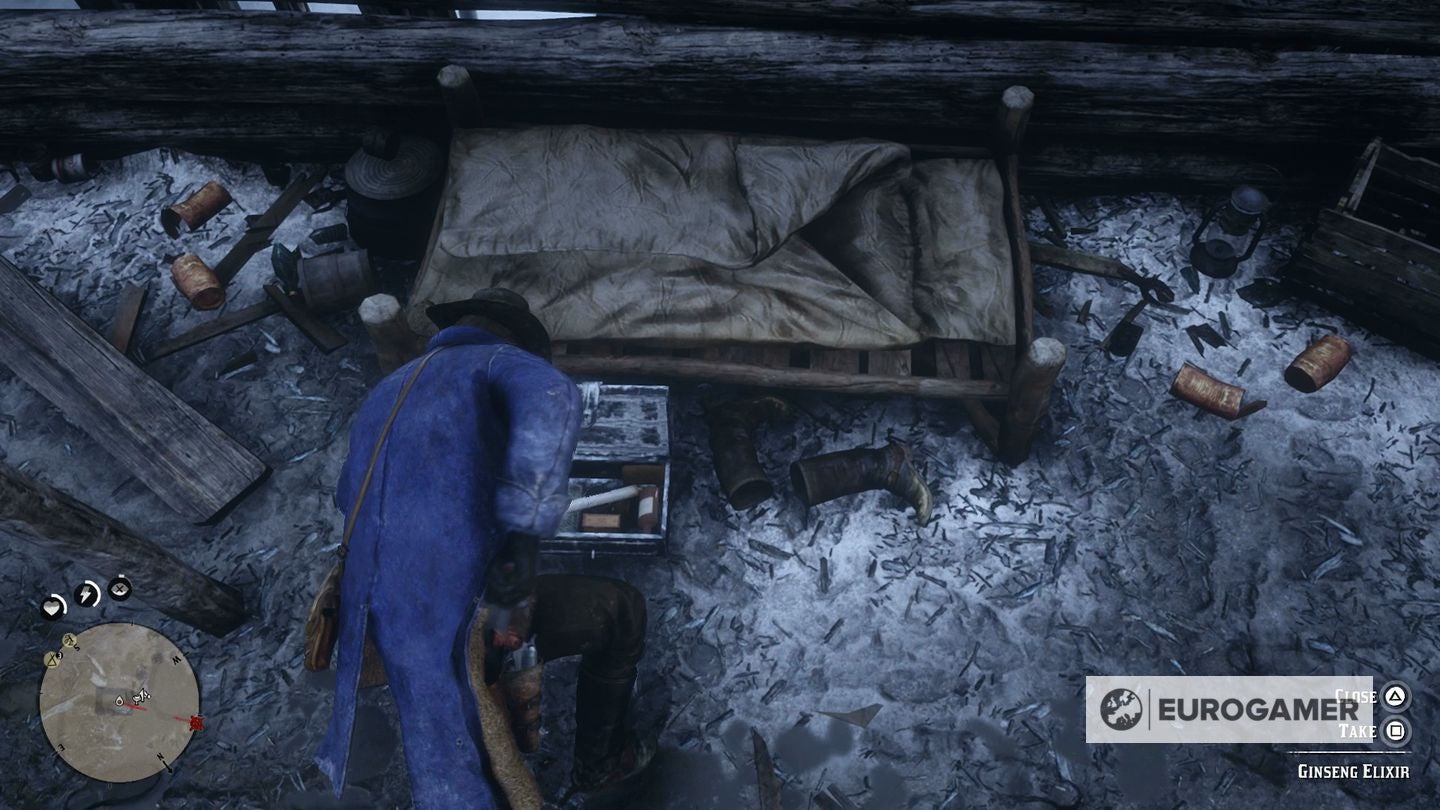
Particularly it is within the hut on the sting of the frozen-over Cairn Lake, within the north-west space of the map. Head inside, choose up the Cigarette card on the desk when you’re there, after which search beneath the mattress in a lockbox to seek out it. For those who’ve began the Gunslinger mission involving Flaco Hernandez, you may find yourself at this cabin, too.
After getting it, it will reveal the situation of the subsequent treasure map in your path.
This second map is kind of some time away.
Toxic Path Treasure map 2 location:
Toxic Path Map 2 is within the Lemoyne space, due south-east of the place you discovered the primary map, earlier than you attain Saint Denis.
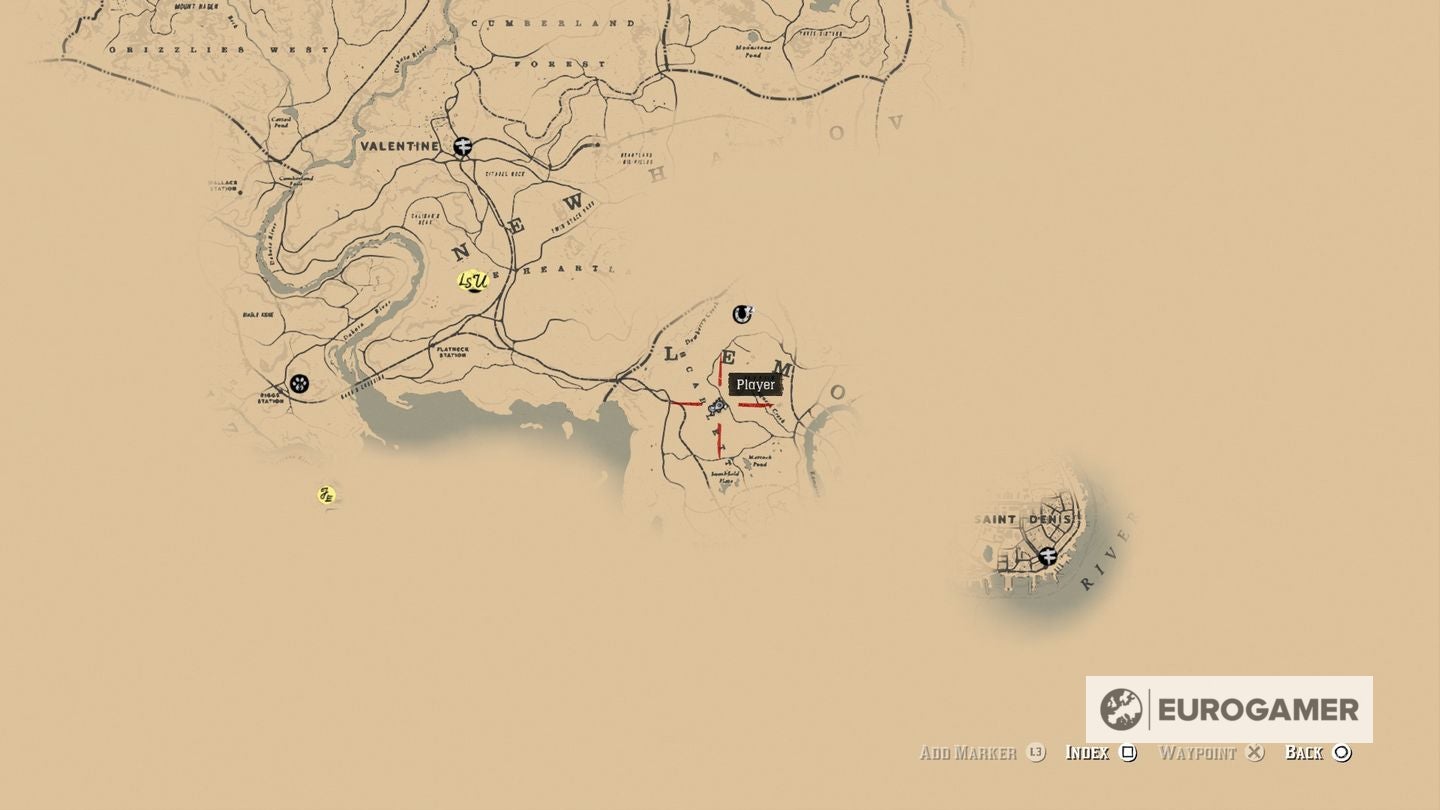
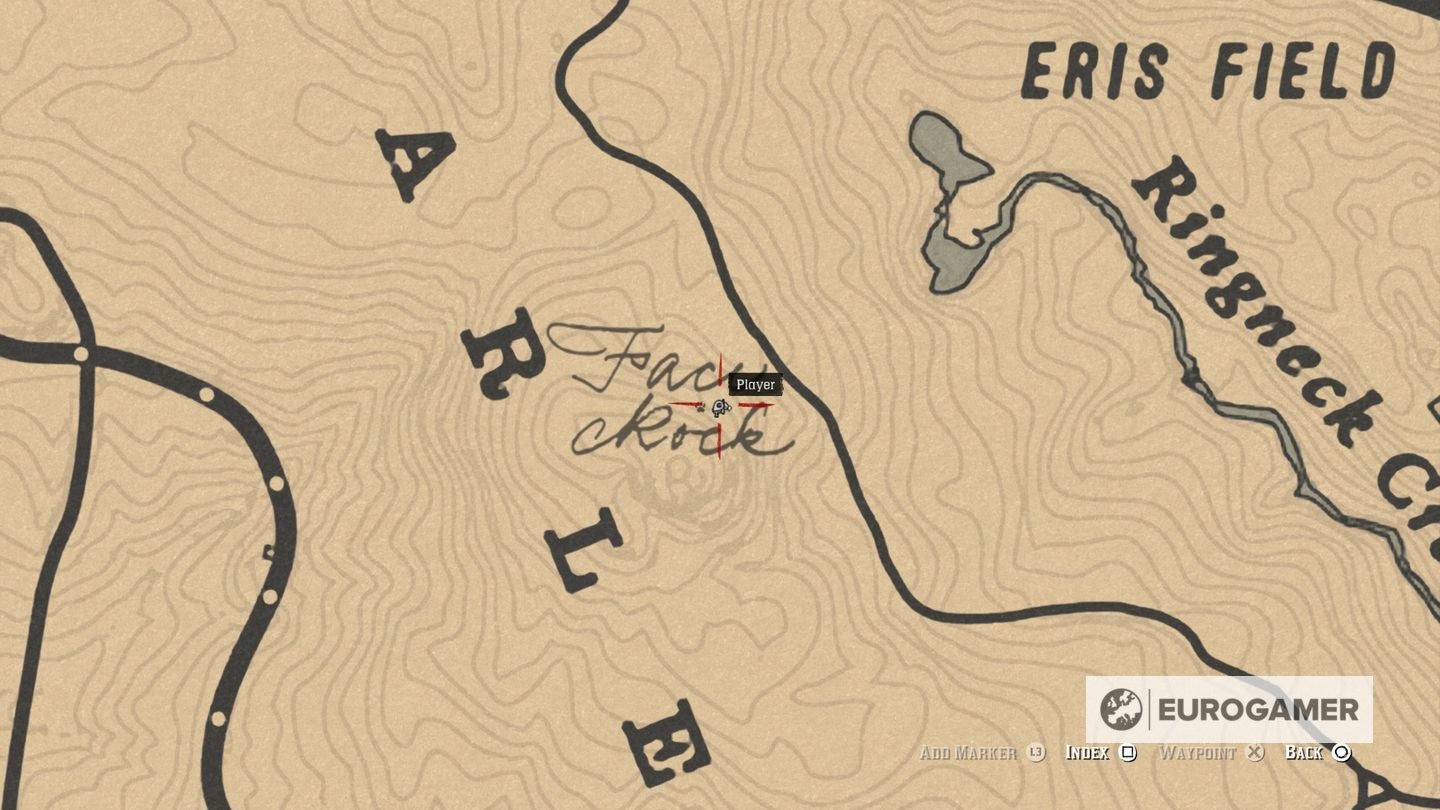
The realm you are after known as Face Rock. It is simply to the west of Ringneck Creek and Eris Area. Simply to the best of the ‘R’ and ‘L’ of ‘SCARLETT’.
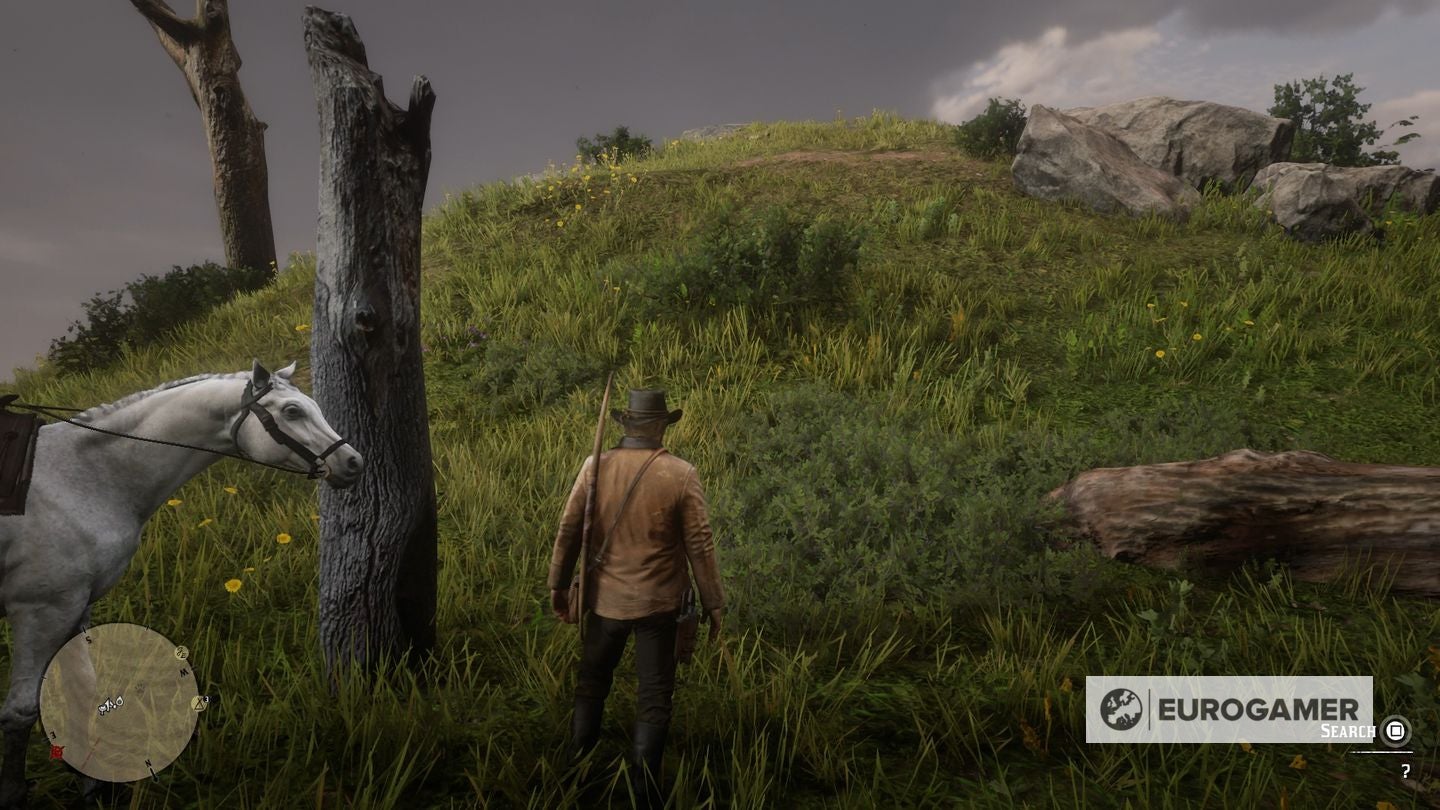
Face Rock is actually simply that – a big rocky outcrop that appears like a human face when seen from both facet, simply as depicted within the map itself. What you are in search of is a burned out, roughly six-foot-high tree stump on the base of the ramp as much as the face.

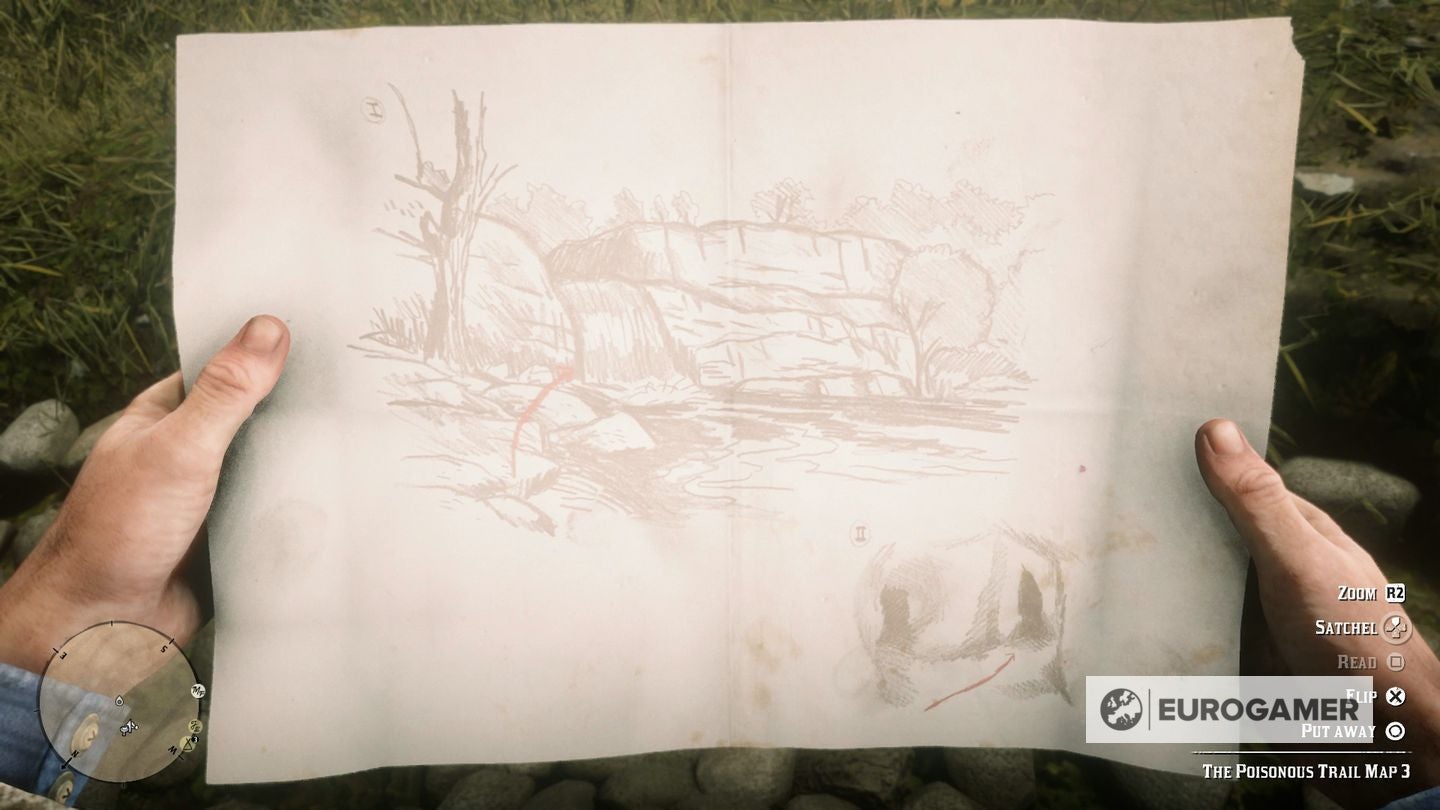
As soon as you’ve got obtained it, learn it to see an outline of the situation of the third and remaining map.
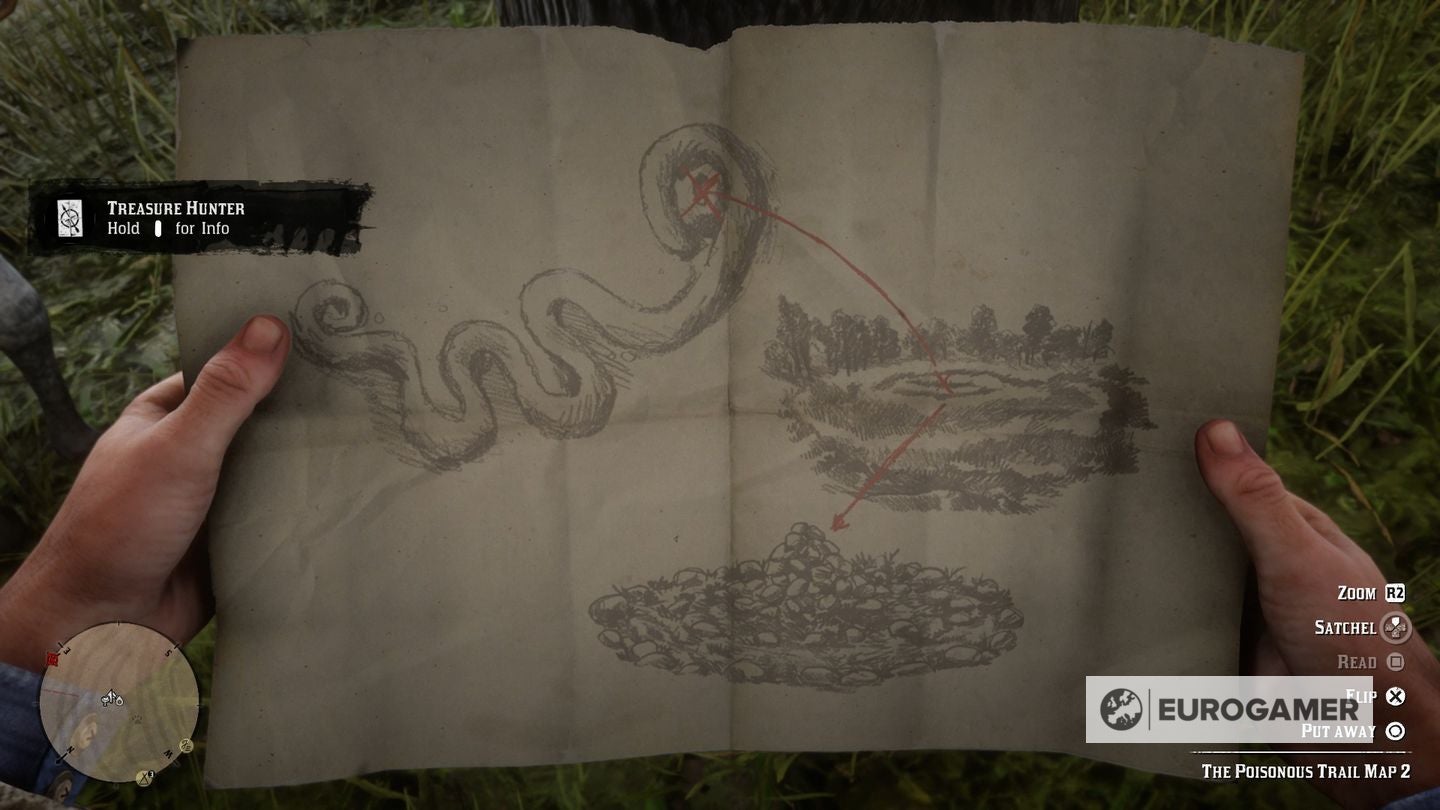
Toxic Path Treasure map 3 location:
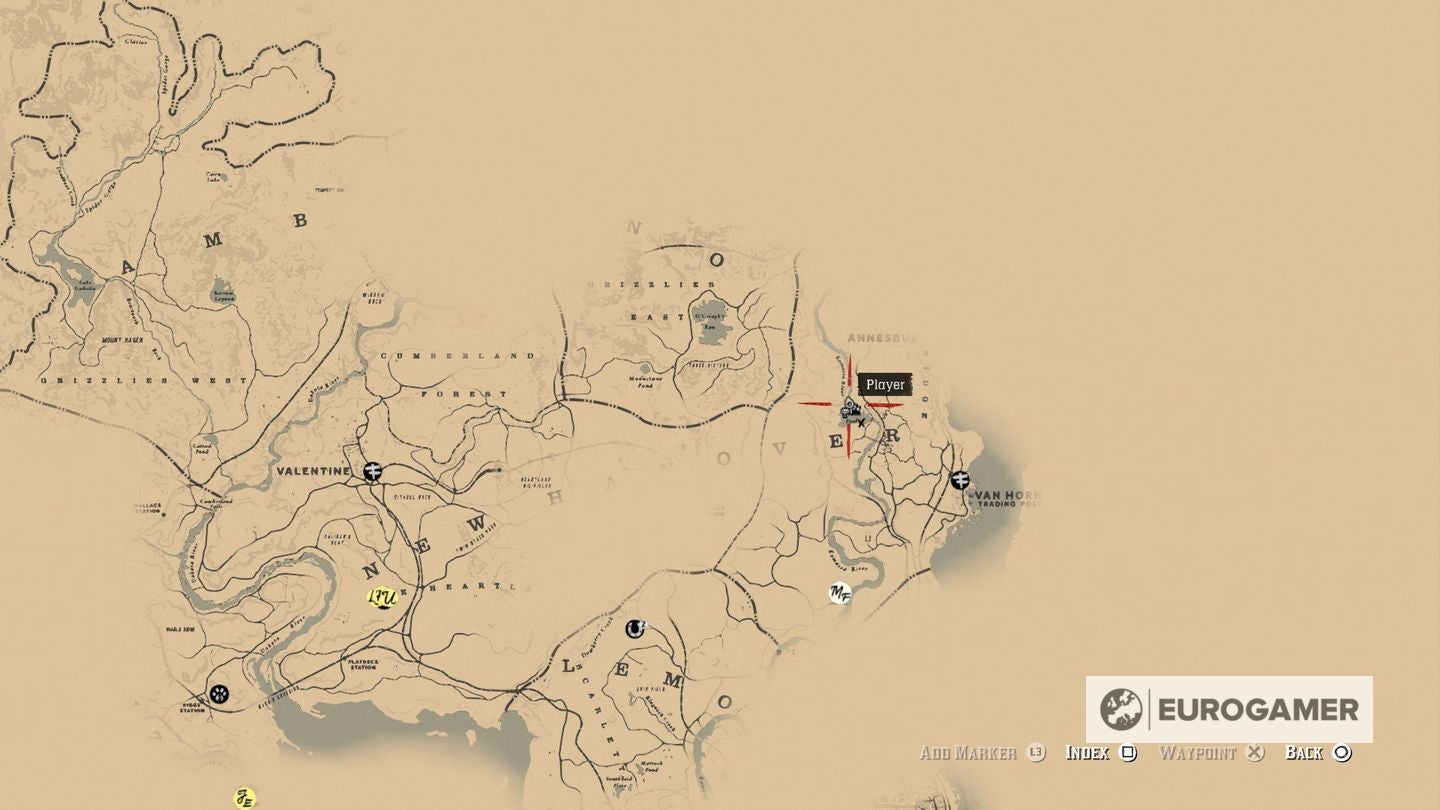
The third map is at one other uncommon spot of nature, however not fairly so far-off. It is due north-east of the place you discovered Map 2 – or just about due north of Saint Desnis.
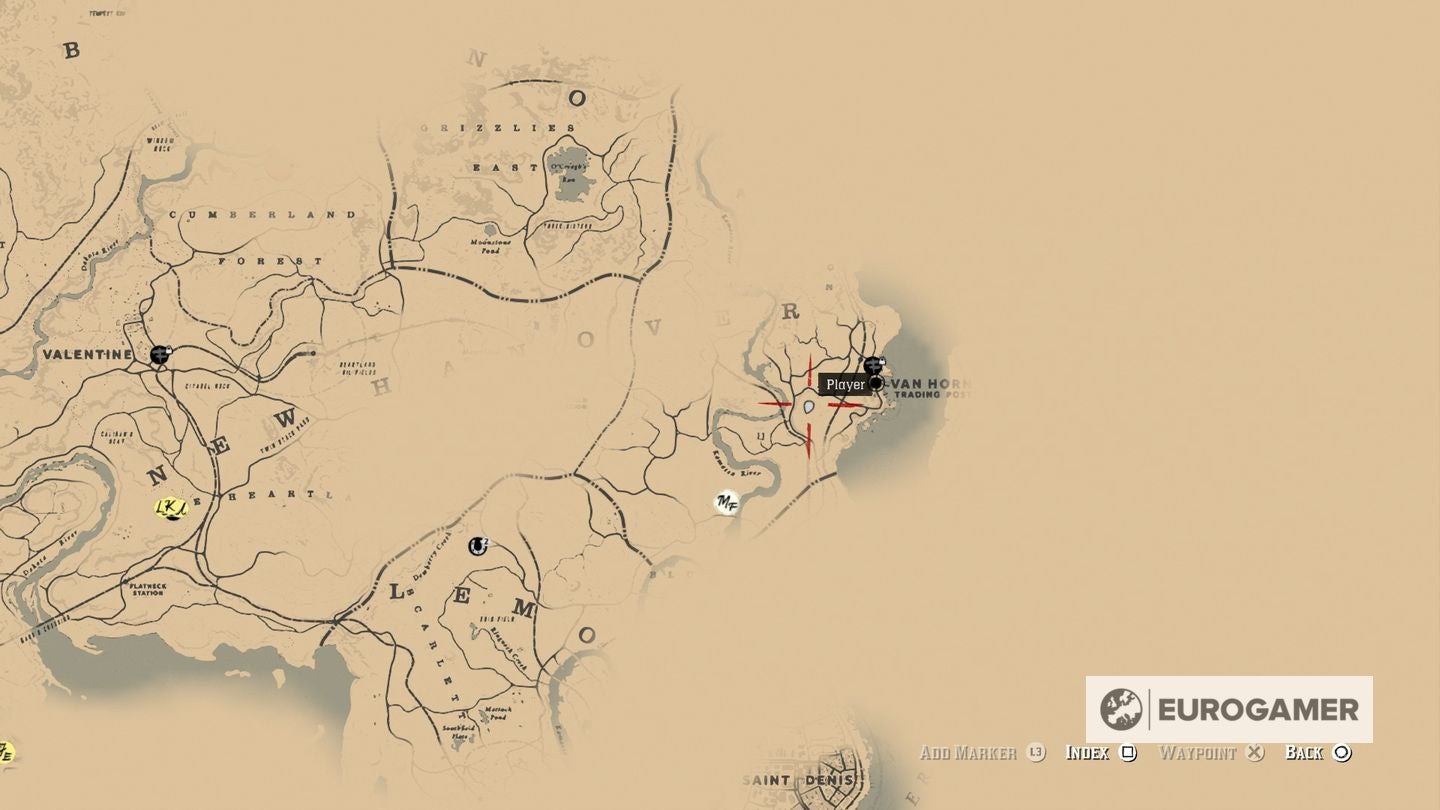
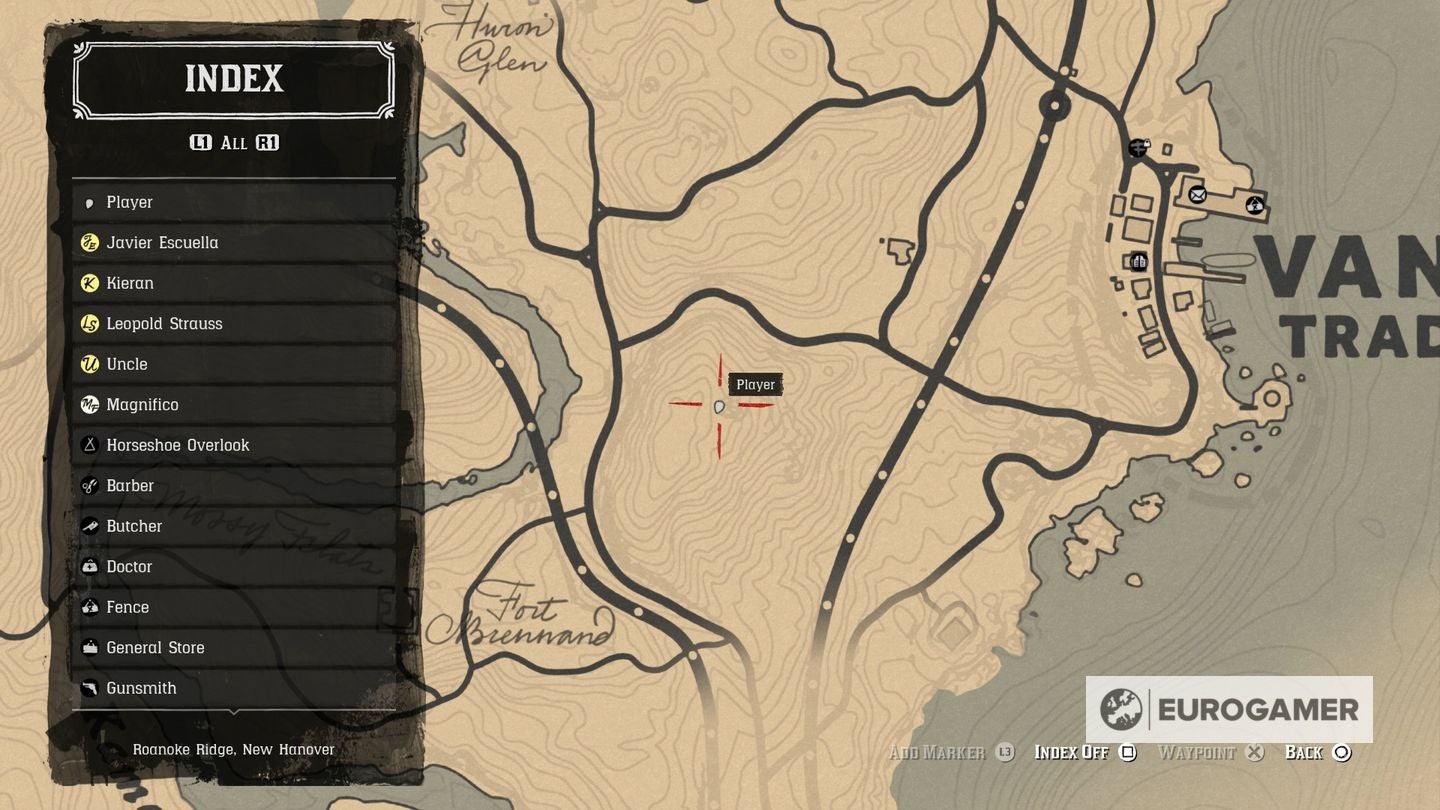
Particularly, the realm is west of the Van Horn Buying and selling Submit, a settlement on the east coast of the map.
For those who journey by way of Van Horn heading south, the highway will very quickly fork – take the fork chopping due west, throughout the rail highway observe, and after one other fork briefly after the rail highway you wan to chop south off the observe, and you must spot it.

It would not have a reputation, however you are in search of a wierd, grassy hill with a coiled mound snaking up it, serpentine, with a spiral on the prime.
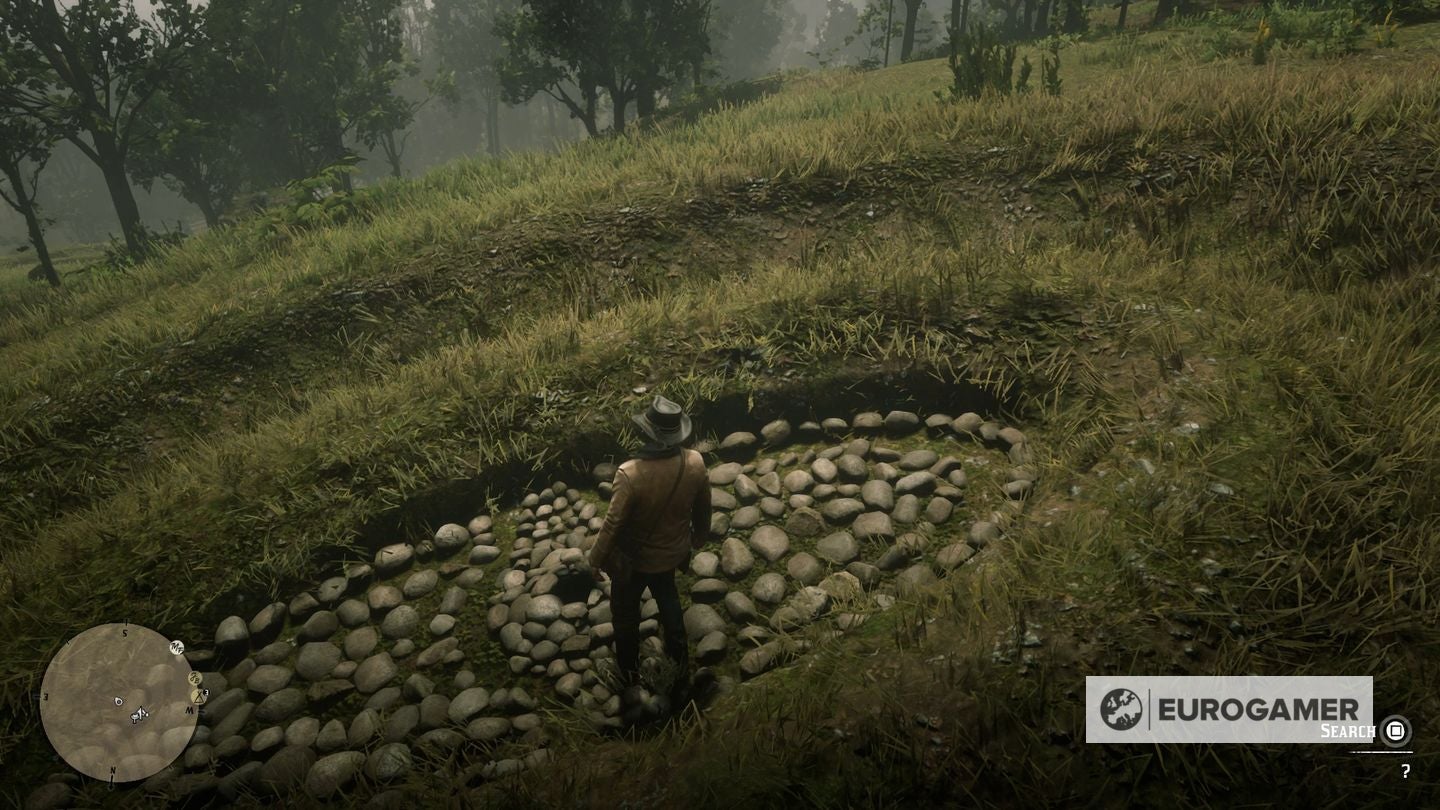
On the prime of the mound, within the coiled spiral a part of the bizarre hill, you may discover a pile of free rocks. Search it to seek out the ultimate map, Toxic Path Map 3.
This one takes you to the treasure itself.
The PC model has seen a number of new additions, together with a photograph mode, Landmarks of Riches Treasure Map, The Elemental Path Treasure Map and the Finish of the Earth mission.
For those who’re in search of extra assist in normal, our Crimson Useless Redemption 2 mission record walkthrough can assist present pointers with the story.
For those who’re in search of issues to seek out, there are Killer Clue Piece places, Excessive Stakes Treasure Map places, Jack Corridor Gang Treasure Map places, Crimson Useless Redemption 2 Le Tresor Des Morts and the Toxic Path Treasure Map places too.
Our in-depth methods explainers consists of looking excellent pelts, hides and skins in addition to all Legendary Animal places and Legendary Fish places, or all Gunslinger places, too.
Lastly, this is an inventory of Crimson Useless Redemption 2 cheat codes .
The Toxic Path Treasure location – the place to seek out the Toxic Path Treasure within the cave
The Toxic Path treasure is in a splendidly typical spot for hidden treasure, but it surely’s an actual ache to get to if you do not know what you are doing.
Toxic Path treasure hidden cave location
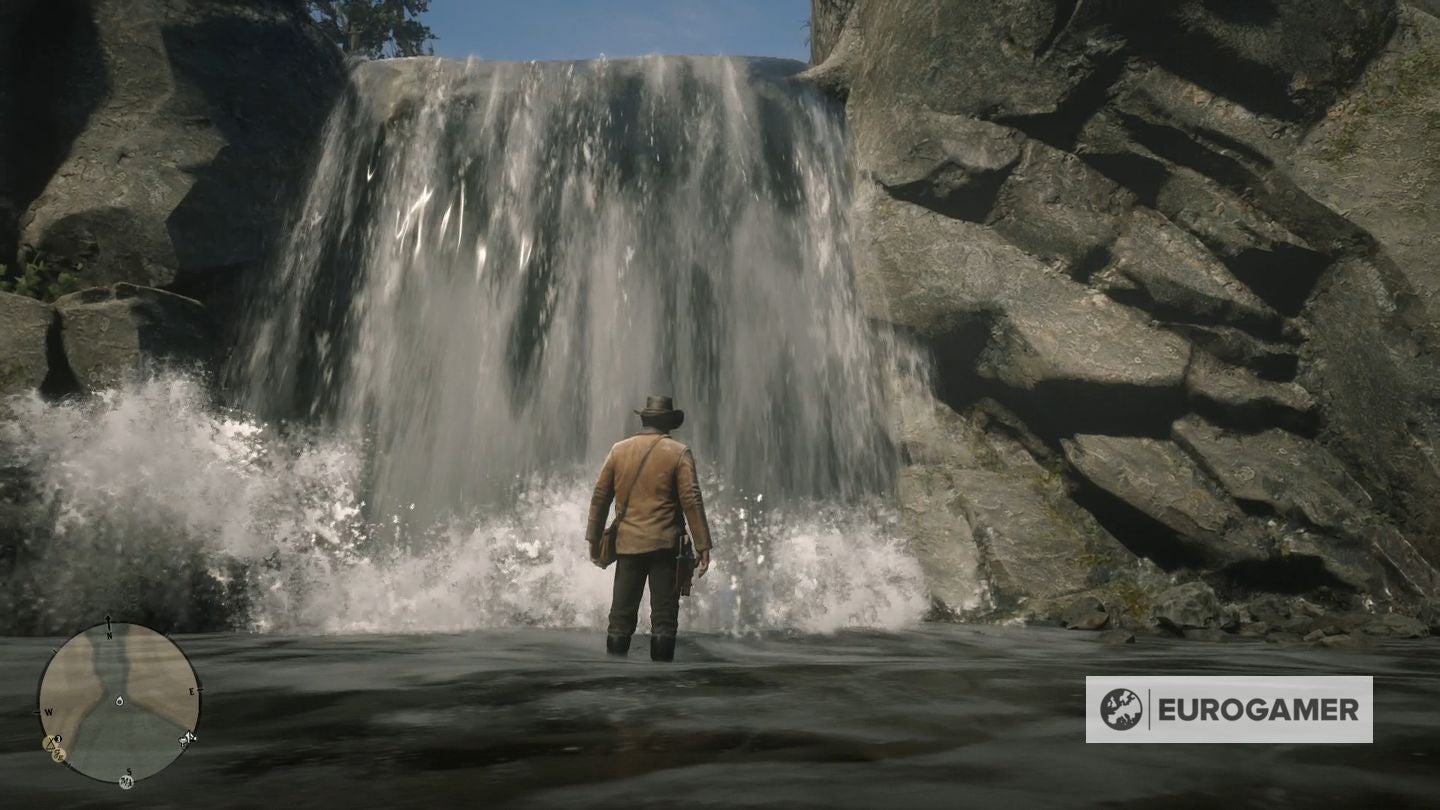
First up, the situation itself. The treasure is hidden deep inside a secret cave, which is discovered behind the waterfall at a small lake referred to as the Elysian Pool (it is value noting that that is additionally one in all a number of Legendary Fish places, too). We advised did say it was typical!
It isn’t removed from the third map: the pool is simply north of the ‘E’ of ‘HANOVER’ on the map. It is close to the east coast once more, midway between Annesburg to the north and the Van Horn buying and selling publish to the south.
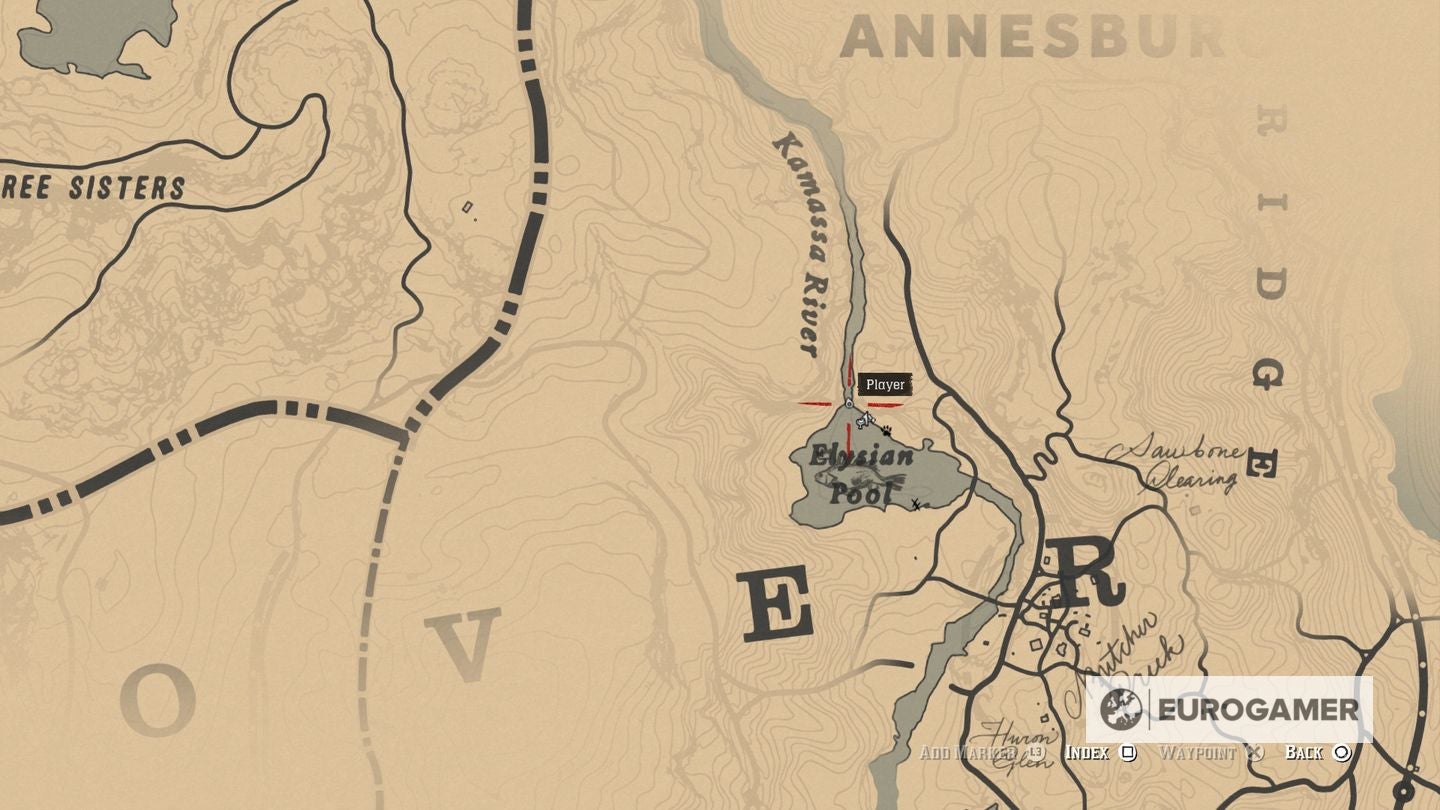
As soon as you discover it, tie up your horse at a close-by tree and wade into the pool, in direction of the waterfall. Easy stroll by way of it to entry the hidden cave behind.
Toxic Path treasure location
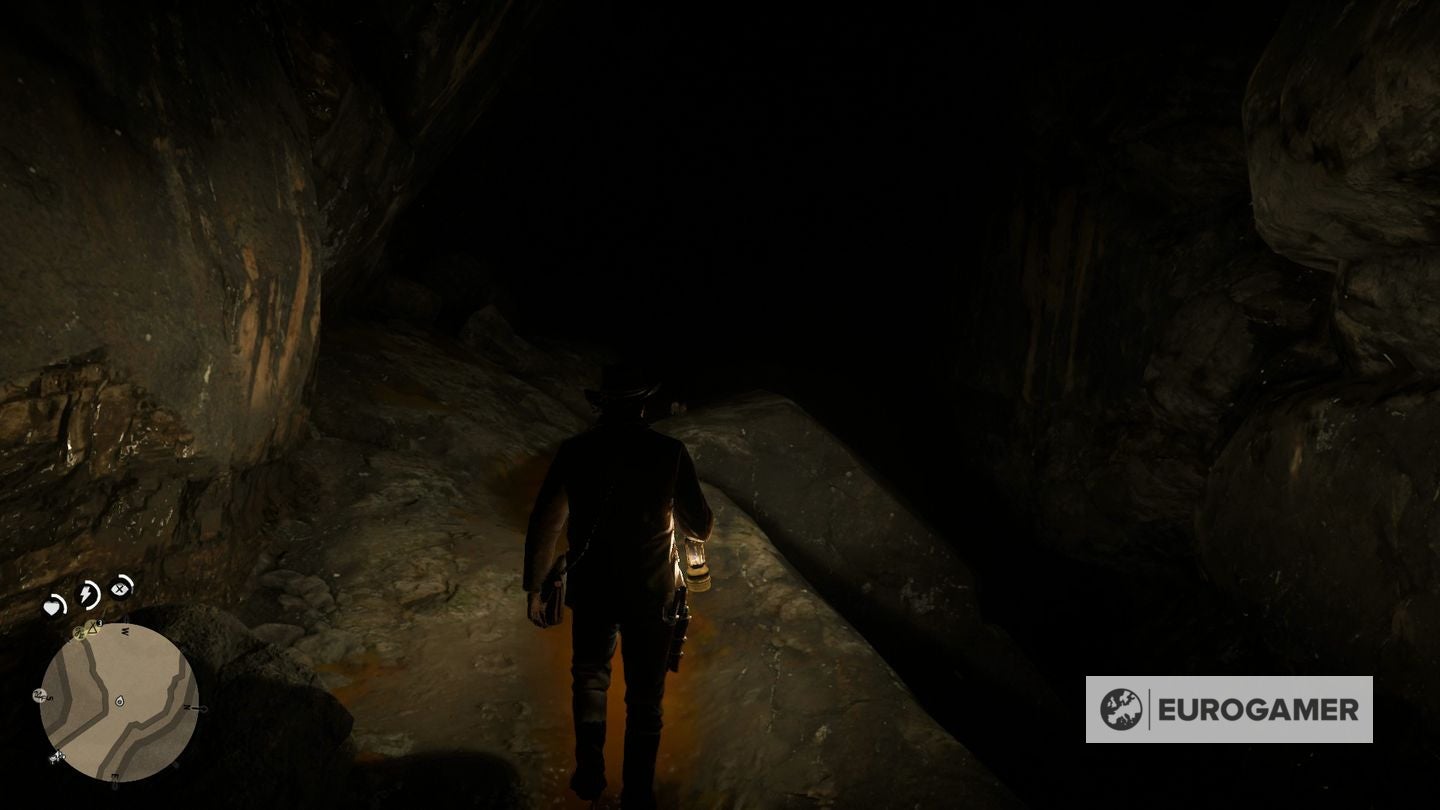
Like we stated, it is simple to get misplaced down right here, so we’ll take it step-by-step.
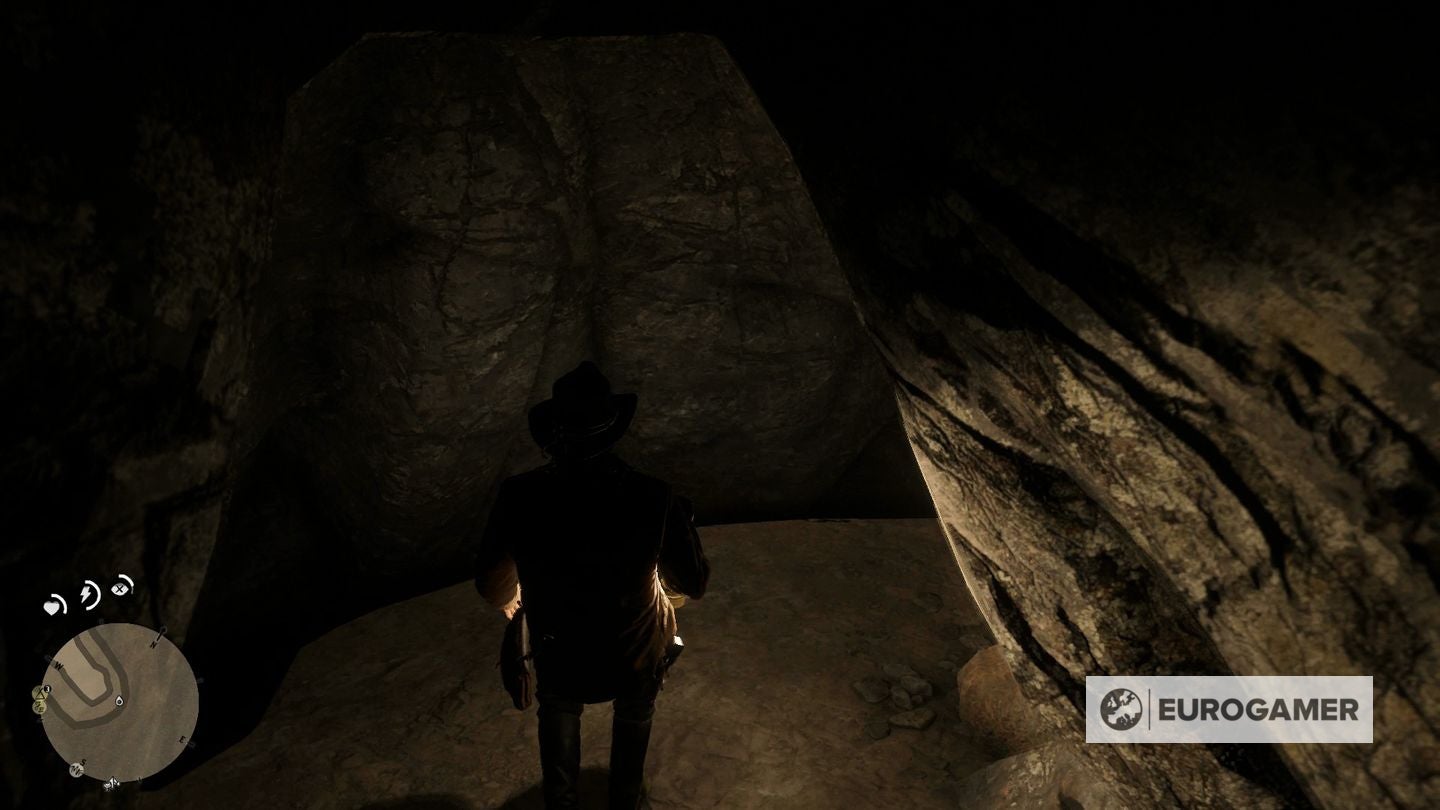
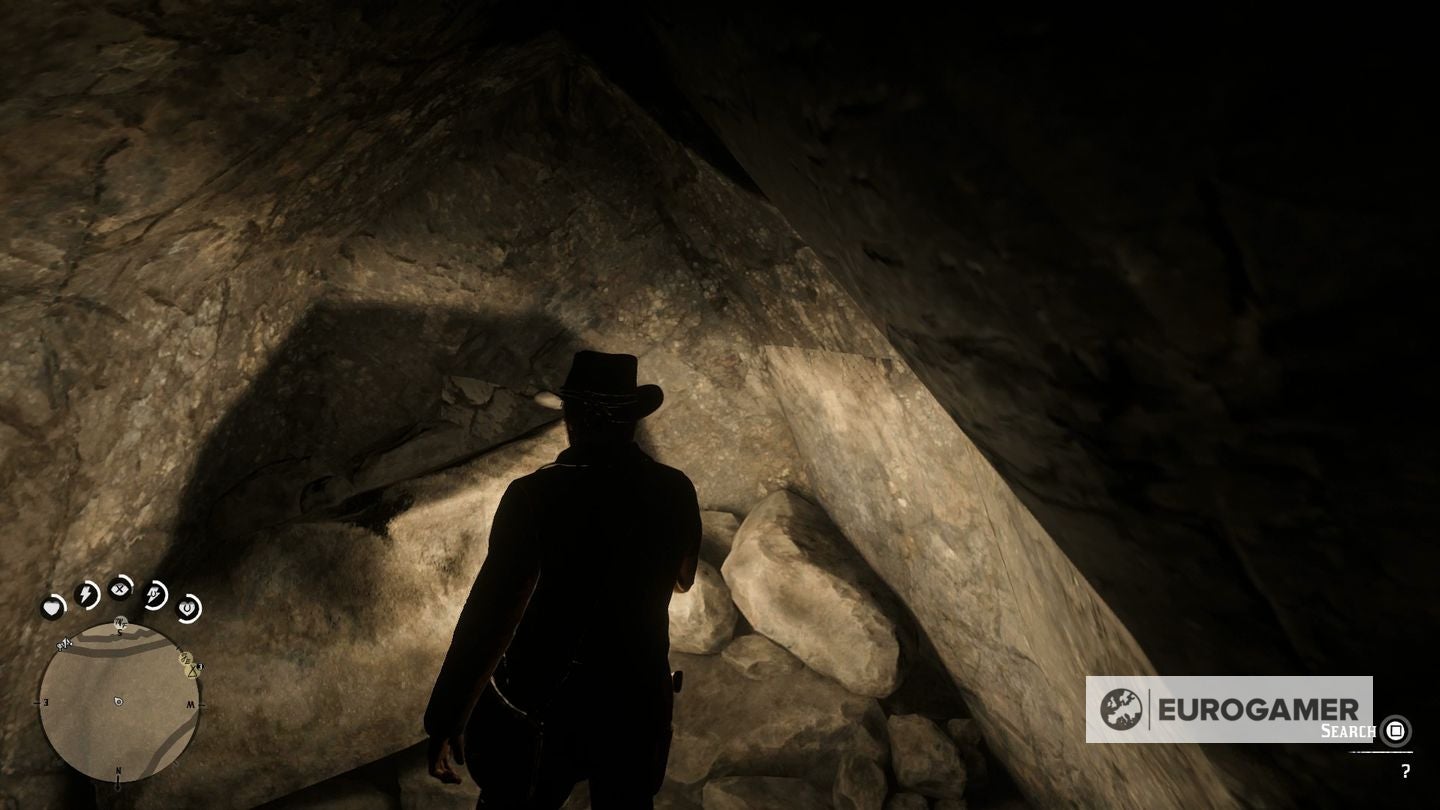
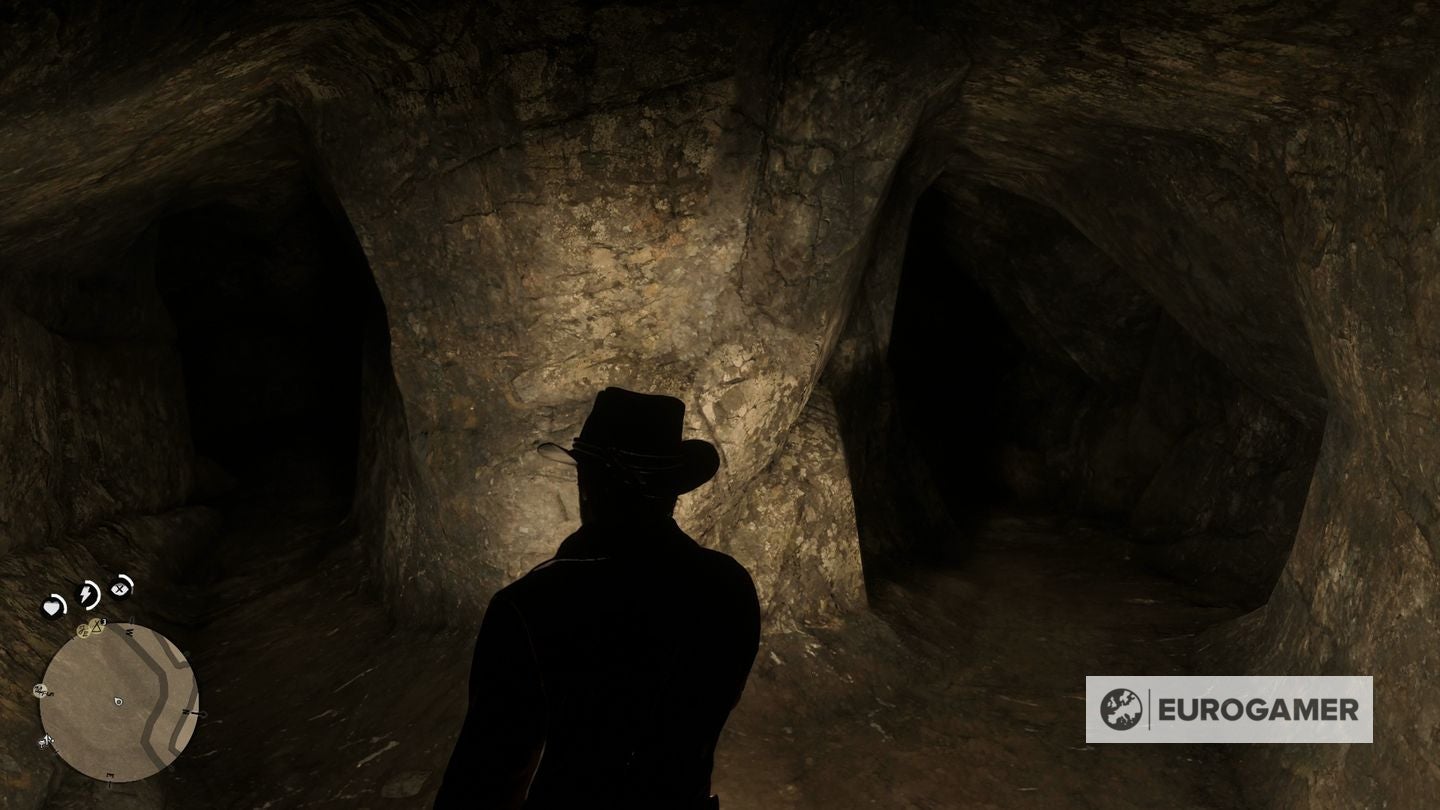
1. The cave appears easy at first however shortly turns into fairly tough to navigate and keep oriented. First, climb up the preliminary ledge – whip out your lantern when you go – and observe the hall.
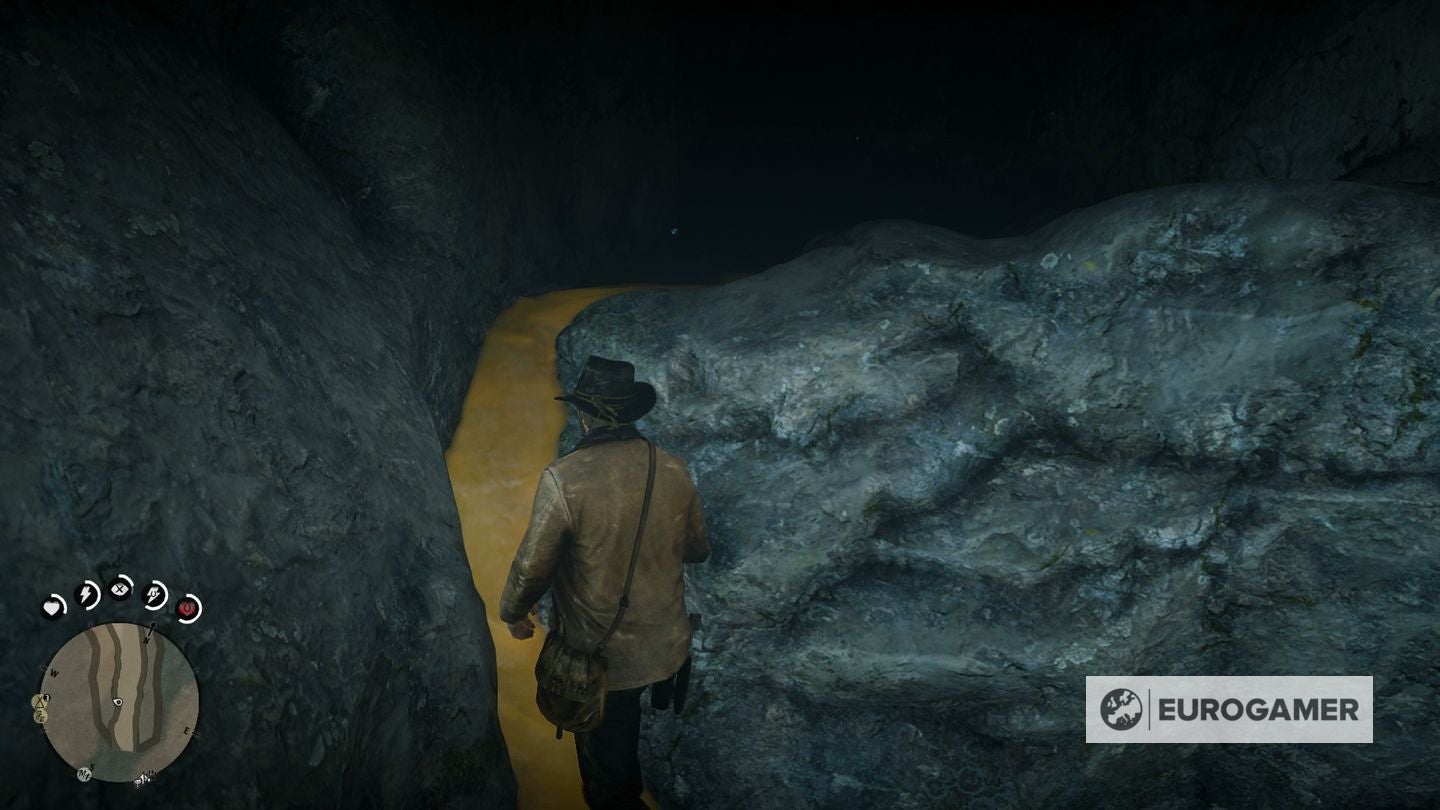
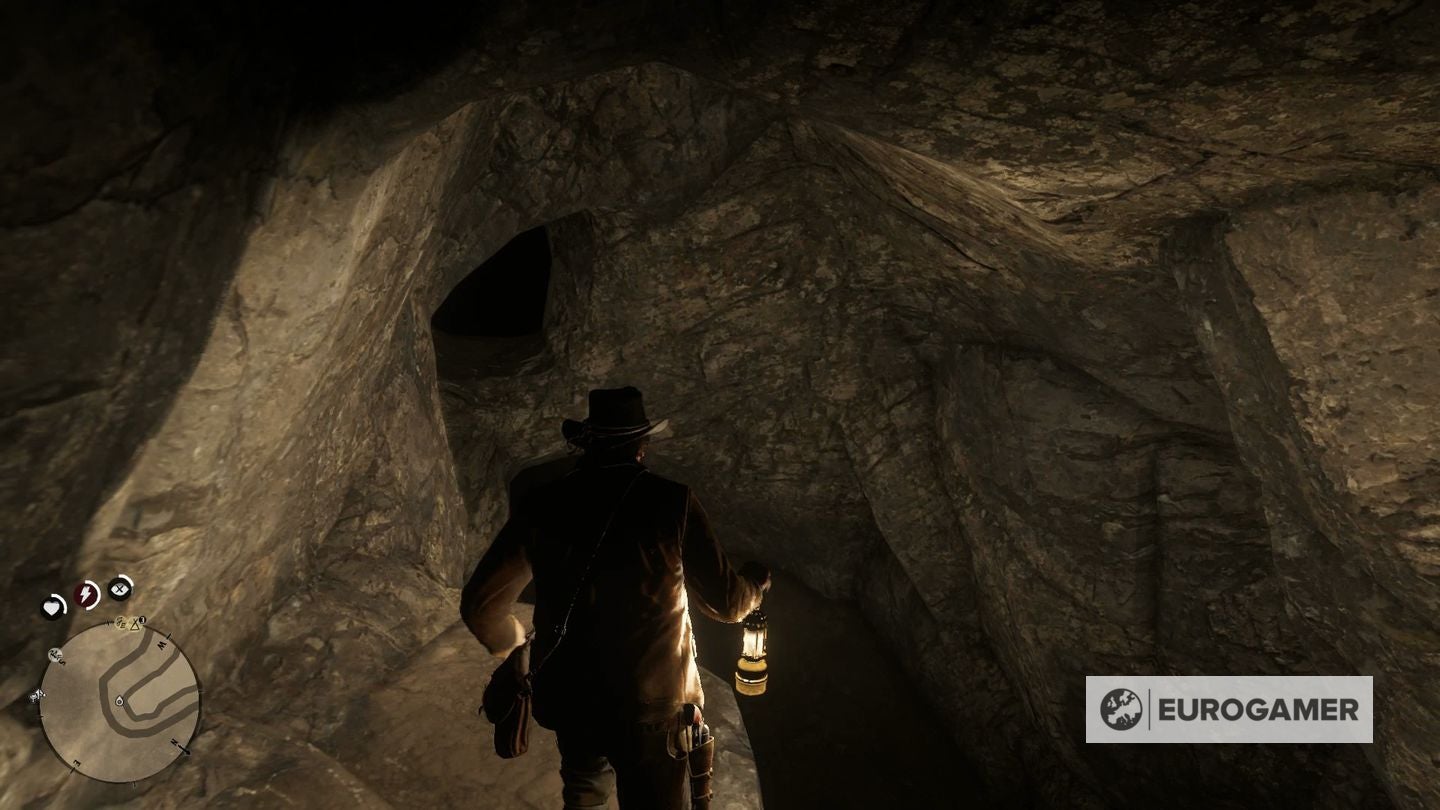
2.After a number of yards, you may end up in a extra expansive hall, with the trail you are standing on dropping all the way down to a decrease slanting ledge to your proper. Use that as a ramp, strolling down it – successfully doubling again on your self within the course of – till you attain the underside.
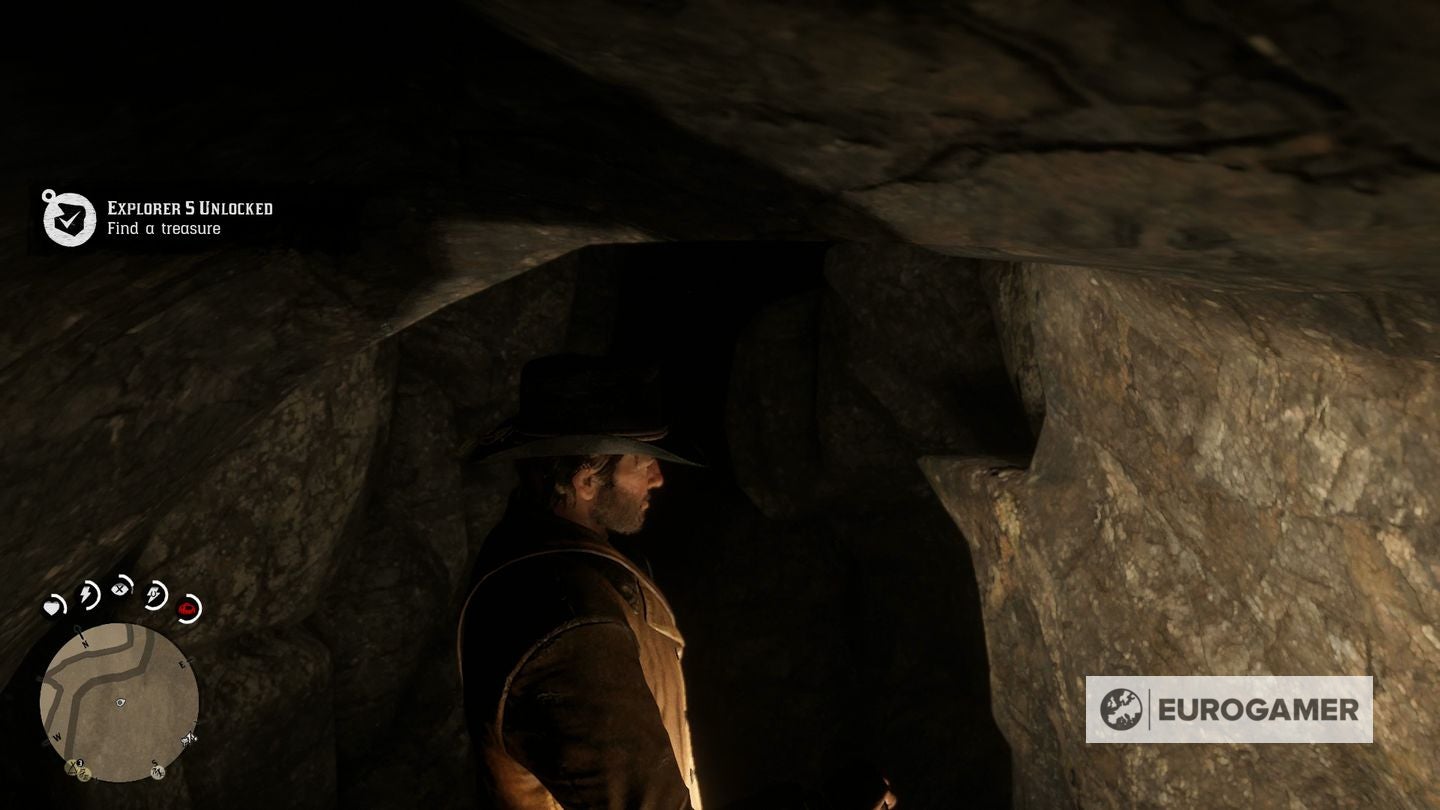
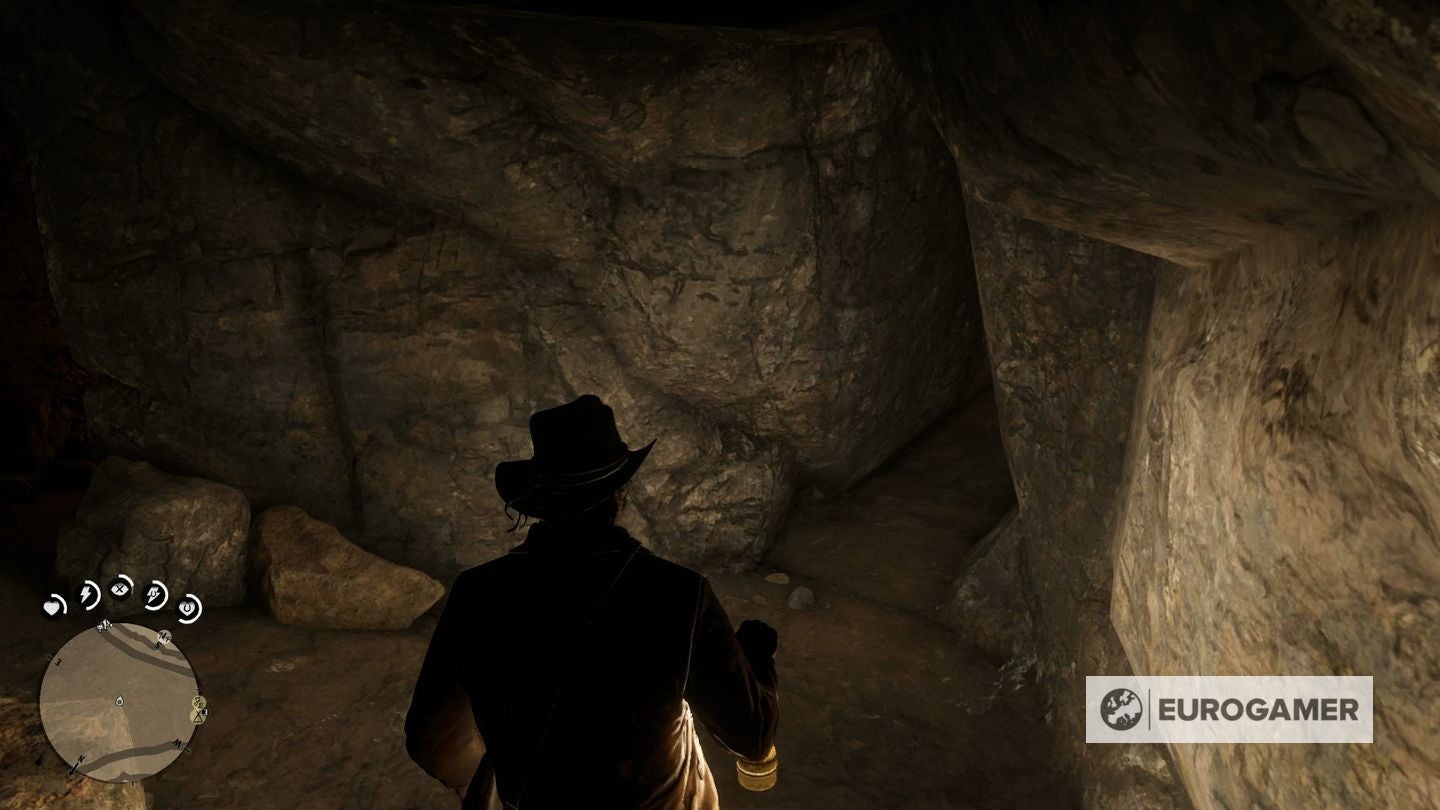
3.Flip and proceed again within the path you have been going, and in your proper is slightly hard-to-spot tunnel entrance by way of the wall. Crouch down and head by way of.
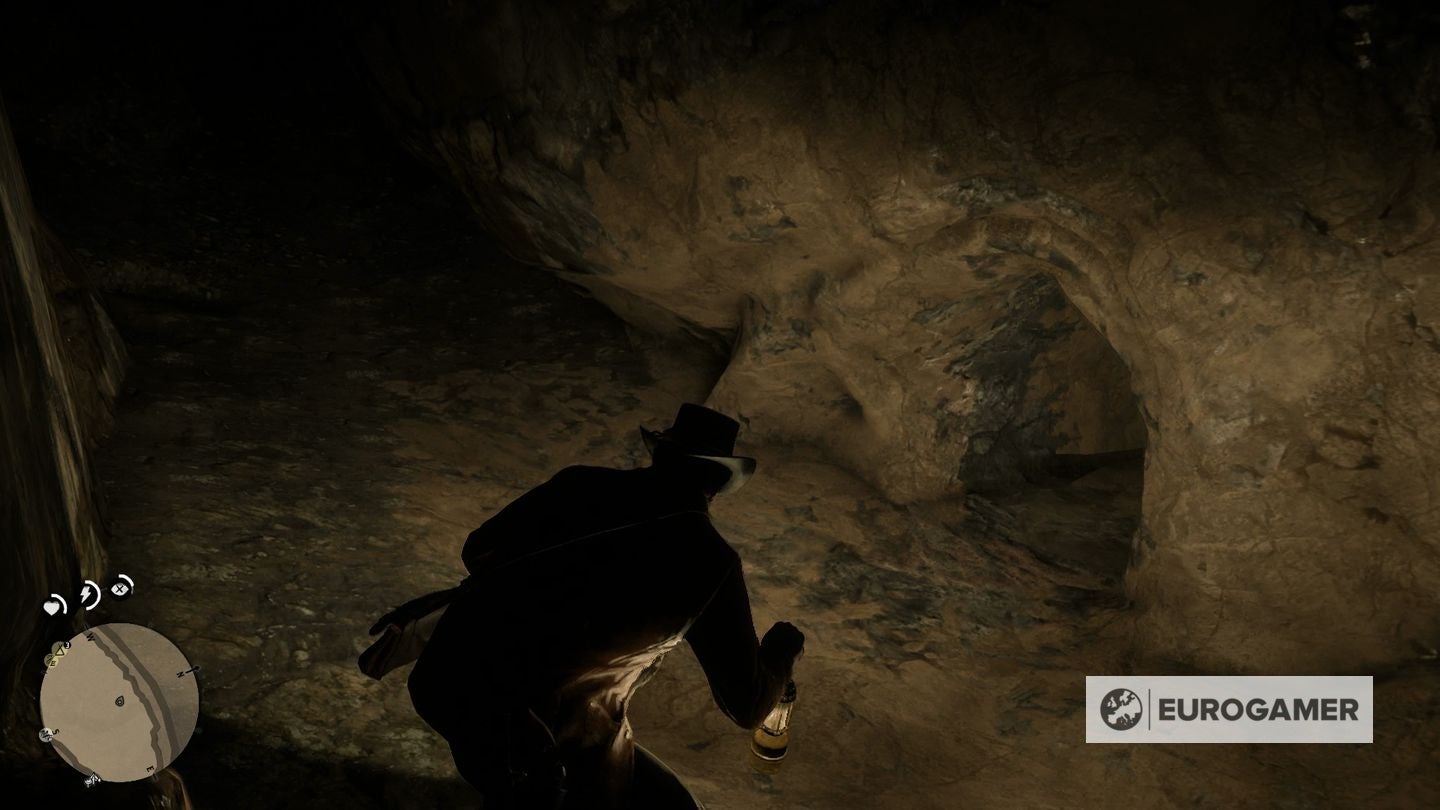
You will come out of that brief tunnel at a fork within the highway – a tunnel to the left and one other to the best. Left is to the exit, so that you wish to go proper.
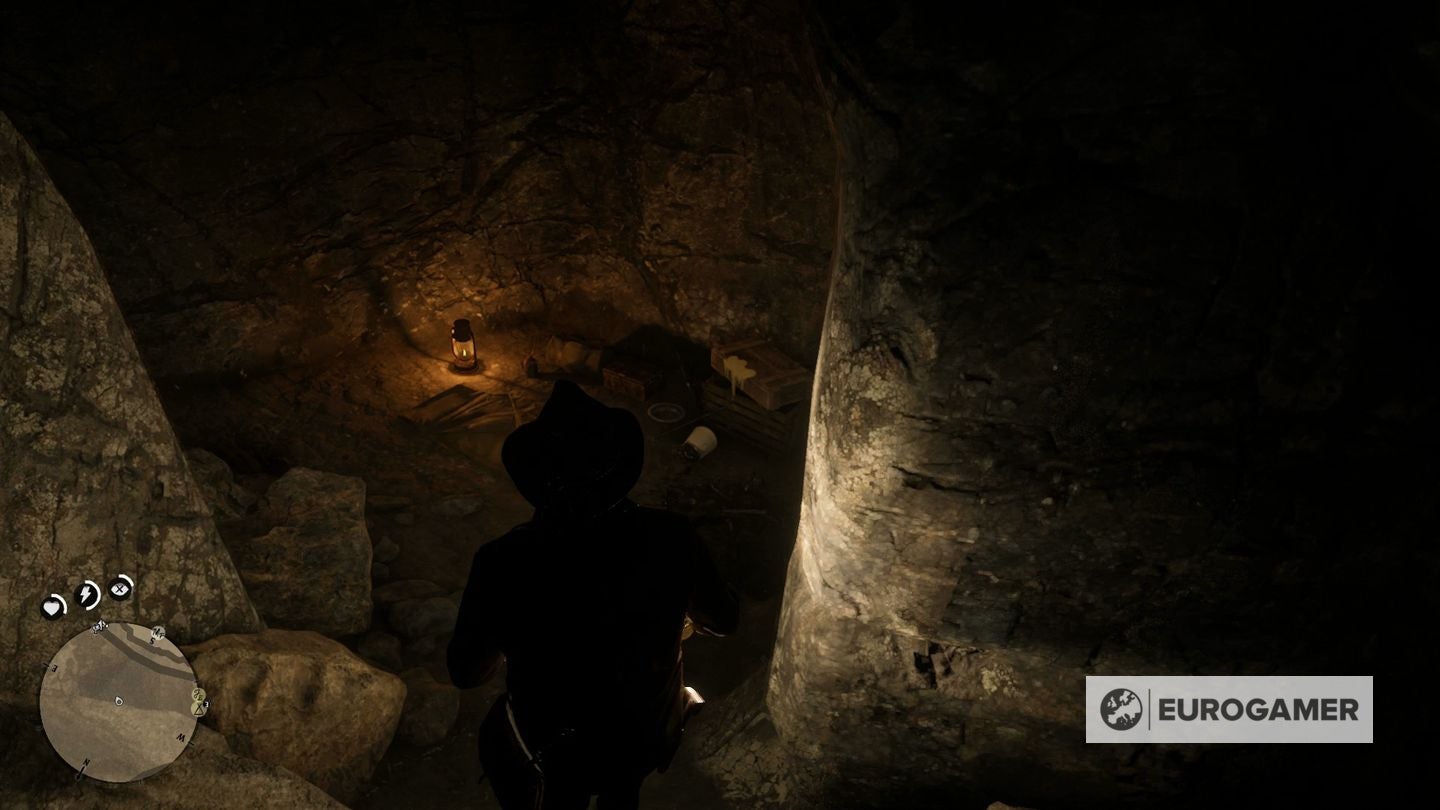
4.Instantly after hanging proper at that fork, look to your proper once more and you will see the orange mild of slightly campsite somebody’s deserted. Loot the lockbox for some beneficial gadgets, then proceed one (you’ll be able to exit the campsite the best way you got here or undergo the opposite exit, they each take you an identical approach).
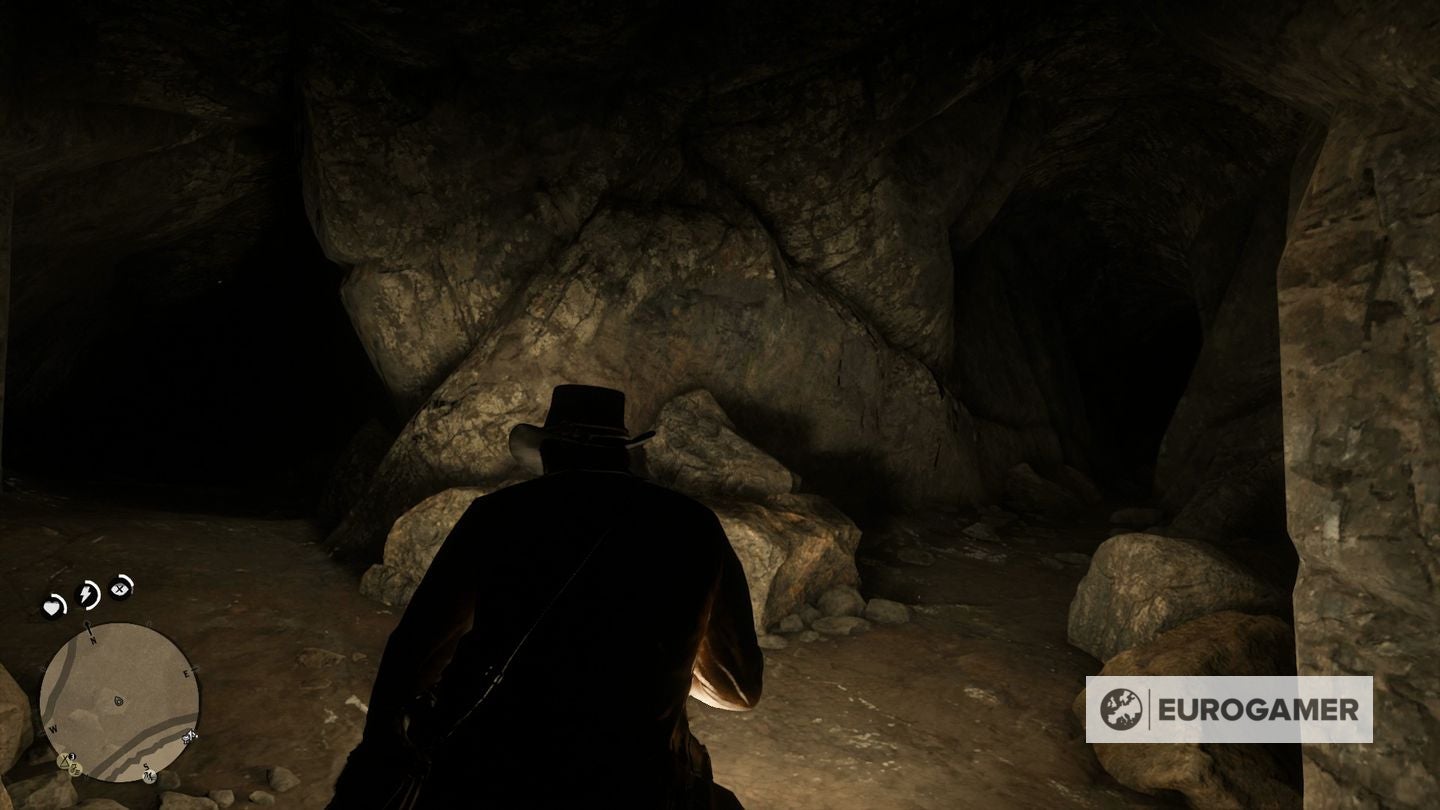
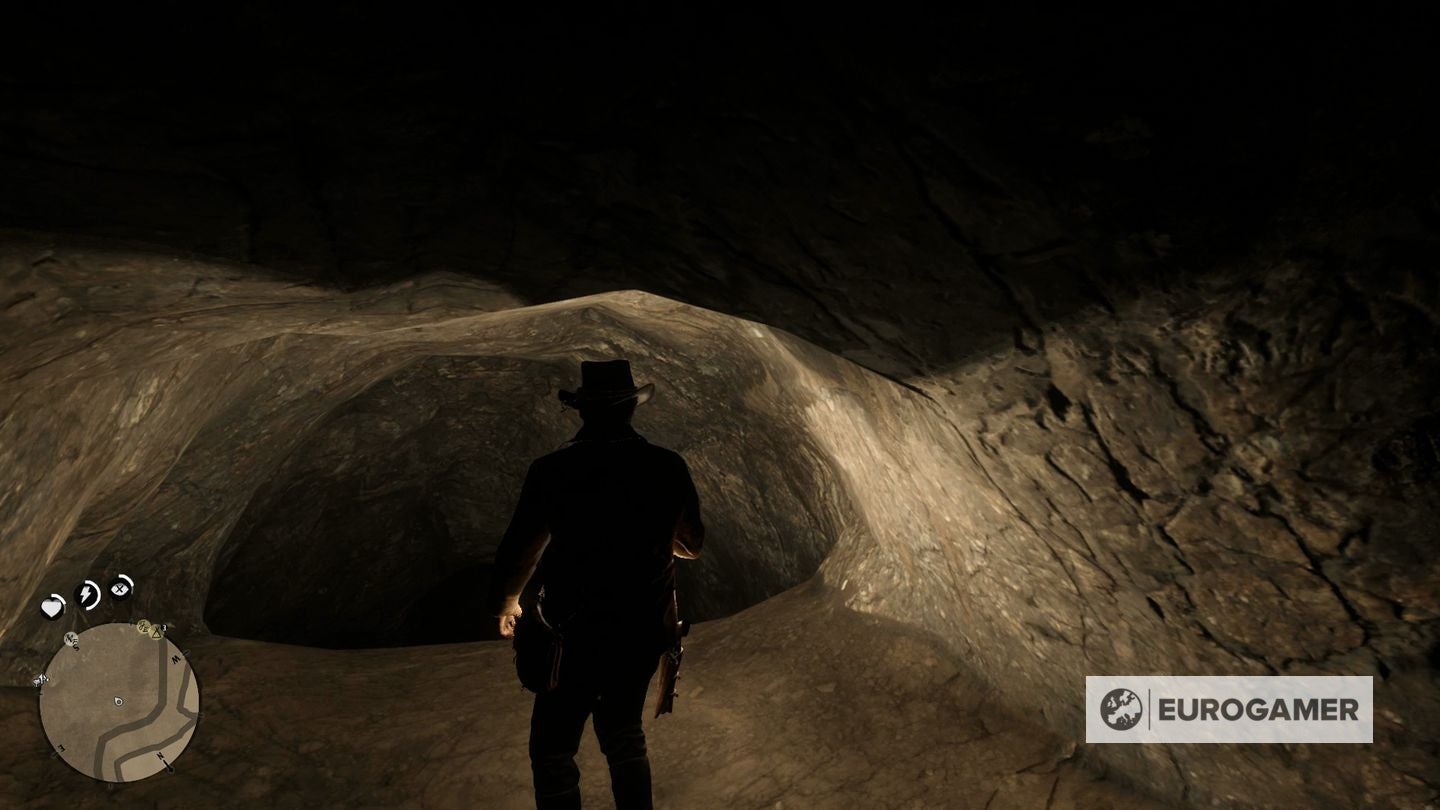
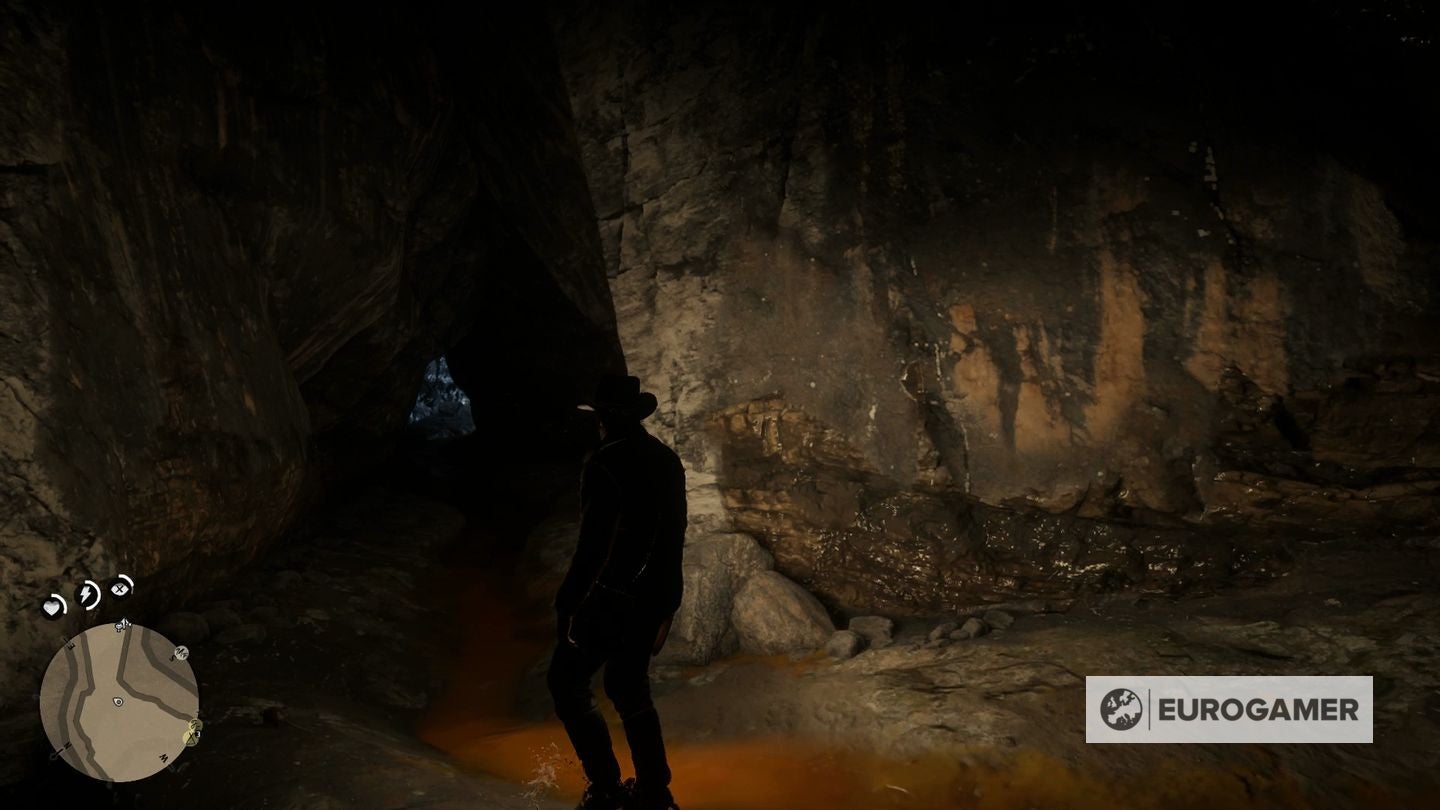
5.After one other brief stroll by way of the tunnel you may come out at one other extra expansive chamber – there is a massive drop in entrance of you and a useless finish in your proper, however flip left and you will see a option to progress – do not do something simply but.
Trying left, you may see a a drop from the ledge your on – at roughly the identical top as you now, the opposite facet of the drop, is a round tunnel within the wall. Ignore that for now (that is your exit for whenever you’ve obtained the treasure). What it’s essential to do is take slightly run up and dash, then bounce in direction of it, and barely to the best of it, to a decrease ledge that is fairly exhausting to see. You might wish to save first simply in case.
We tried this a number of instances and at all times landed clumsily, however try to be fantastic.
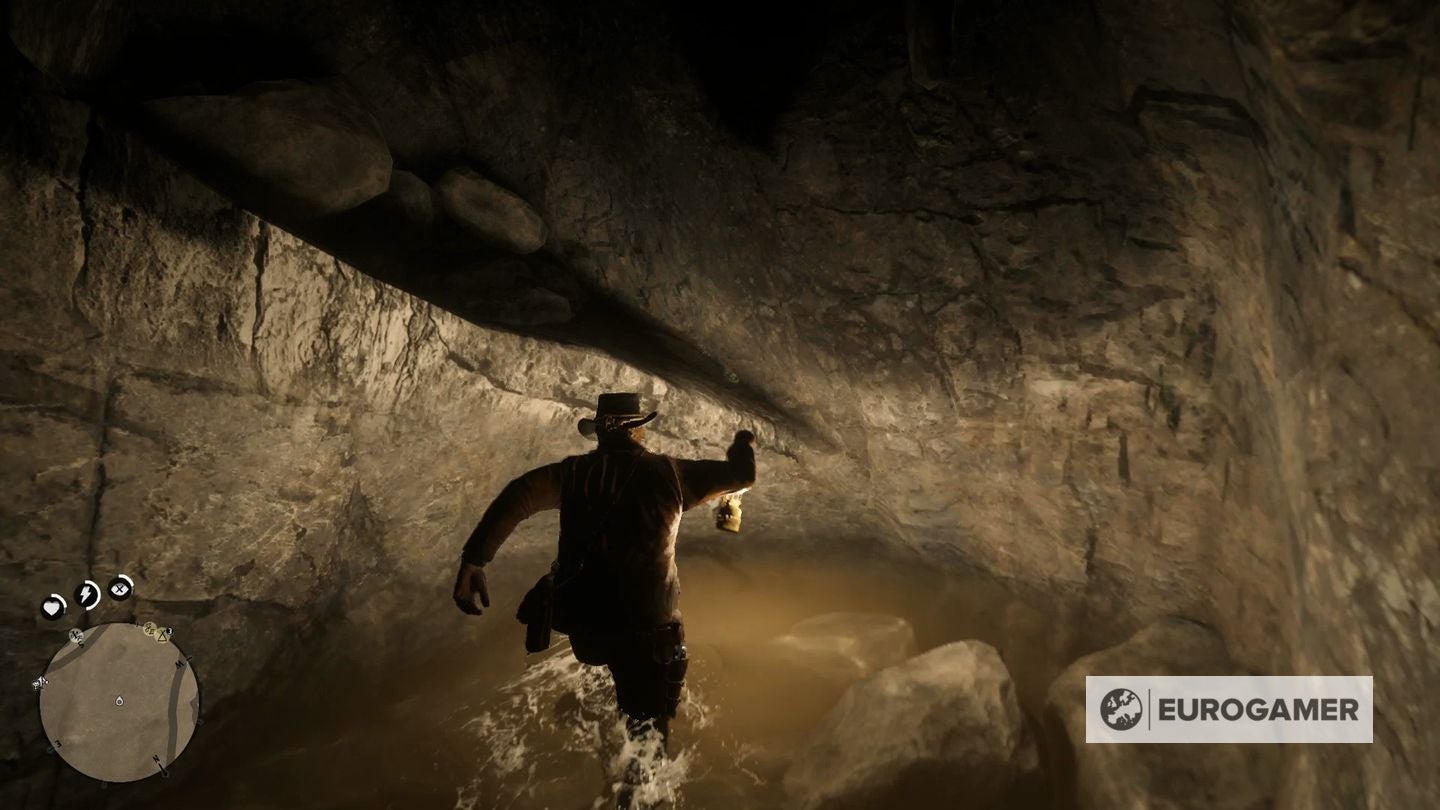
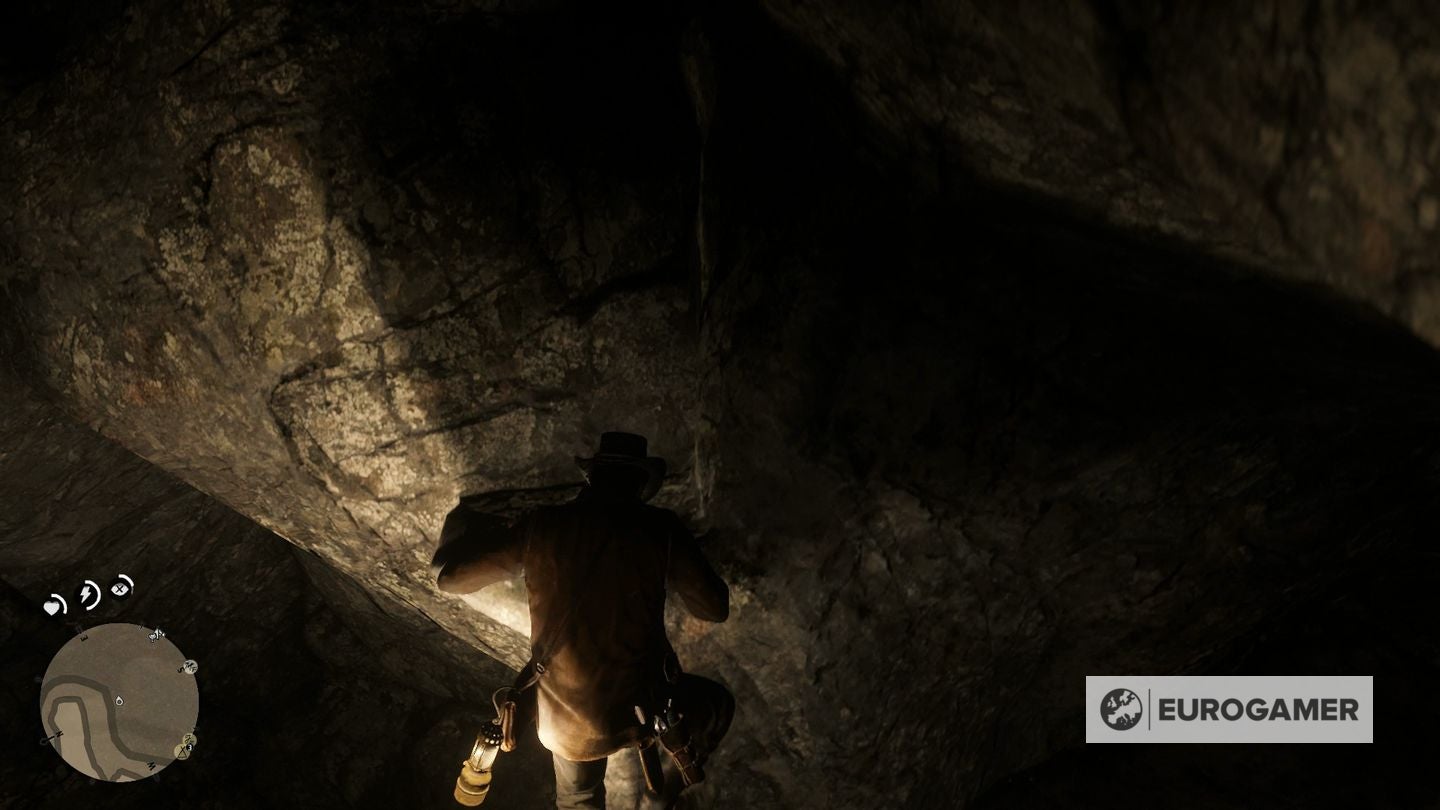
6.Proceed on in that path up a slope, which seems to be virtually such as you’re strolling alongside a tongue inside somebody’s mouth (or possibly that is simply us).
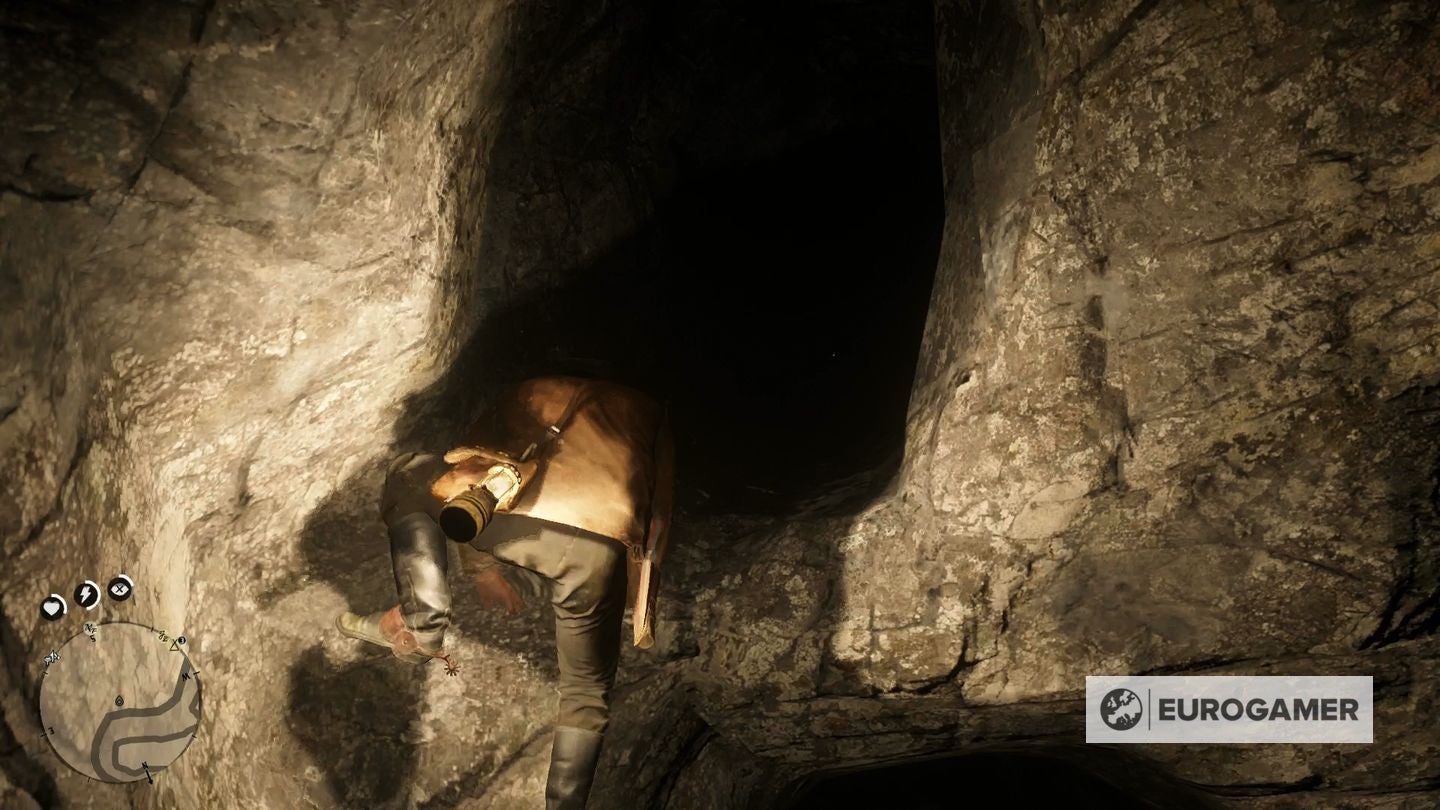
7.You will slide down the opposite facet into slightly pool of water. In entrance of you is a slanting ledge, with some rocks piled up on it.
Climb up onto the ledge and work together with the rocks – there must be a button immediate to look them – and obtain the treasure that’s your reward: a whopping 4 Gold Bars.
How one can exit the key cave
That is simpler stated than achieved – mess it up and it is very simple to fall to your demise (though if you happen to do, you may respawn outdoors with the Gold Bars nonetheless in your stock, however you may wish to save simply in case).
Double again the best way you got here, by way of the puddle of water and up the slippery slope (if you happen to cling proper Arthur can nearly make it again up), then cease whenever you get to the ledge that you simply clumsily jumped all the way down to a second in the past in your approach in. Be sure you do cease, as a result of if you happen to stroll too far you may simply fall to your demise.
Flip to your proper as you close to the top of that slope, and there is a little handhold-sized ledge jutting out at about head top. You could seize onto that (the identical button as earlier than for climbing up onto ledges, though it took us a number of goes to get it to work).
Arthur will pull himself as much as stand on the little ledge, after which once more at head top to your proper is that round tunnel that we talked about earlier as your approach out. Hop as much as that, and observe the tunnel.
After a few steps you are at one other fork – solely this one is not a lot of a fork, simply two very brief paths that come out on the identical place.
After that fork although you may come out proper in entrance of that tunnel you needed to crouch by way of a lot earlier (it is likely to be barely to your proper, so hug the best hand wall).
Return by way of it, out to that decrease degree close to the doorway path, work your approach again up, after which you’ll be able to head again out the best way you got here, beneath the waterfall – or, proceed exploring the cave if you happen to so want.
With that, you are achieved – keep in mind it’s essential to go to a Fence to promote your Gold Bars! In any other case, cycle again to our essential Crimson Useless Redemption 2 walkthrough and guides hub for rather more like this.
In search of extra issues to seek out and accumulate Crimson Useless Redemption 2? We suggest the next:
Treasure Maps:
Collectables: